February 2026
AW-
Link to Website Index: ![]()
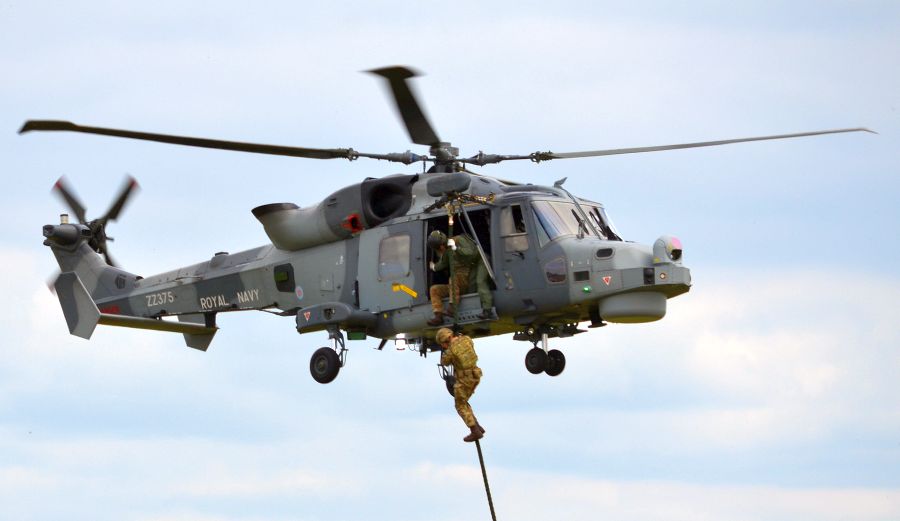
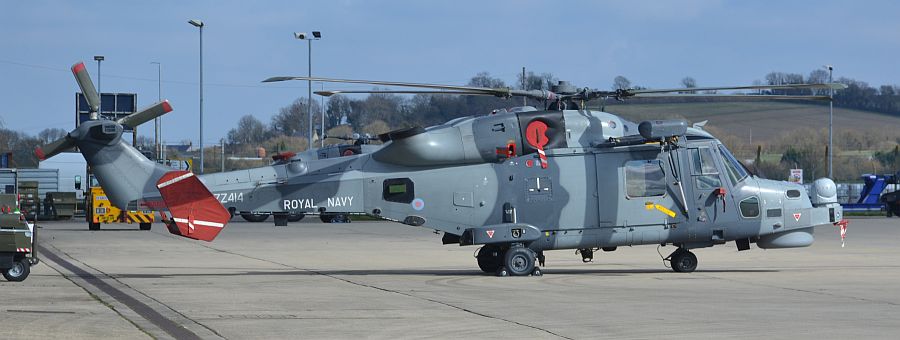
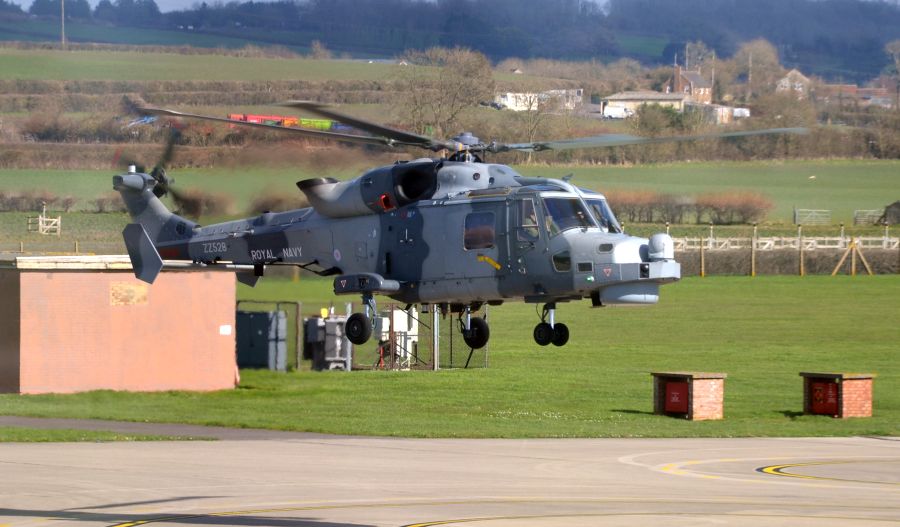
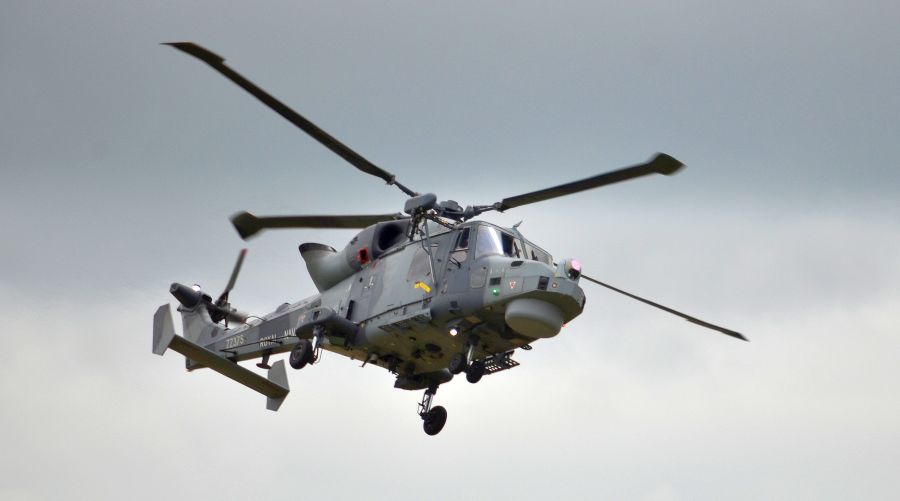
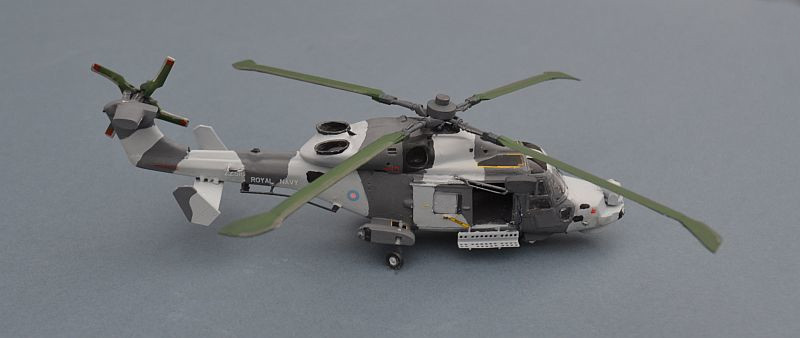
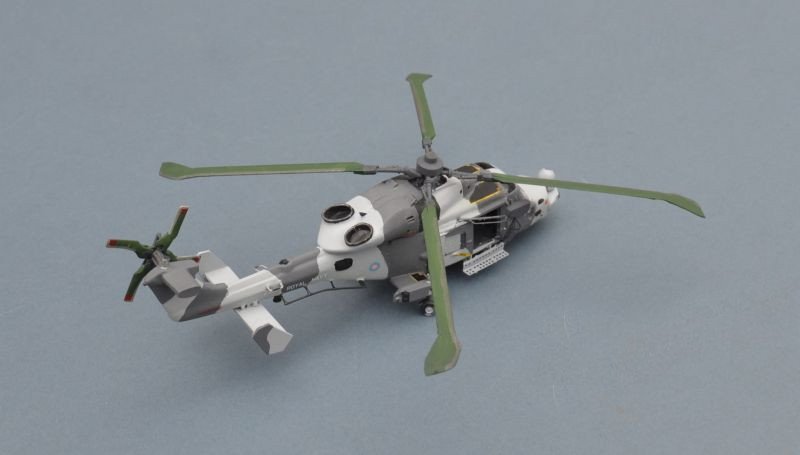
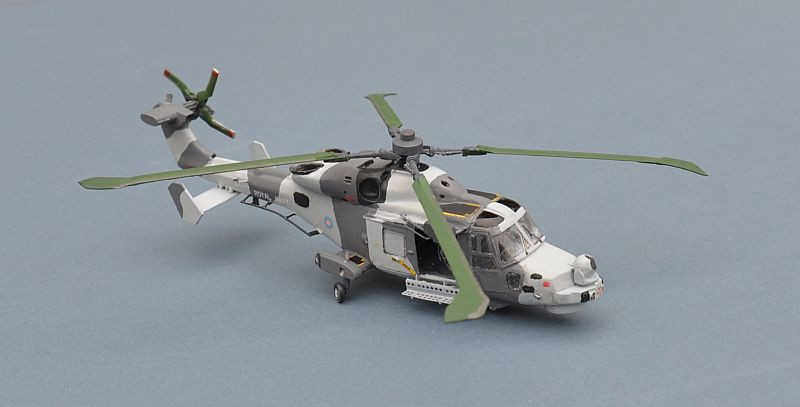
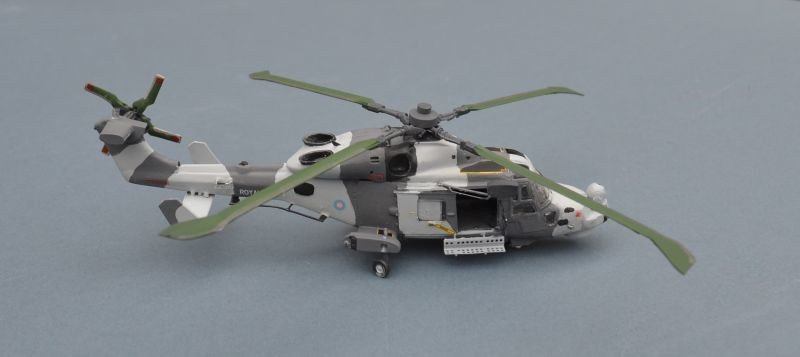
Leonardo AW 159 Wildcat HMA.2
815 Sqn, Fleet Air Arm, HMS DRAGON, 2019
Air-
Link to Website Index: ![]()
Text & Images © www.gengriz.co.uk (unless otherwise indicated)
The AW-
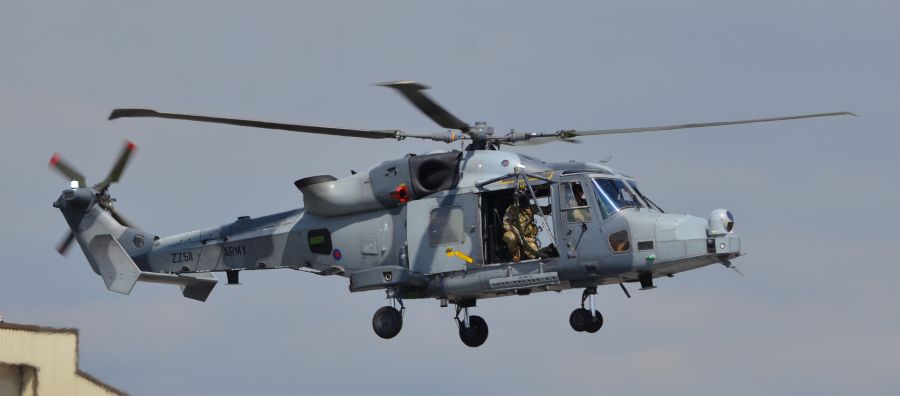
The RN’s interest in Wildcat came from the realisation that the planned all-
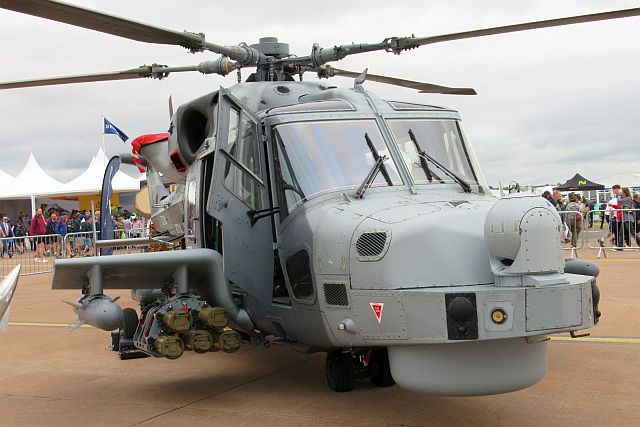
Elements of the Merlin’s avionics and glass cockpit were added to the existing “Super Lynx” design. A very high degree of commonality has been maintained between naval and land based variants, with the most obvious difference being the radome beneath the naval nose.
UK Wildcats can be armed with up to 20 Thales Martlet general purpose missiles (for
anti-
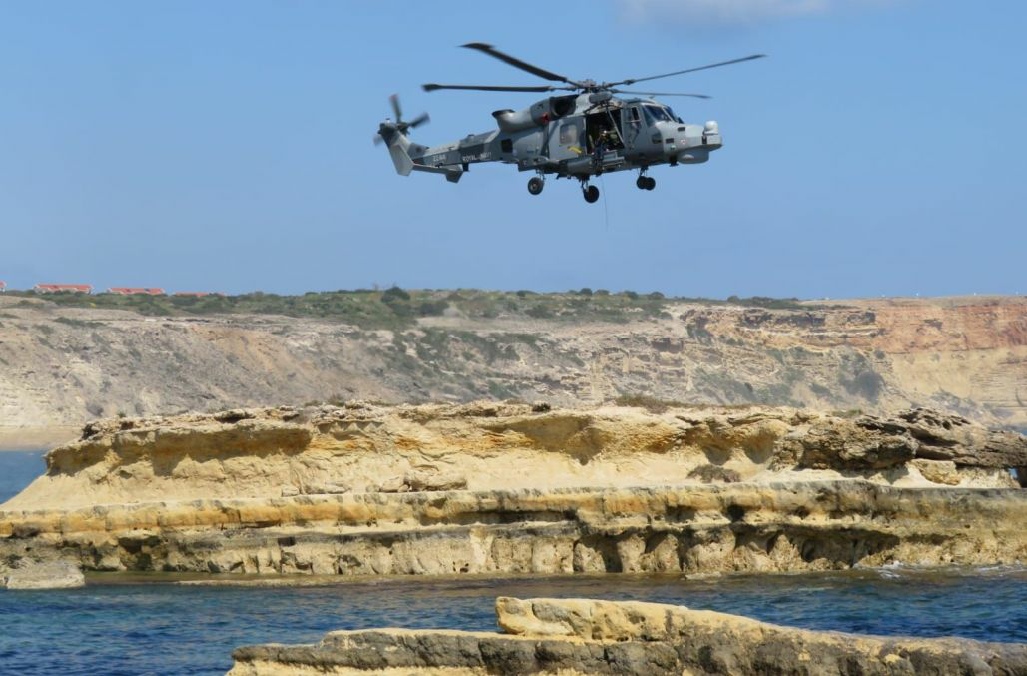
RN Wildcat HMA.2s entered operational service in 2015 onboard Type 23 Frigates and Type 45 Destroyers. Wildcats are normally also carried by the RN’s QE Class aircraft carriers as a defence against small attack craft and for general utility use. The HMA.2 variant is operated by 815 Sqn and 825 Sqn, whilst 847 Sqn also operates the AH.1 land attack variant for the Royal Marines.
Building the Air-
Naval aircraft are definitely my modelling "thing" and for most of the last 50 years,
that has mostly mean helicopters. Sadly, these have not been entirely popular as
modelling subjects, such that whilst there are quite a few kits available, few of
them are really "up to date" (standfast perhaps the Italeri/Revell Merlins and EH-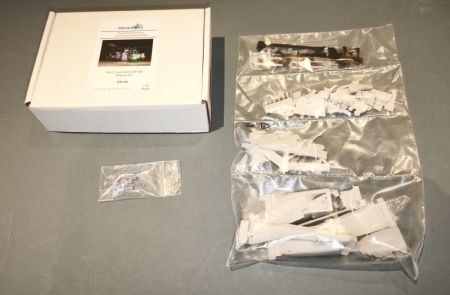
However, you can often count on Air-
The Royal Navy and British Army's current AW-
The new issue is a complete kit, supplied in a small sturdy box with the resin and
a small number of 3D parts sealed in a set of polythene pouches. It certainly looks
good in the box, although the current lack of building instructions has put off a
number of modellers. Fortunately, the Air-
According to the original instructions, the resin Masters are by Colin Pickett, casting
By Tomas Valch and artwork By Jon Freeman. Separate parts are provided where needed
to allow either a naval or land-
A quick glance at the instructions shows that the kit is not going to be "shake and make" and will probably require some careful scratch assembly and some extra preparation. An ideal project for the Xmas holiday period and into the new year!
Continued below….

I started by decanting the parts from their plastic pouches into a sealable box. The conversion kit instructions don't transfer directly, with e.g. parts 13 & 14 (cabin interior) now ready moulded into the cabin sides. Indeed the full kit seems to improve on quite a few shortfalls of the conversion.
Initial assembly of the cabin interior went well, with most parts separating nicely
from their pouring stubs/blocks. I broke both the (nicely thin) pedal sets, so have
had to leave these out (I didn't notice there were 3D printed alternatives!) but
experience suggests that at this scale they will not be visible through the nose
windows. 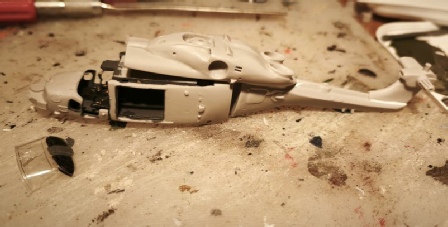
The seat configuration needed a little research -
The optional nose parts caused me some confusion, but after some research, it was clear that the part with the oblong side intake is intended to be the naval one, although this intake should only be on the starboard side and not both as moulded (but see later, as it didn't survive in any event).
Continued below….
As resin kits go, this one started off as a relatively straightforward build. The major fuselage parts needed some fairing in and filling (but not as much as the conversion instructions suggested). Clear parts are reasonable, but not entirely clear. Surface detail is a little soft, but again quite acceptable.
I found that the fit was mostly OK, but the chunkiness of the parts does limit how
well you can put things together. Air-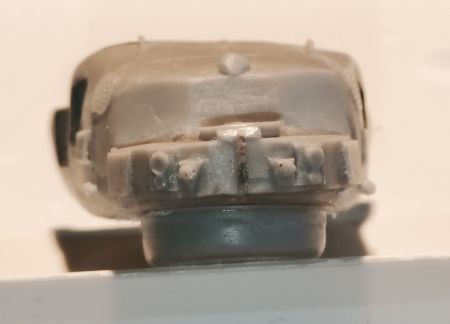
Joining the major parts also worked reasonably well at first, although filler was needed to blend them together. However, at this point things began to go badly awry. When the radome was attached, it became obvious that the lower nose is angled way too far up. It looked very wrong, so I attempted to remove the radome, hoping to shim it or at least reshape it to be more parallel to the ground. It was firmly fixed and not moving, so I tried to cut it off with the razor saw, accepting that there might be some ensuing damage to the main part. Then whilst I did this, the entire nose section fell off.
So: I reprofiled the joint between this and the main cabin to angle the entire nose further downward and reattached it. Still not right, but better! This is actually quite a major shape issue and I'm not sure if it was my mistake or a fault in the kit. Either way the radome is definitely not the correct shape so if you are building this kit, beware and add a shim to keep it flat. Interestingly, an angled up nose is one of the more obvious faults on the Hobby Boss Lynx kit and it wonder if this has been inadvertently transferred to the new resin Wildcat nose.
Sadly it got worse from here before getting better. Having reattached the nose and
applied filler to the other joints, when I started to sand it back, I noticed that
the entire fuselage seemed to have a longitudinal bend, front and back. The nose
was almost certainly my fault through not sanding it back evenly when I corrected
the upward twist, but having been sensitised to this issue, I found that the tail
section also has a slight bend. Not much I could do about that, but the nose was
taken off again at which point I I noticed that the front of the nose section is
quite badly twisted, so that the windscreen is not at all parallel to the nose platform
section. I checked the 2nd nose piece (the AH-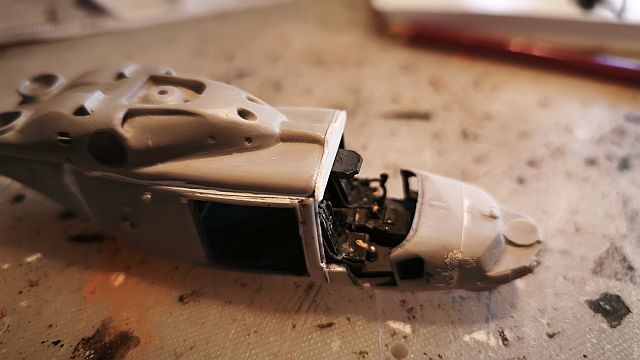
This required a more difficult resolution and I decided to cut the nose section in
two just in front of the lower windows, reattach the front part parallel to the windscreen
then fill and sand any gaps (sadly losing some detail -
As there was really no choice about this "surgery", I took the opportunity at the
same time to resolve what I still think is a nose that turns up too much. I did
this by placing a shim inside the cabin for the front of the cabin floor to rest
on -
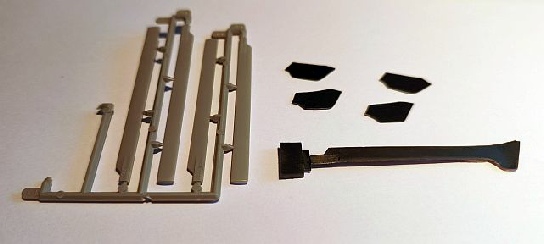
A small bag of 3D printed parts comes with the kit and these are very nicely formed. They include the winch, undercarriage legs and a replacement for the radio antenna on the port aft fuselage. The 3D "wire" antenna is slightly better than the resin part, but strangely, it bends in the wrong direction, which means some careful bending of the part when you attach it.
A set of fold down steps is also included, but this left me quite perplexed as it
seems to be inside out -
A few additional antenna and miscellaneous parts (one of which I couldn't identify) are also provided as are collective levers for the cockpit that I didn't use because I had used the resin parts. The winch is good and easily attached. Door rails (top and lower) need to be fabricated from plastic strip.
Continued below….
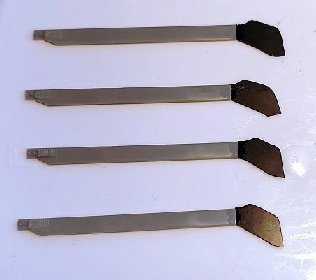
On the other hand, the provided resin BERP blades are an area of real disappointment.
I do appreciate that there have been some changes in the shape of BERP blades over
the years, but as far as I can see, none of them look like the ones in the kit. From
my research, I believe that BERP IV blades are fitted to the Wildcat -
I have fudged up BERP blades before for a folded Lynx by adding new plastic card
paddles to the end of a set of conventional blades (ex-
Initially I was unconvinced by the tail rotor parts -
The tail surfaces and fins fitted well -
For the main paint scheme I used Humbrol 127 and 164, with an acrylic (W&N) matt
varnish finish. Air-
To sum up this kit, it is highly challenging with some disappointing flaws, but ultimately a quite satisfying build if you manage to complete it! Whilst not cheap, for a resin kit like this its price is about what I expected and the finely moulded resin and 3D parts are done very well. However, it has significant assembly challenges plus I believe, some shape and detail flaws, so don't expect it to build "out the box". If you are a real perfectionist, you may become extremely frustrated trying to correct things. I was pretty frustrated too, but as is my modelling want, I persevered and only tried to correct major issues and assembly snurglies.
Most of the joints needed filling and unfortunately most are also in positions that
are awkward to tidy up afterwards -
Although my frustration levels grew with each new step (not least as it is a resin
kit assembled with my pet hate -
Something easier next I think…………
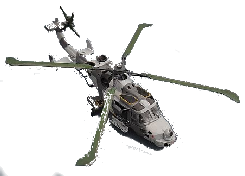
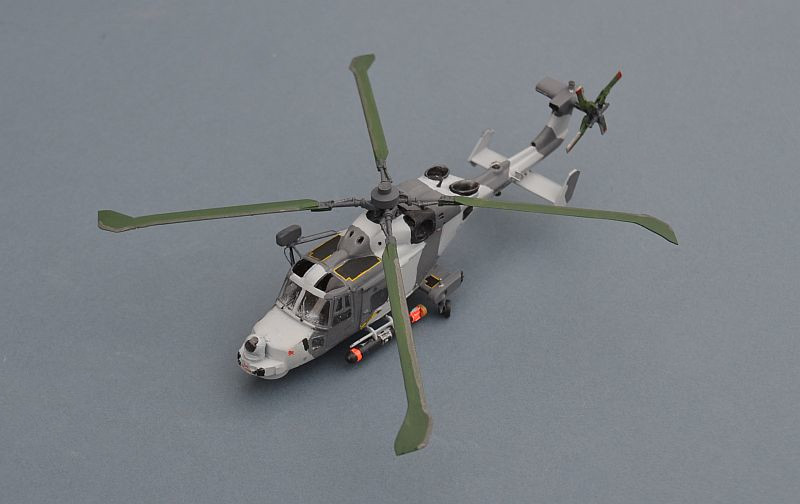
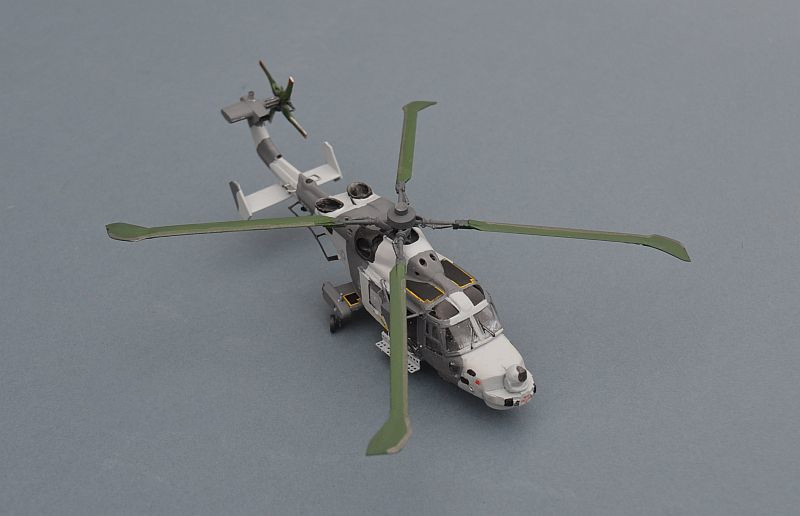

Above -
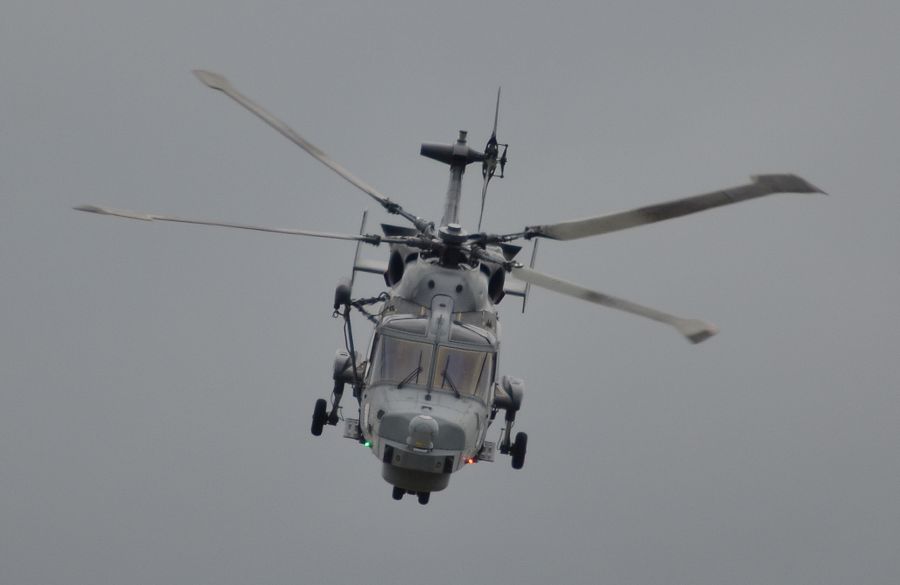
Above -
Below -
Picture -