January 2024
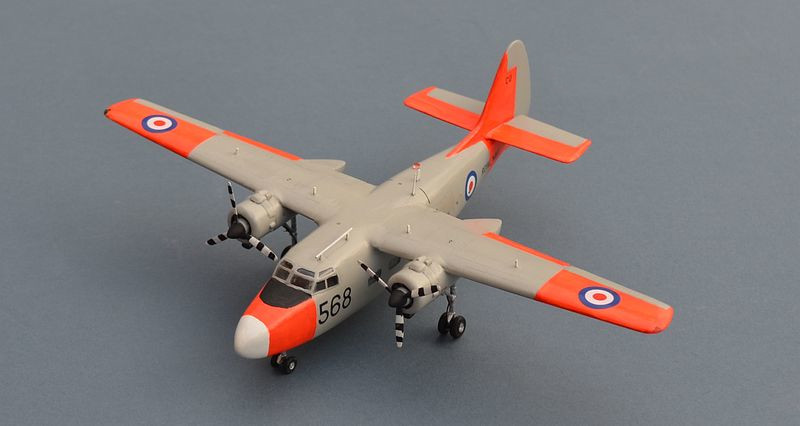
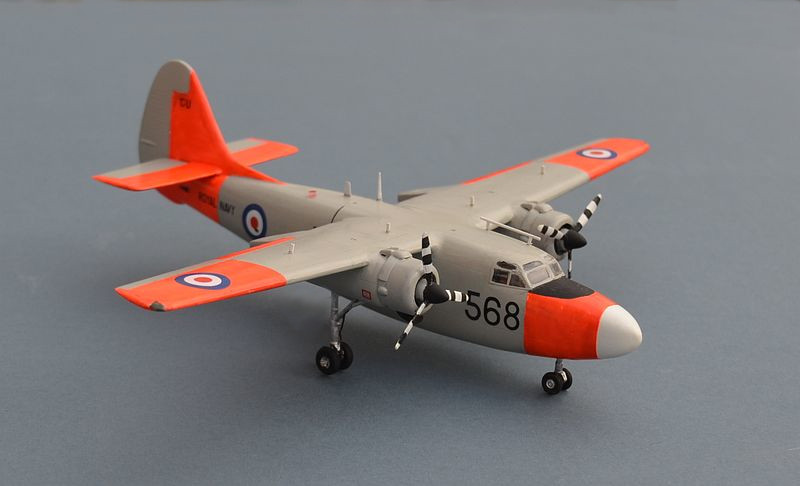
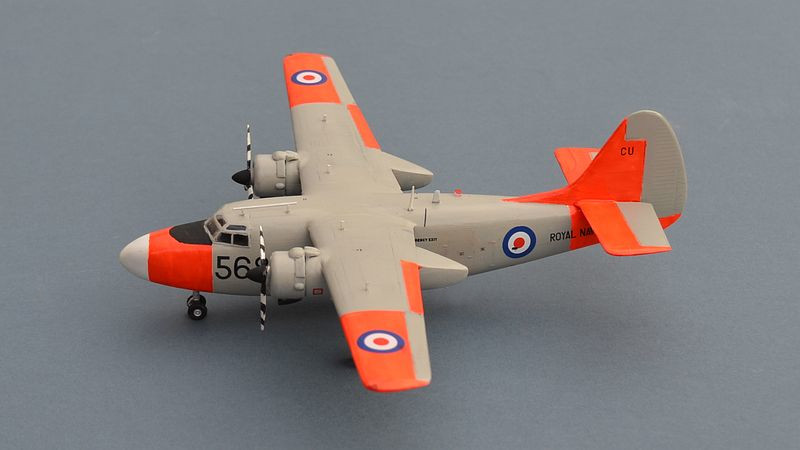
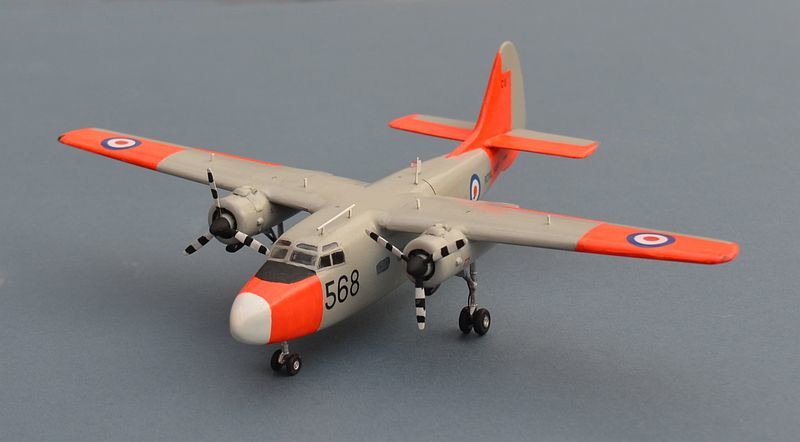
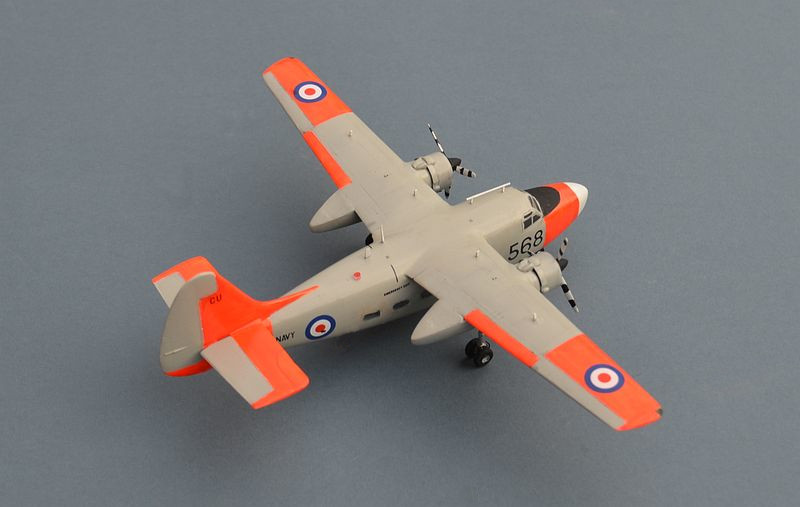
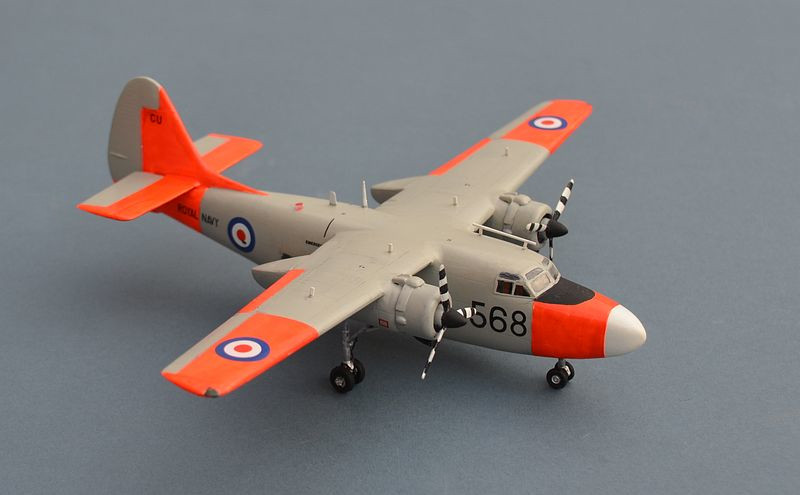
Hunting Percival Sea Prince T.1
Link to Website Index: ![]()
Hunting Percival Sea Prince T.1
750 Naval Air Squadron,
RNAS Culdrose, 1977.
Special Hobby (ex-
Link to Website Index: ![]()
Text & Images © www.gengriz.co.uk
The Hunting Percival Sea Prince was a military variant of the civil Merganser and Prince light transport aircraft developed in the late 1940s. Its high wing and low slung fuselage were intended to make it easy for passengers to embark and disembark at small airfields.
The design was quickly adopted by the Fleet Air Arm as a transport aircraft, followed
by the development of a dedicated anti-
Forty one Sea Prince T.1s served in the ASW and navigation training role from 1951 until 1972 when they were replaced by the Jetstream. The RAF also operated an upgraded version of the Prince with extended wingtips and a greater range/payload, known as the Percival Prentice.
Building the Special Hobby Pembroke/Sea Prince Kit:
This is a build project that started way back in 2009, during a trip to Paris, where
I purchased the Special Hobby kit of the Hunting Percival Pembroke, with the hope
of converting it into a naval Sea Prince T.1, inspired by the one on exhibition in
the Fleet Air Arm Museum's Cobham Hall reserve collection. The project stalled because
I couldn't work out what the exact differences were between a Pembroke and a Sea
Prince. 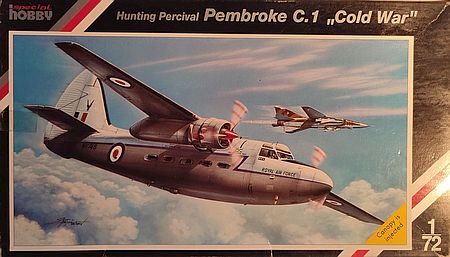
Nearly 15 years later, I now have the details I need. Even better, I now know that
Special Hobby actually include parts for a Sea Prince in the box (although they haven't
released one -
I already had several pictures of the Cobham Hall and Doncaster Aeroventure aircraft, but a trip to the Flixton (Norfolk & Suffolk) Air Museum over the summer and the South Wales Aviation Museum in November allowed me to photograph their aircraft in detail and work out the purpose of the extra parts in the kit.
The kit itself looks very nice on the sprues, my only criticism being the fact that the large cargo door does not open, which is a shame given the interior seats/displays/plotting table parts that are provided. After some thought, I decided that opening it up was probably beyond my skills, as the doors have a curved surface and prominent strengthening on their inner surface. This was one of the first Special Hobby kits to include injection moulded clear parts and they look to be very good indeed.
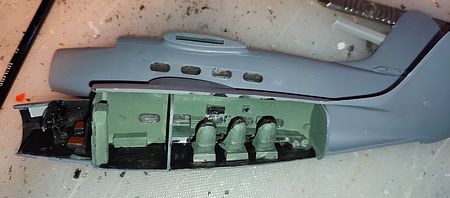
Without any instructions, fitting the Sea Prince's interior detail required a bit of guesswork, informed by my pictures. Unfortunately I needed to fit the provided interior bulkhead to make the floor sit in the correct position. Whilst this may exist on the Prentice, it does not on the Sea Prince, with the result that the usable cabin is a little shorter than I would wish and the student seats a little further aft than they should be. However, the limitations of what can be seen through the small windows meant that this was not a major issue. For the emptier areas, I added some sprue detail just to give what can be seen a little built of texture.
After painting, the clear cabin windows were added and the fuselage halves were joined.
Clear parts on short run kits can often be a weak spot that requires careful work.
There are no discernible lips on the parts, but the instructions show them being
added from the outside, which is what I did. It worked reasonably well, although
I needed to ream around the edges of a few window frames to get the parts in. One
word of warning here -
The Real Thing: There are quite a few Sea Princes in UK museums !
Below -
Link to many more Fleet Air Arm Aircraft on my Flight Deck pages
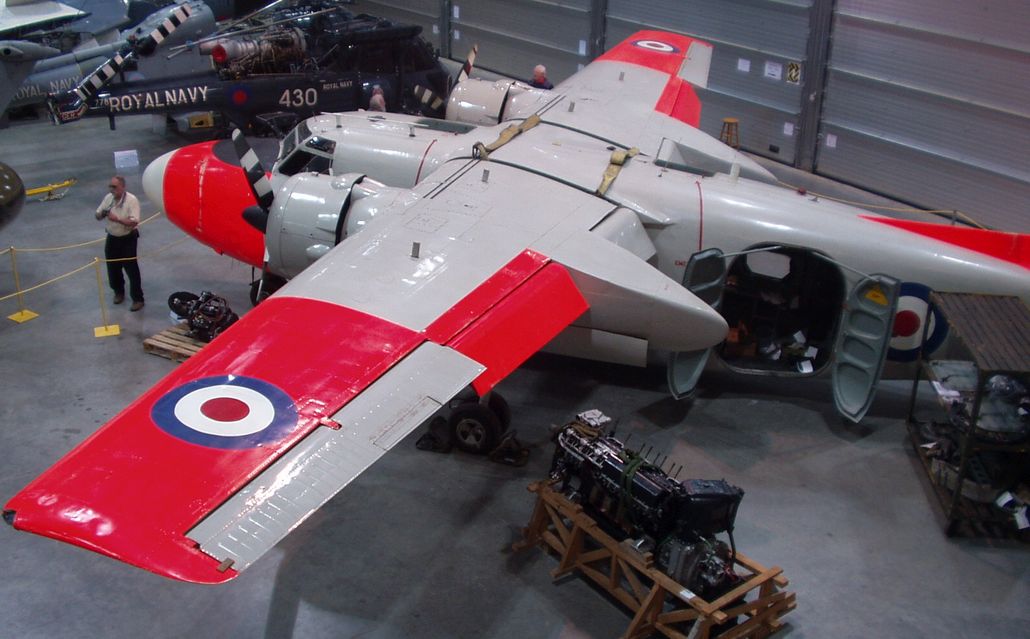
Below: WP313 at the Fleet Air Arm Museum (Cobham Hall reserve Collection), Yeovilton.
Looks like they could do with some filler in their wing joints too!
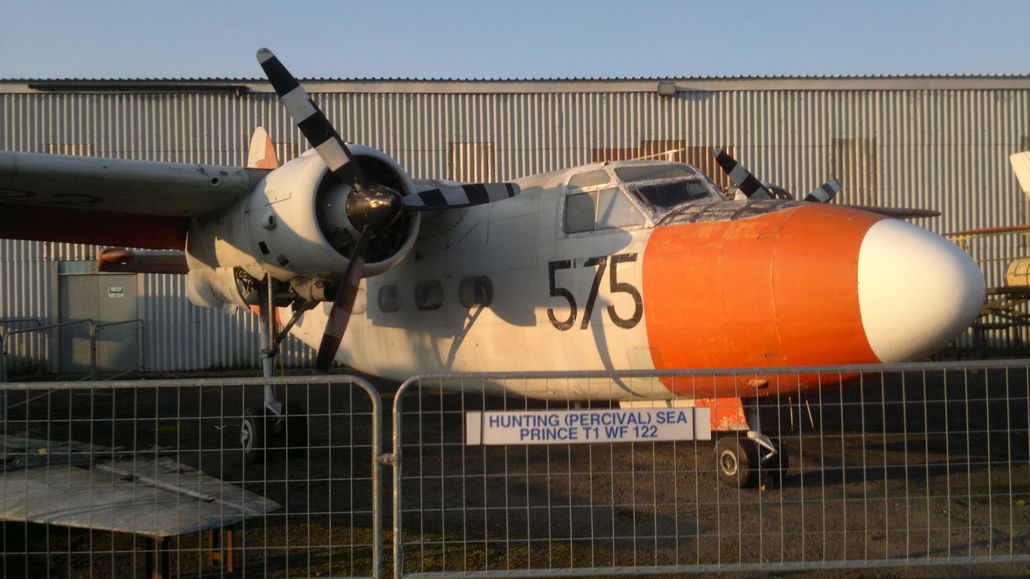
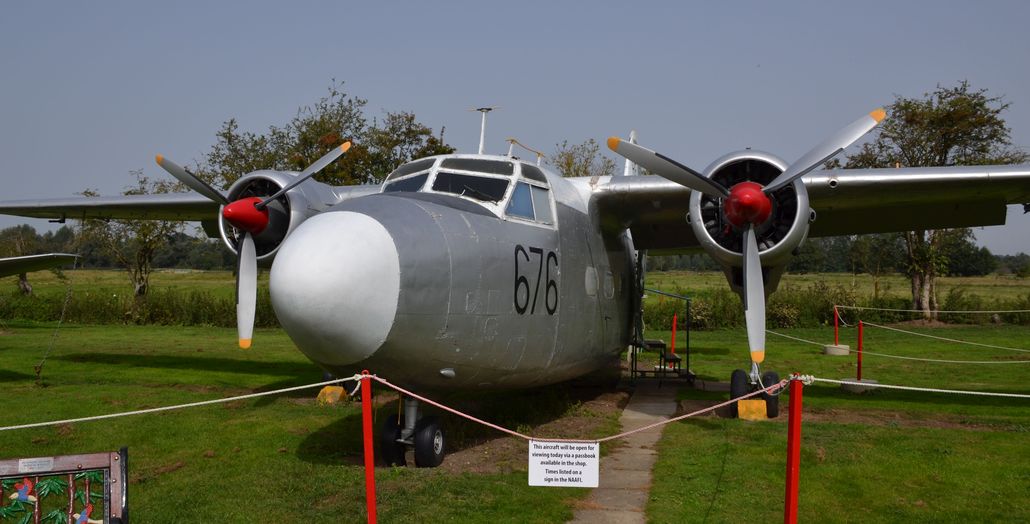
Below: WF128 at the Flixton Norfolk & Suffolk Museum
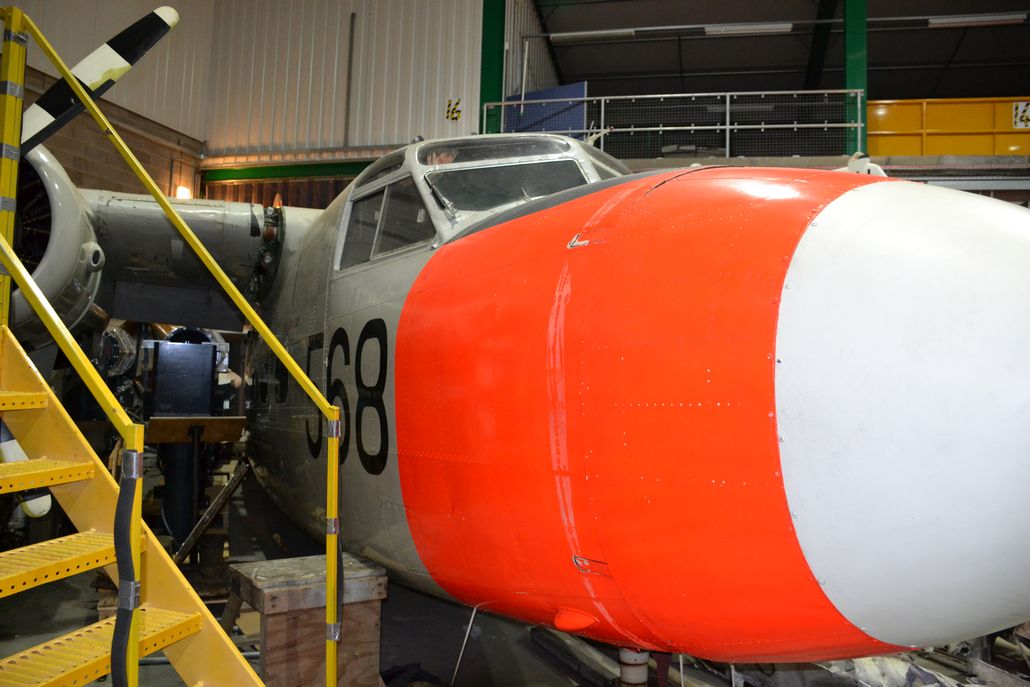
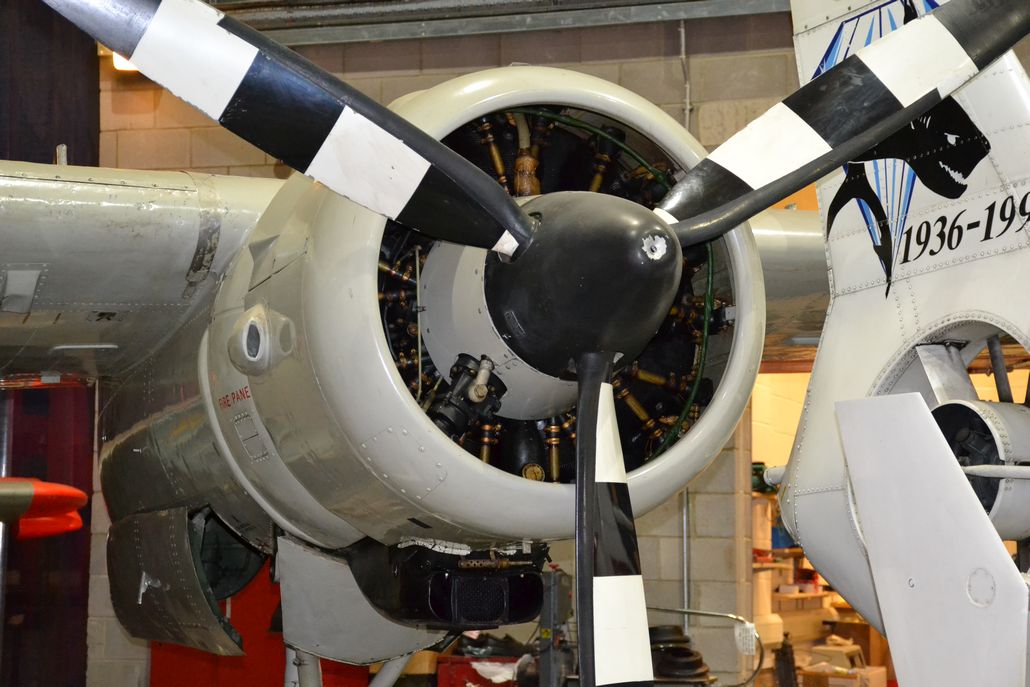
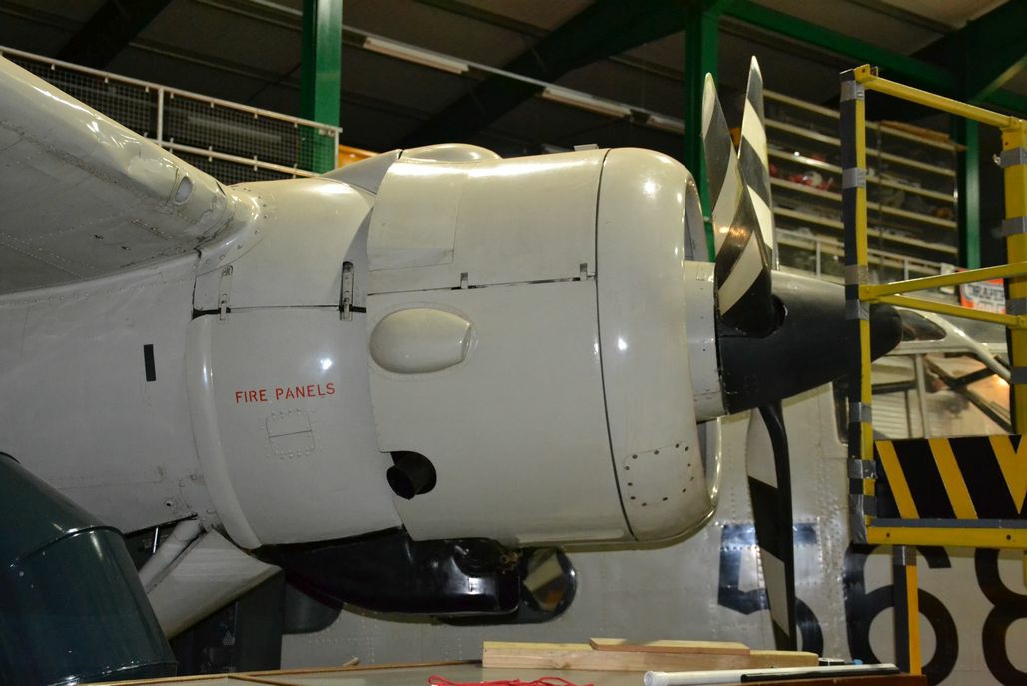
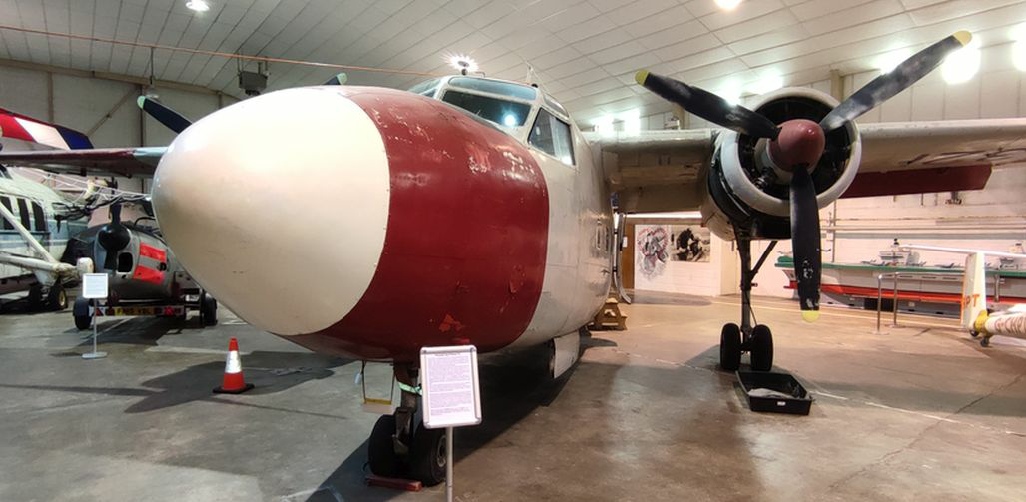
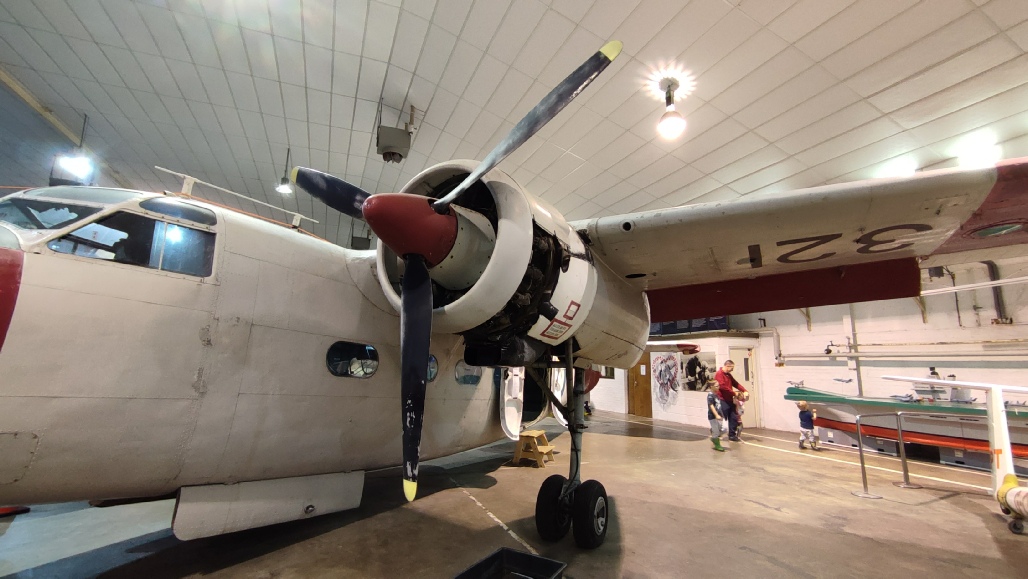
Below: WP321 at the South Wales Aviation Museum


Below: For completeness, this is an ex-
Below: WP313 at the Fleet Air Arm Museum (Cobham Hall reserve Collection), Yeovilton.
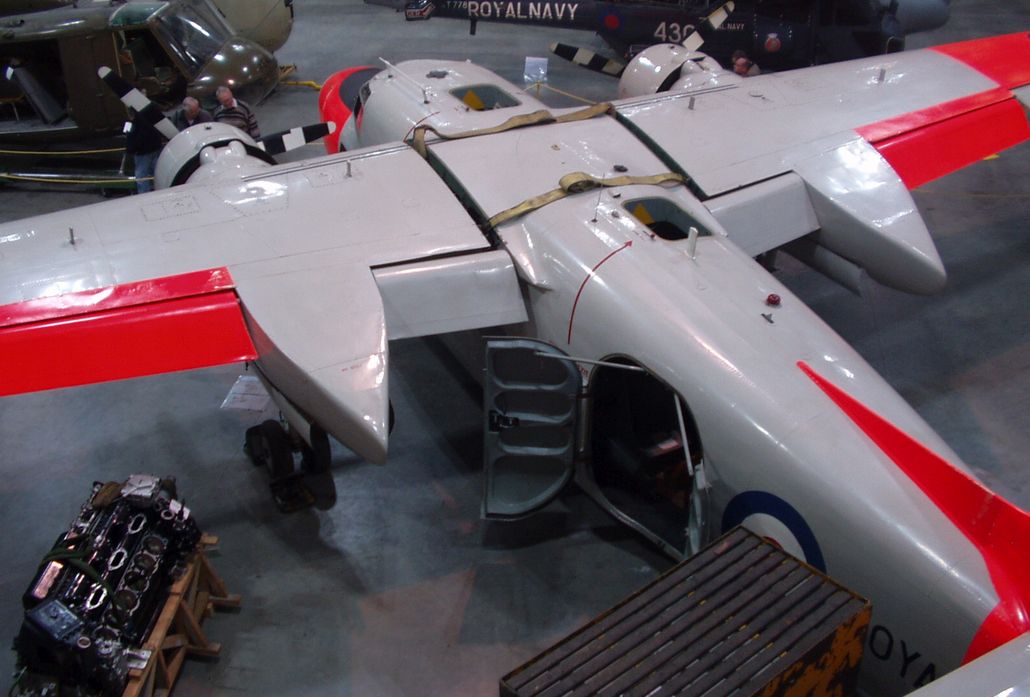
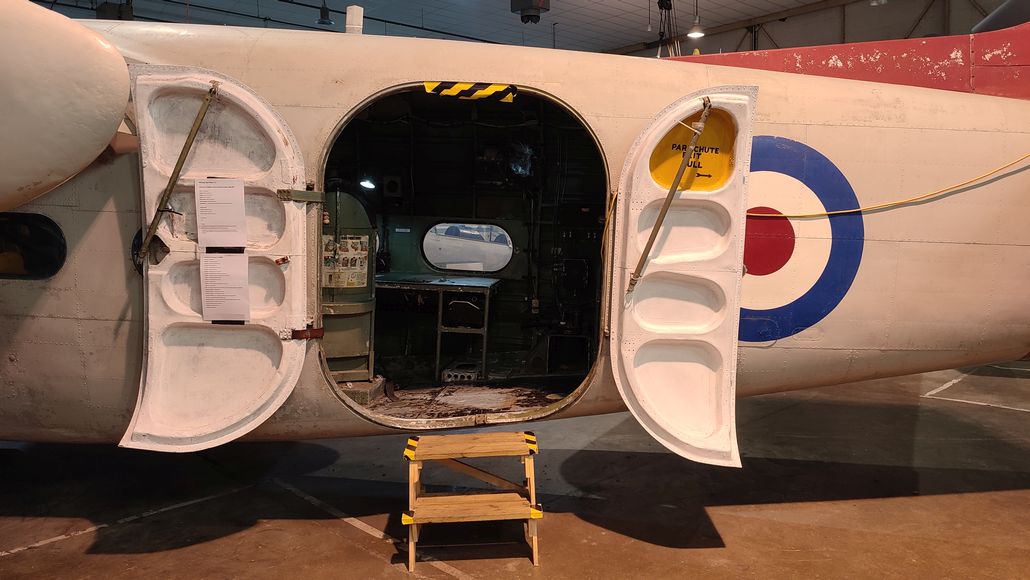
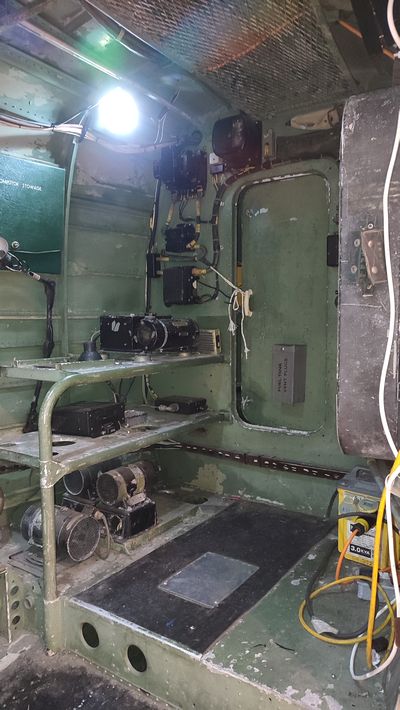
Right & Below: Inside WP321 at the South Wales Aviation Museum, showing the 3 (substantial) student seats, plus plotting desk and small radar screens.
The aft end of the cabin includes some extra radio equipment. The kit would be ideal for some superdetailing, but would need the complex doors (above) opened.


Joining the two fuselage halves went reasonably well, considering that there are no locating pins. The upper edge had a little lip (mould not entirely together?) that needed to be removed first to make later tidying up of the seam a little easier. Although the fit looked good, I chose to join and clamp the tail first, then work slowly along the top surfaces first, leaving them clamped in position until the liquid solvent had set.
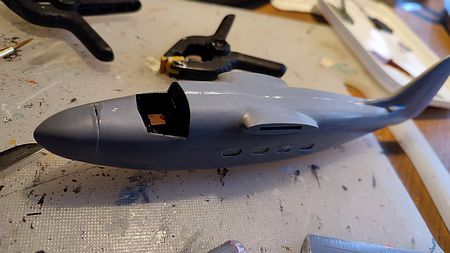
I then joined the small gap on the lower surface to finish. Several nose parts are provided in clear plastic for other versions, but the one for the Sea Prince is the grey plastic one. Its fit was reasonable in profile (but be careful as there is definitely an up and a down), but the joint then needed some filler to close gaps.
The engine/undercarriage nacelles fitted together quite solidly, but the rear top
of the nacelle was perplexing. Special Hobby provide a small textured part to fit
in the gap, but also provide a larger rear nacelle that protrudes above the wing
surface. The instructions show the smaller part being fitted (as do the decal diagrams),
but then later instruction diagrams show the larger part. I can only assume that
this is an option for another version; all of my photos show that part of the nacelle
aligned with the wing (and not textured!) on both Sea Princes and Pembrokes. It's
not the best fitting part in the kit and needed some fettling of the side surfaces
to get it to fit then some filler to close the gaps. 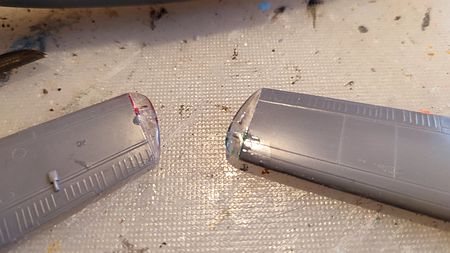
The tailplanes have some very vague fitting positions and needed a lot of support to keep them horizontal as the glue set. There are locating pins, but these can be easily damaged while removing the part from the sprue. It also appears that they are not both in exactly the same position, so check you are applying the correct tail to the correct side, otherwise its leading edge will not align. The wings fitted solidly, but the starboard one had a definite edge that needed filling and some heavy duty sanding to make it acceptable. The port onr got away with a little filler and a quick sand.
The canopy is nicely moulded and a reasonable fit although it has very little "ledge"
to sit on, with the risk that any sanding would disturb it. As with the wings, there
was a large step (and a gap) between the fuselage and the canopy top that needed
filling and careful sanding to give a good 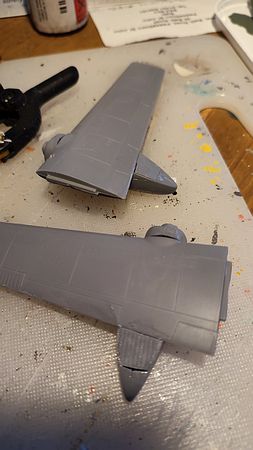 profile at the transition between the
parts. Fortunately, most of the canopy will be painted over, as otherwise the sanding
required would have resulted in a lot of subsequent polishing to try to restore the
surface.
profile at the transition between the
parts. Fortunately, most of the canopy will be painted over, as otherwise the sanding
required would have resulted in a lot of subsequent polishing to try to restore the
surface.
With sanding/filling complete, as is my normal building sequence, I added the undercarriage
legs at this point leaving the vulnerable wheels off until to the end of the build.
I also added some of the required antennae to the fuselage before painting it. Fortunately
these seem quite limited on the Sea Prince, although the Flixton aircraft has a large
pedestal that the others do not, possibly a D/F aerial. Special Hobby provide quite
a comprehensive set of PU parts for the numerous antennae carried by the Pembroke,
plus some Phot Etch. I left all of these parts off, partly because I detest PE (or
more specifically, Superglue!) and partly because most of the antennae carried by
the Sea Prince are simple enough to use styrene strip instead. In any event, the
antenna at the front (two pedestals and a wire) looks to be very fragile in the PU,
so some strip and sprue seems a much better idea. 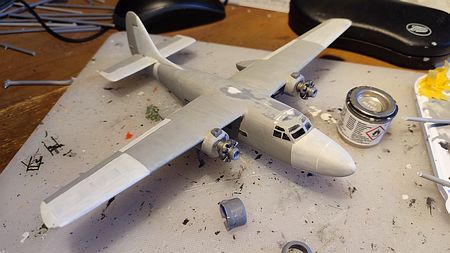
The undercarriage went together with unexpected ease, although the locating holes and pins proved unusable; the nose hole was not in the centre and the wing legs had no pins! Nevertheless, the whole thing assembled without problem and seems to be fairly robust, although it doesn't look so.
Engine cowls, as expected, didn't fit together very well and needed some filler /sanding to make them tidy. The engine fronts are very simplified, but hidden so deeply in the cowl that they can hardly be seen. The propellers are a simple butt joint to their shafts, so don't turn.
Painting left a few choices; the main fuselage seems to be Light Aircraft Grey (Humbrol
166), but the hi-
I chose to represent the aircraft at the Fleet Air Arm Museum (reference pictures below). Decals are a mix of the main RAF kit markings, plus the required Fleet Air Arm extras from my decal spares folder. The kit markings that I used went on very successfully, and whilst nicely thin, the small lettering is a little fuzzy and the roundels are a little more translucent than I would have wished (especially over the fluorescent red).
This was not a particularly easy kit to build, but the end result is pleasing and it adds another unusual Fleet Air Arm aircraft to my collection !