February 2024
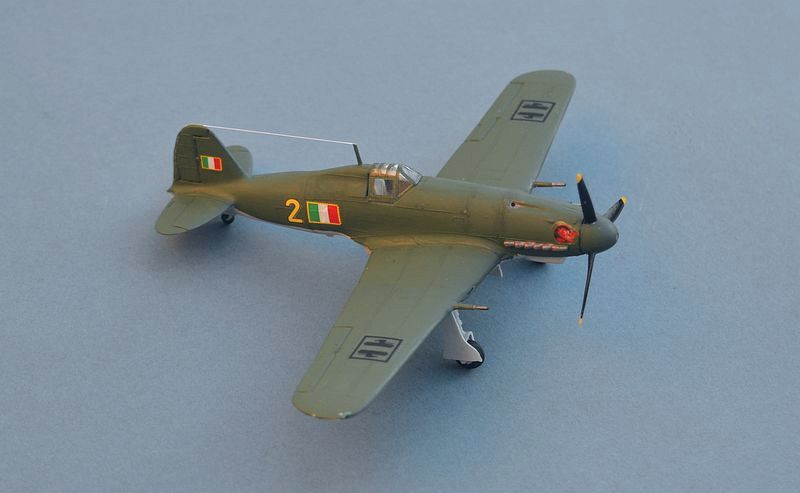
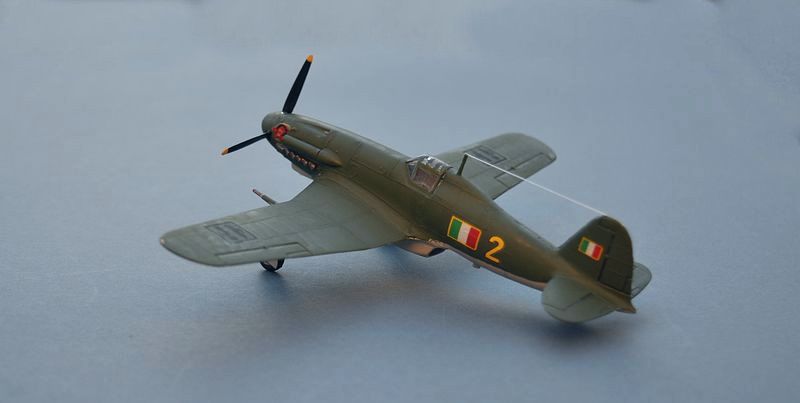
Fiat G.55 Serie 1 Centauro
Link to Website Index: ![]()
Fiat G.55 Serie 1 Centauro
2 Gruppo 4 “Vittorio Pignati di Morano” Aeronautica Nazionale Repubblicana (ANR)
Bresso (Milan), Lombardy, Apr 1944
Aliplast 1/72
Link to Website Index: ![]()
© www.gengriz.co.uk
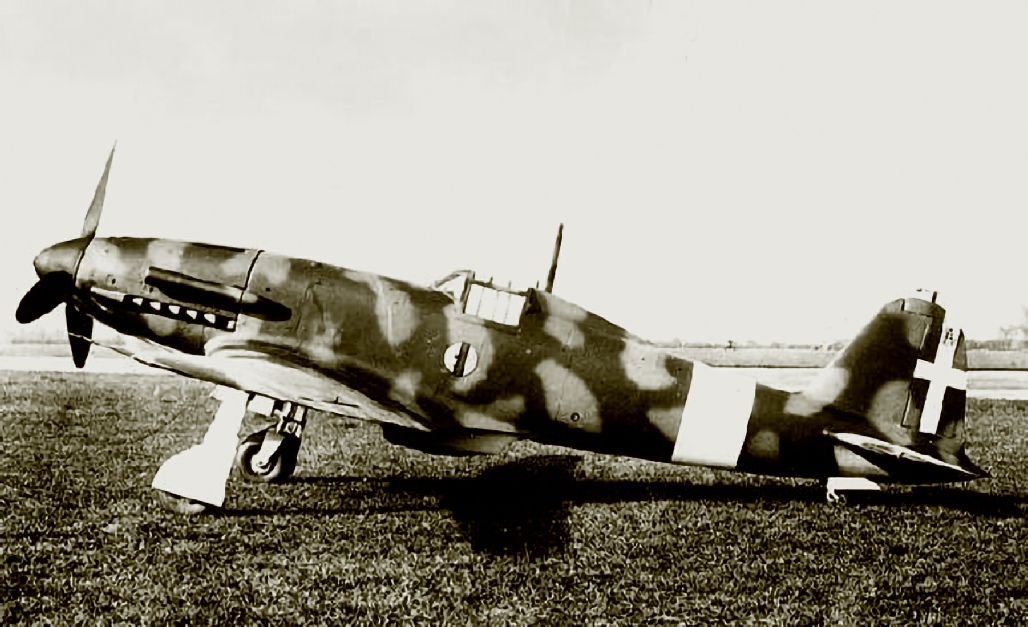
The FIAT G.55 Centauro entered Regia Aeronautica service in early 1943, with 20 Gr,
51 St initially defending Rome and then moving to Cagliari. Part of the trio of advanced
"Serie 5" fighters that included the Macch C.205 and Reggiane Re.2005, it was regarded
as one of the finest Italian aircraft of the war, with even the Germans rating it
higher than the Bf-
Powered by a licence-
By September 1943, the date of the armistice between Royalist Southern Italy and
the Allies, only 35 had been delivered, but production continued under the German
puppet Italian state, with at least 138 new aircraft used by the Aeronautica Nazionale
Repubblicana (ANR) and the Luftwaffe, replacing Macchi C.205s and eventually being
replaced themselves by Bf-
After WW2, Italy restarted production using stockpiled parts and airframes. As well
as the Italian Air Force, 30 were exported to Argentina, plus a number to Egypt.
A new model, the G.59 powered by a Rolls Royce Merlin engine, flew from 1948 including
as 2-
Building the 1968 Aliplast G.55 Kit:
In some respects, it could be argued that this how Italeri first began, with Aliplast
Kit Nr.101. 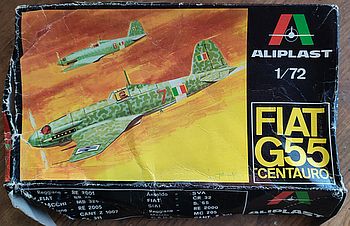
This one doesn't fit into any of my normal modelling themes. For example, the FIAT
G55 Centauro came to prominence after the Malta campaign, with its first combat over
Sardignia in June 1943. However, WW2 Italian aircraft have an attraction all of
their own (to me at least) and when this one came up on e-
I didn't actually intend to build it at first. It is a first issue "Aliplast" kit,
one of several that later became a part of the Supermodel range, then Italaeri, then
the more modern spelling of Italeri. Its box was in good condition and made an interesting
comparison with later Italeri packaging and symbols. Unfortunately, despite the
vendor making a credible job of packing and protecting it, by the time it arrived
at my house, it had clearly been stood on heavily (or driven over) and crushed quite
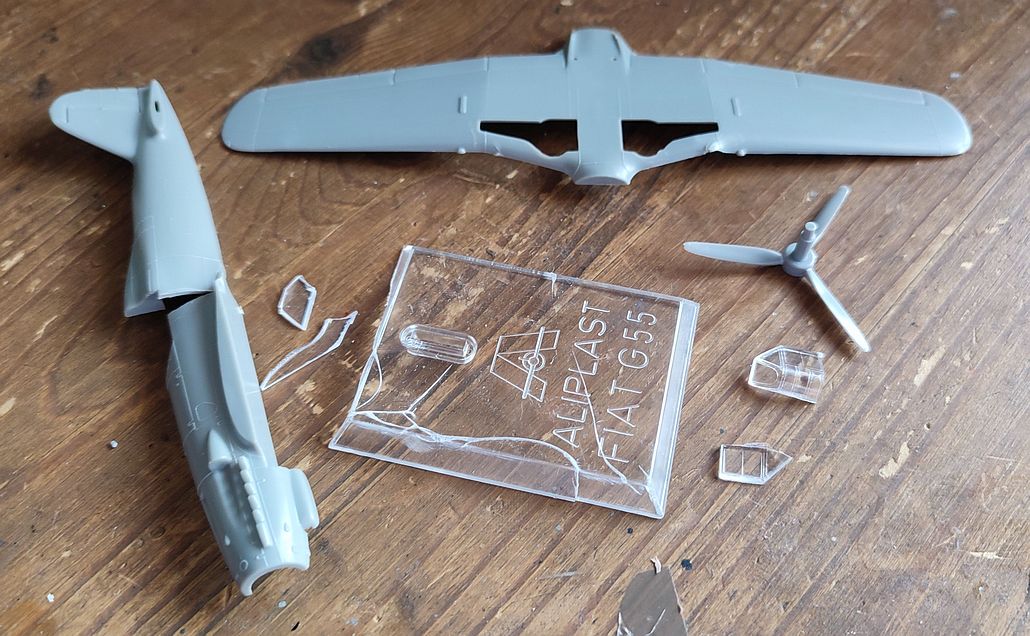
badly. As well as the rare box being trashed, the fuselage was split in two, the
lower wing cracked and twisted, the canopy split in two, the clear stand shattered,
plus the decals and instructions had been ripped (by the broken parts I assume).
Clearly no longer a collectible. The e-
So now I have this broken kit, what sort of recovery can I achieve?
Link to many more Italian Aircraft on my Adversaries pages
The stand was beyond repair, and the fuselage was badly twisted as well as cracked.
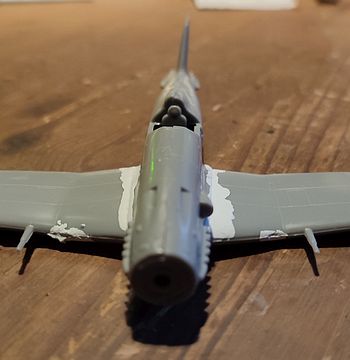 Rejoining the fuselage crack was relatively easy (although it is still noticeable),
but working out the twist proved a little more difficult. The fin and rudder have
a definite list to port, that I think will be better addressed later in the build.
The real thing did have a slightly offset rudder to overcome a propeller torque induced
yaw at take-
Rejoining the fuselage crack was relatively easy (although it is still noticeable),
but working out the twist proved a little more difficult. The fin and rudder have
a definite list to port, that I think will be better addressed later in the build.
The real thing did have a slightly offset rudder to overcome a propeller torque induced
yaw at take-
After contemplating the tail twist for a bit I genuinely considered abandoning this build as beyond repairing, but as a last ditch effort, I placed the tail of the model in a cup of boiling water for a few minutes, then using a dishtowel to avoid burning my fingers, I tried twisting it back into shape. It worked! Not perfectly, as the rear end of the fuselage now has an obvious bend in it, but probably good enough. Either way, the build is back on!!!!
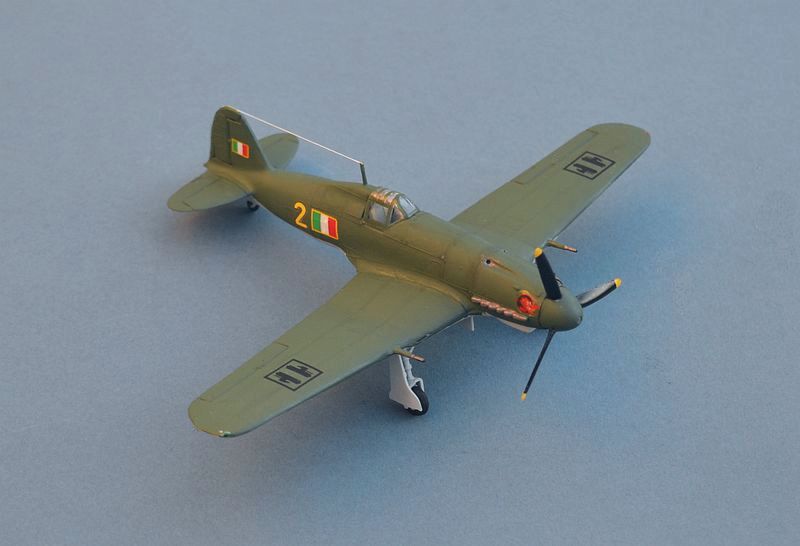
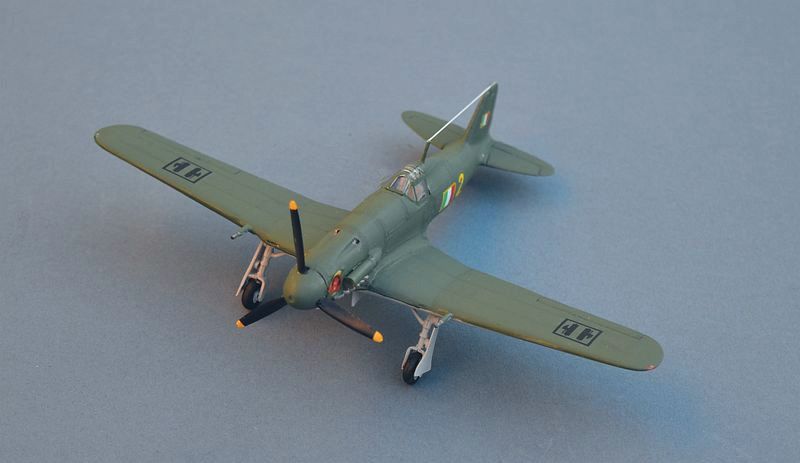
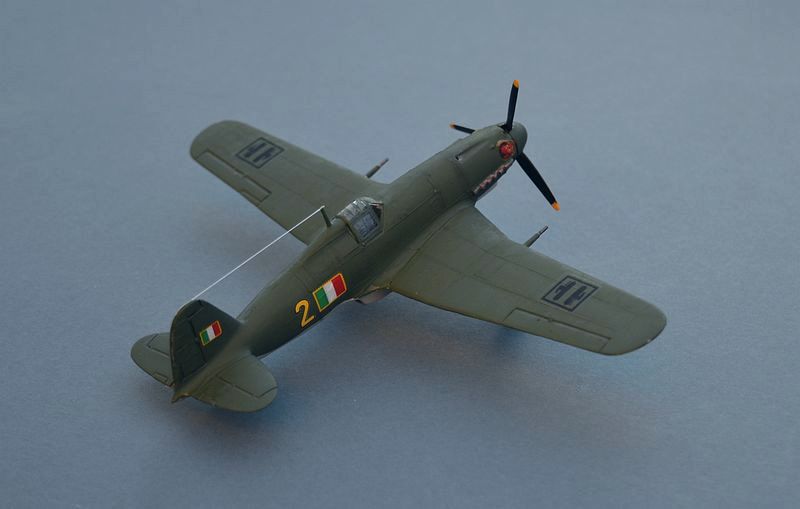
Another dip in boiling water allowed some of the remaining rear bend to be straightened, with the wing gaps filled and sanded back. The canopy was broken along one of its frames, so some careful glueing allowed it to be restored to an almost clear state, with only a little of the glue showing once it was painted. I left the very basic cockpit interior as provided, bar the addition of two paper seat straps. The upper wings had a little gap that needed filling, but the undercarriage went together without any drama. The kit has no provision for a radio mast, so I added a stretched sprue one, plus some lycra thread as a wire.
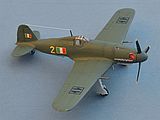
The Aliplast decals were quite badly yellowed and also misaligned, so I dug out some old FROG ones, only to find that they were almost as badly misaligned (but not yellowed).
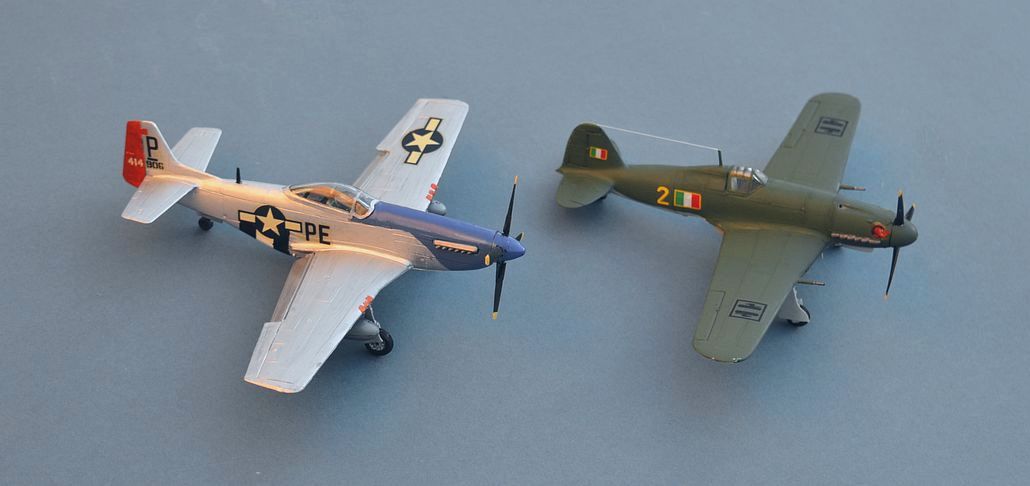
However, I also have an Italeri C.205 to build and it should be possible to do this
in Reggia Aeronautica markings as an “on theme” Malta-
This was a very simple kit to build, but Aliplast/Supermodel had a good reputation and I think the end result looks good. As mentioned, I already have a C.205 to build and will keep my eyes open for a Re.2005 to complete the set!
Part 2
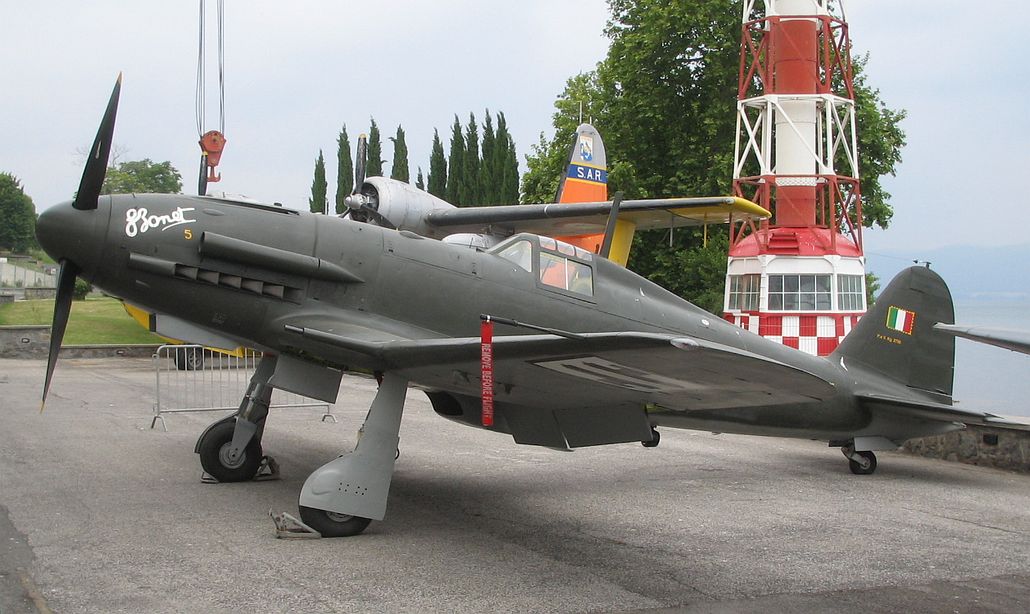
A G.55 Centauro at the Italian Air Force Museum, Vigna di Valle (photo credit Lorenzo Tomasi)