November 2023
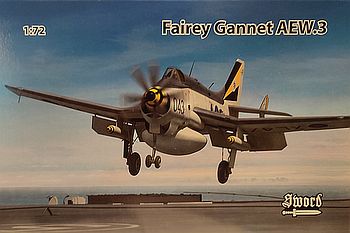
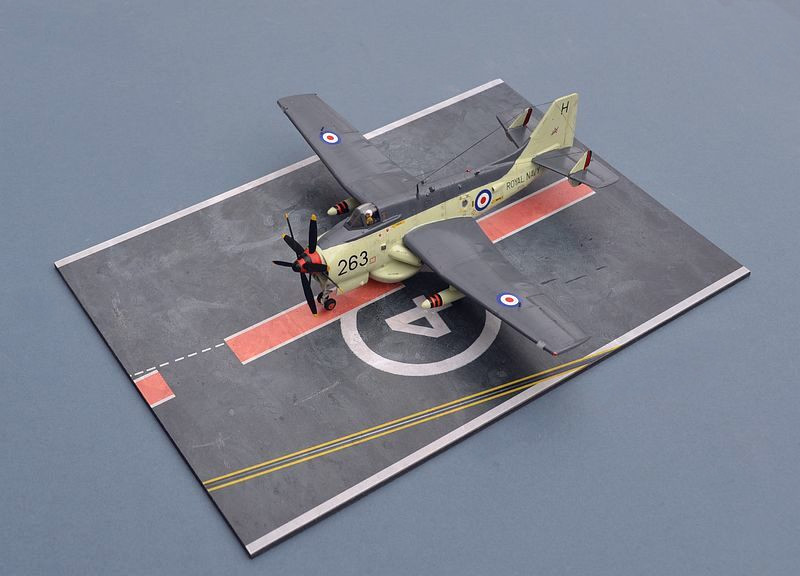
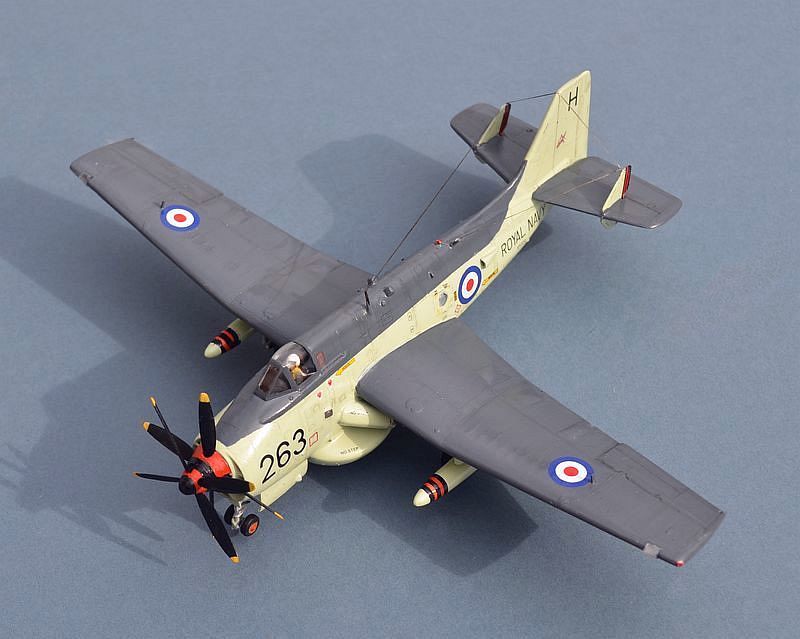
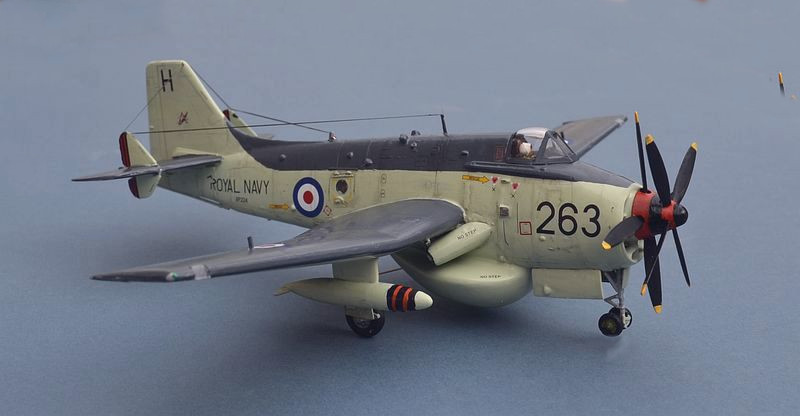
Fairey Gannet AEW.3
HS Buccaneer S.2
Fi-
Supermarine Spitfire Vb
Link to Website Index: ![]()
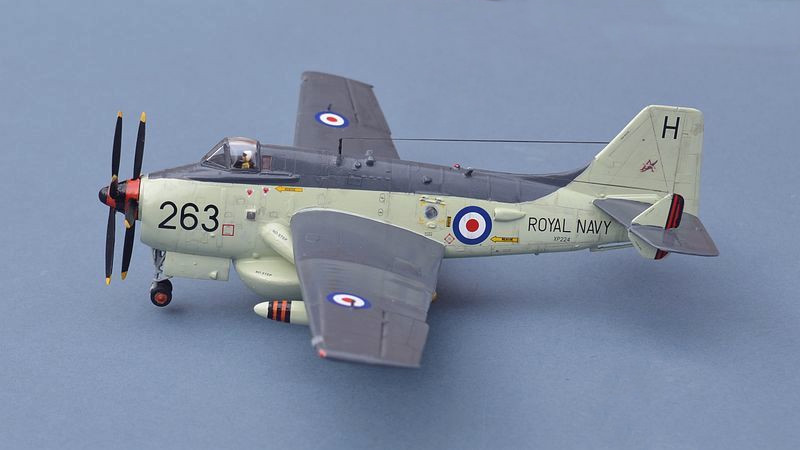
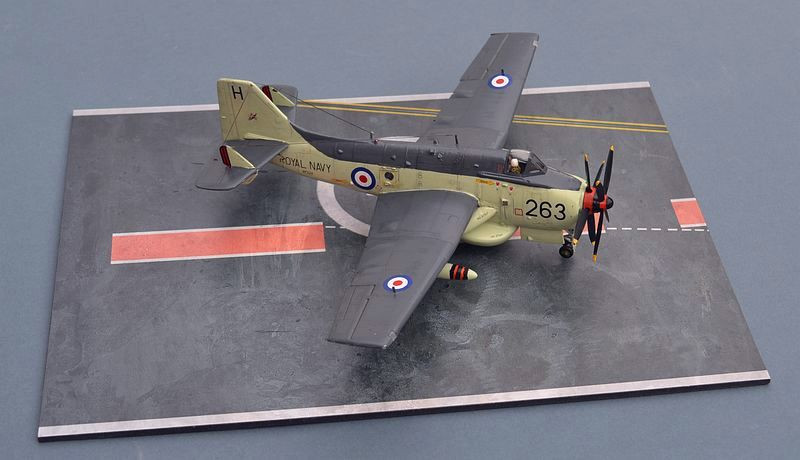
Fairey Gannet AEW.3
849 Naval Air Squadron, A Flight
HMS HERMES,1968.
Sword 1/72
Link to Website Index: ![]()
© www.gengriz.co.uk
The Fairey Gannet entered service in 1954 as an anti-
Although it was replaced in the ASW role by helicopters in the mid 1960s, 44 examples
of a much modified AEW version were produced in the late 1950s and continued in service
until 1978. These aircraft carried an AN/APS-
The AEW Gannet was operated by 849 Sqn, split into 5 flights, a land based HQ Flight
at RNAS Lossiemouth, plus 4 ship-
Bizzarely, the AN/APS-
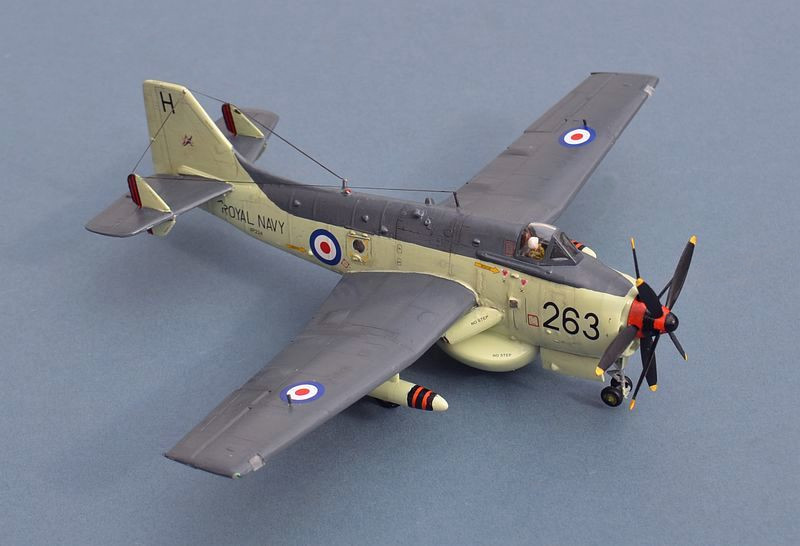
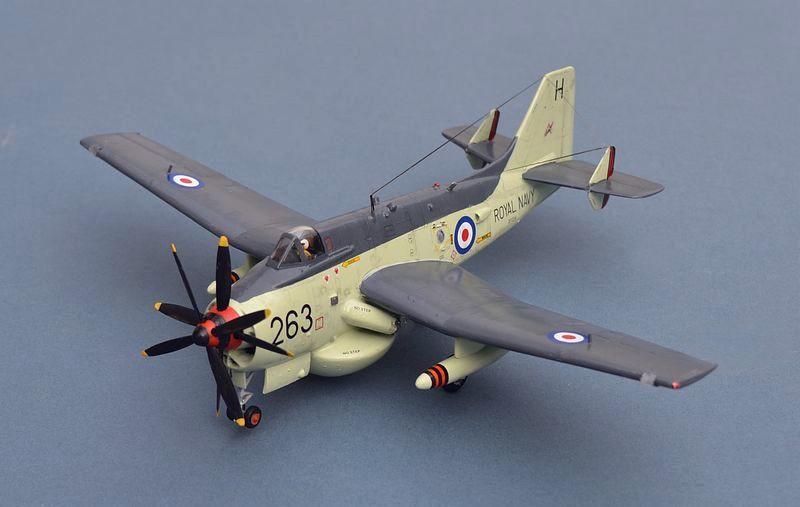
Building the Sword Gannet kit:
Many years ago I built the ID Vacform kit of the Fairey Gannet AEW.3, using the old FROG/Novo kit as a parts donor (wings , engine/prop & undercarriage). At the time, I was quite pleased with it, but in comparison to today's kits it really no longer "cuts the mustard". Czechmaster and Alley Cat have produced some excellent kits, but slightly beyond my budget at the time, so when Sword's new mould kit appeared in 2015 (a more recent issue includes some new internal resin detail) I quickly snapped one up and added it to the "to build" list. It's taken me 8 years to actually get round to building it, but now's the time and now's the hour, as they say!
I quite like Sword kits, which usually have good surface detail, reasonable accuracy and use a relatively soft darker grey plastic. Unfortunately, sometimes their detailed parts are a little complex to assemble and the Gannet kit is no exception. It is definitely a "medium run" kit for the more experienced modeller, with quite chunky thick parts, few location points, some difficult "butt joints" and large mould extraction towers/sprue attachment points in awkward places. That said, fit is fairly good and even when the parts are chunky, the detail on them is very fine, so care and patience in assembly (plus the benefit of the softer plastic) will pay dividends and result in a very nice replica
Assembly starts, as expected, with the cockpit, which has adequate detail and looked
as though it fitted into the space well, as did the front undercarriage bay. Subsequently,
the cockpit did require some trimming to get the two fuselage halves to join. Although
etch seat belts are provided, I went with a trimmed down (ex-
Link to more Fleet Air Arm aircraft on my Flight Deck pages
Part 1
Attachment points for the main gear are a little fragile though and this is probably the most difficult area of the kit. The main leg sits in a "shelf" on the interior wall with its strut in a hole at the front of the wall. If you haven't got this entirely right when fitting it inside the wing, then the gear and its forward strut will lack attachment points. an internal retraction strut can be used to provide some strength, although its attachment point is a little vague too. Finally, (and fortunately) the main gear doors attach to the wing and the bottom of the leg, providing much needed strength to the finished article. The nose gear is much more simple, with a locating hole and a ridge to hold the rear strut. Once again, the gear door can add a little subtle strength. As is my normal practice, I assembled and painted the wheels off the kit, leaving their final attachment to the very end to avoid damage during the build.
 The rear cabin windows fit from the inside and to avoid the risk of them appearing
"see through", I added a bit of black plastic card behind them as a background. This
is a method I have used previously on 1/144 airliners and it works well, giving a
suitable impression of depth. Joining the two fuselage halves required some care;
the rear end fitted well, but the upper forward parts less so. I trimmed the sides
of the cockpit to try to improve the fit, but still ended up with a step and gap
to fill.
The rear cabin windows fit from the inside and to avoid the risk of them appearing
"see through", I added a bit of black plastic card behind them as a background. This
is a method I have used previously on 1/144 airliners and it works well, giving a
suitable impression of depth. Joining the two fuselage halves required some care;
the rear end fitted well, but the upper forward parts less so. I trimmed the sides
of the cockpit to try to improve the fit, but still ended up with a step and gap
to fill.
Most joints will need some dressing, perhaps some filler and sanding back. The horizontal
stabiliser fins are a vague fit in their (flash filled) slots. These need careful
assembly and probably a little fettling to get them to sit right. Despite my best
efforts I ended up with a slight gap at the front, which was filled with Krystal
Klear PVA. The wings have a small tab to assist with their joint to the fuselage
and went together with little problem once I had trimmed the tab to actually fit
the slot (!) -
The raised wing detail and some of the fuselage detail is a little heavy and benefits from a little sanding back. I removed the prominent wing strengtheners, as these are not obvious on most of the pictures I have, although they are very clearly present on the aircraft at Newark, Dumfries and St Athan museums, which makes me think they may have been a late mod, since these are all later aircraft.
Assembly of the exhaust cowlings is quite delicate and will definitely need filler
to get an acceptable end result. Once again this is best done off the kit before
attachment. The fairings are not well shaped; their forward ends should be a lot
more curved and it is possible that they are also “sided". Mine went on OK, but
this is a weak part of the kit design. I did struggle for a short while to understand
how they should be assembled, particularly whether they should have an inner gap.
Build the exhaust pipes first, then attach the cowling all around them -
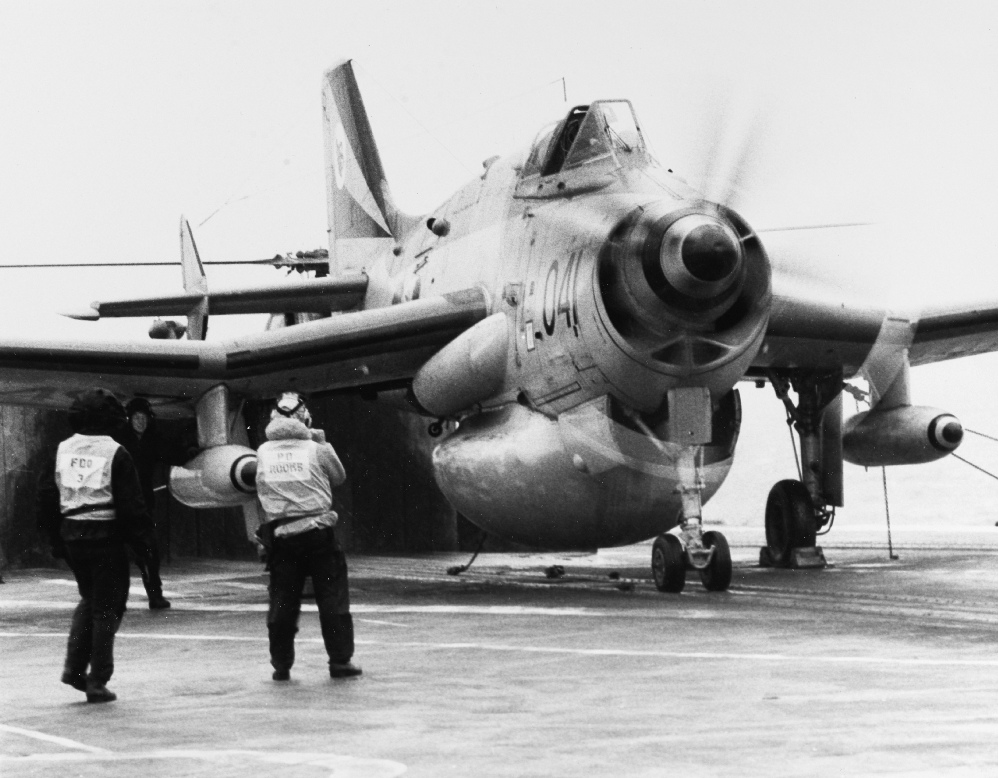
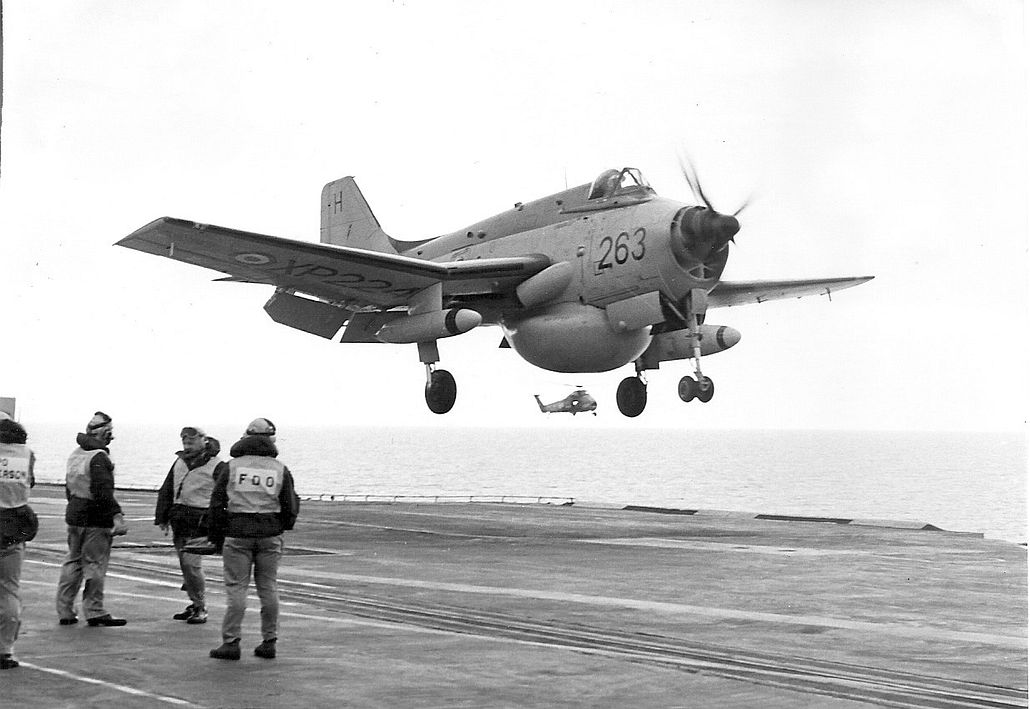
Below: an aircraft of B Flight, onboard HMS ARK ROYAL in the late 1970s. (US Navy photo USN 1173276)
Left -
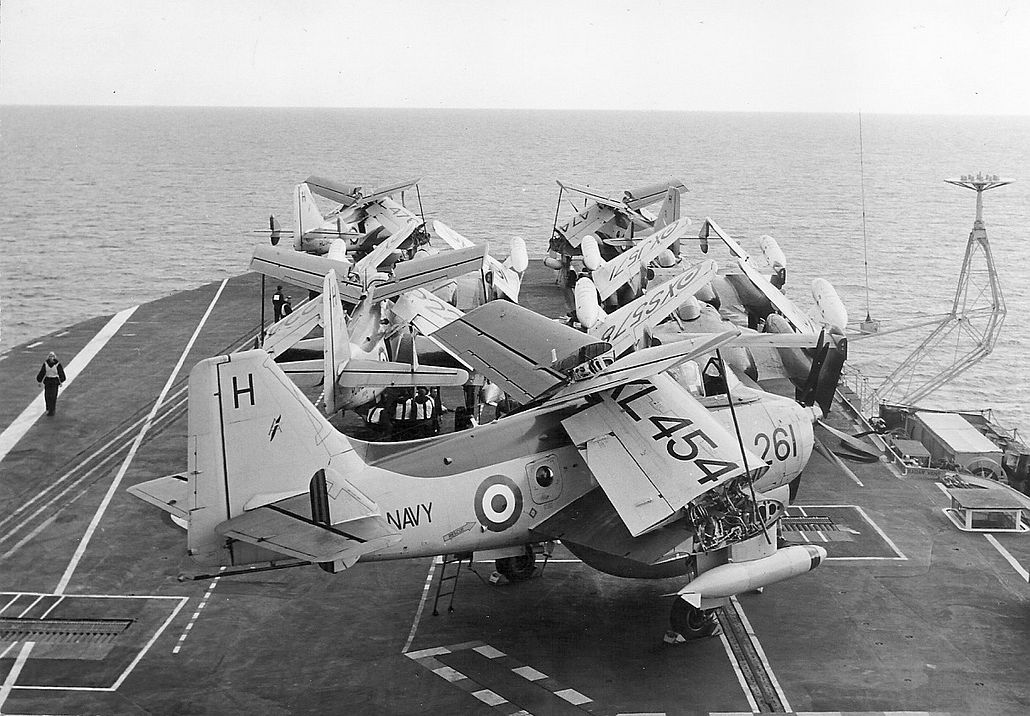
The real thing:
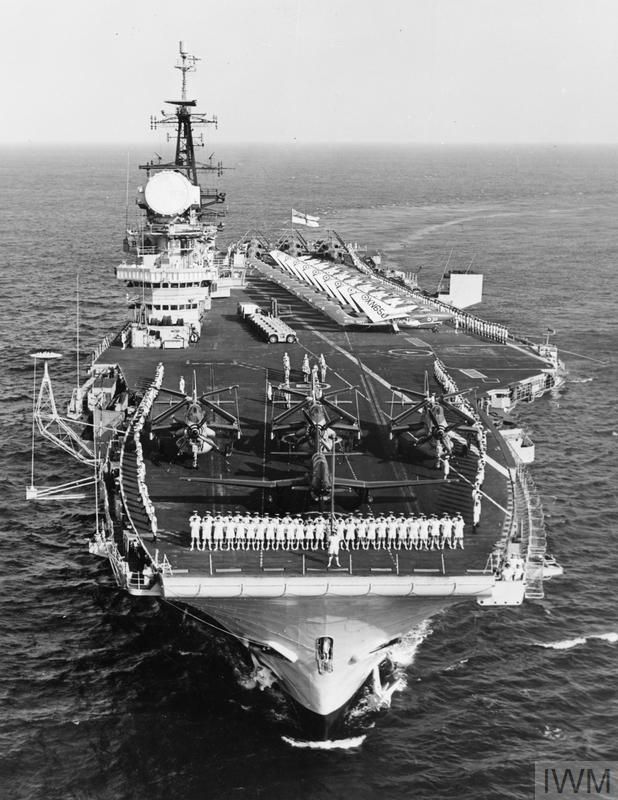
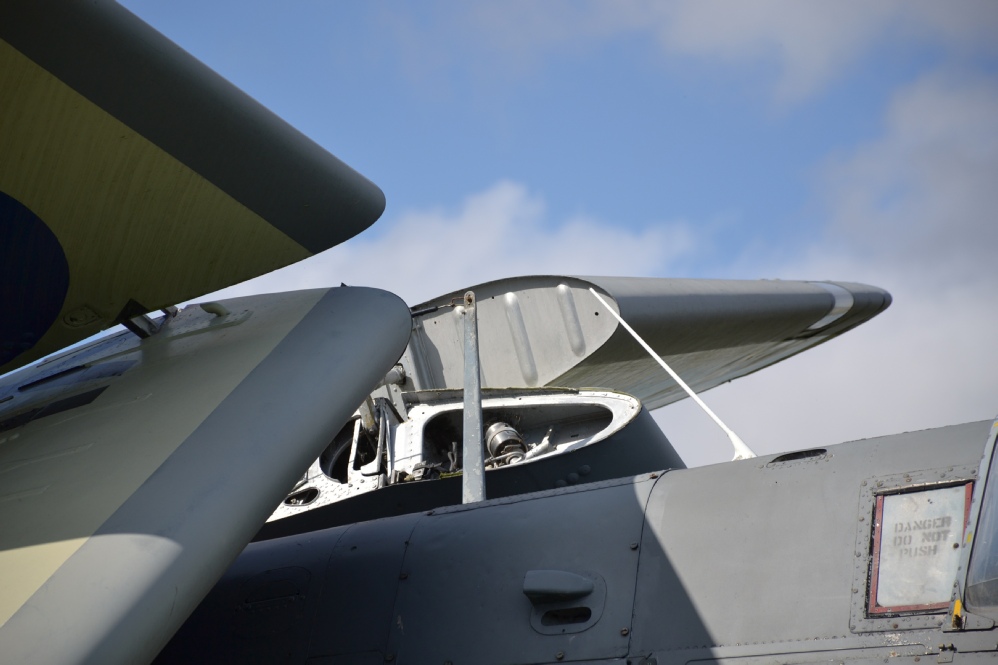
Three folded AEW Gannets and a spread COD Gannet sit at the forward end of HERMES’ deck for Procedure Alpha
Below -
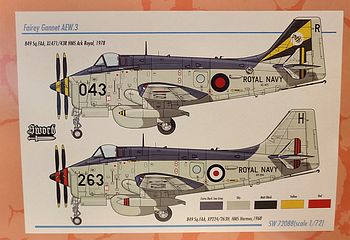
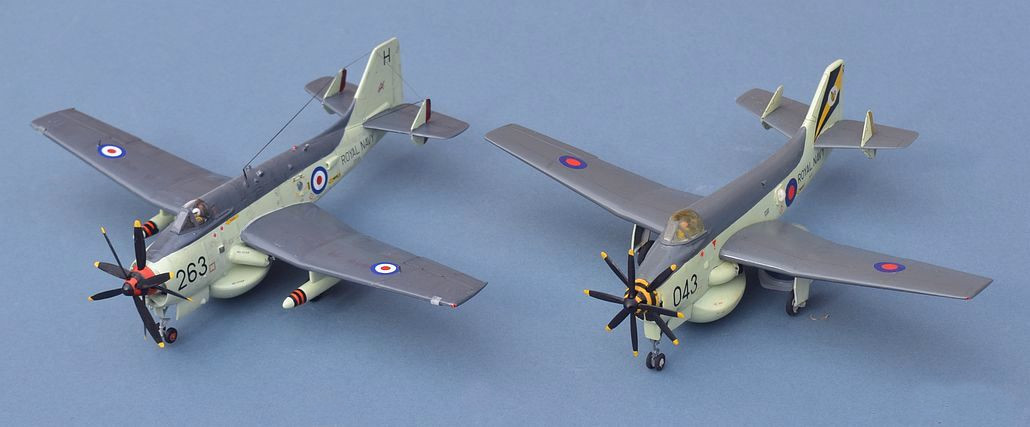
Decals are nicely printed by Techmod and include an option for the very colourful
"B" Flight onboard HMS ARK ROYAL in the late 1970s, which I suspect will be the choice
of most modellers, since it is the scheme worn by the final Gannets onboard HMS ARK
ROYAL in the late 1970s and the scheme worn by 5 of the 8 surviving GANNET AEW.3s
in museums. I have found that Techmod decals can be very thin and difficult to move
once applied, so take care. I lost two (an “H” and the small fuselage serial number)
that curled up as I applied them, but luckily I had already procured another kit
(for a D Flight option), so had some spares. Unfortunately Sword (and every other
after market sheet I can see) messed up with the bee on the starboard tail, which
should be facing backwards. 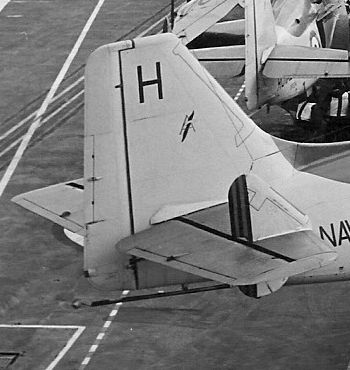 The decals also include numbers for the top of the flaps,
although no parts are provided to extend these. Alternative decals are readily available,
but essentially, there are only 6 possible schemes for this kit -
The decals also include numbers for the top of the flaps,
although no parts are provided to extend these. Alternative decals are readily available,
but essentially, there are only 6 possible schemes for this kit -
However, for this build, I plan to use the kit's own second option, which is a slightly
plain aircraft from "A" Flight, flying from HMS HERMES in 1968. Application of the
decals revealed some shortfalls: e.g. only 3 “Rescue” arrows are provided. They
are also missing the “A Flight” symbol from the tail. Given that this is an otherwise
pretty plain colour scheme, I felt I had to address both these issues. A spare yellow
“rescue” marking was easily found on another decal sheet, but the Gannet & A on the
tails demanded some custom decals be made up. Using several photos and profiles,
I drew up a large scale version of the symbol, then scanned it into my computer.
I then printed it at the appropriate size on clear ink-
The (very many) tiny stencils went on quite easily (without curling!) But there are so many of them and they are so small that I limited myself to the main ones. A check with my reference pictures suggested that a few were the wrong colour or size, but in general I was quite happy with them.
 The main paints that I used were Humbrol 123 (Extra Dark Sea Grey) and Revell 59,
both enamels and hand brushed on.
The main paints that I used were Humbrol 123 (Extra Dark Sea Grey) and Revell 59,
both enamels and hand brushed on.
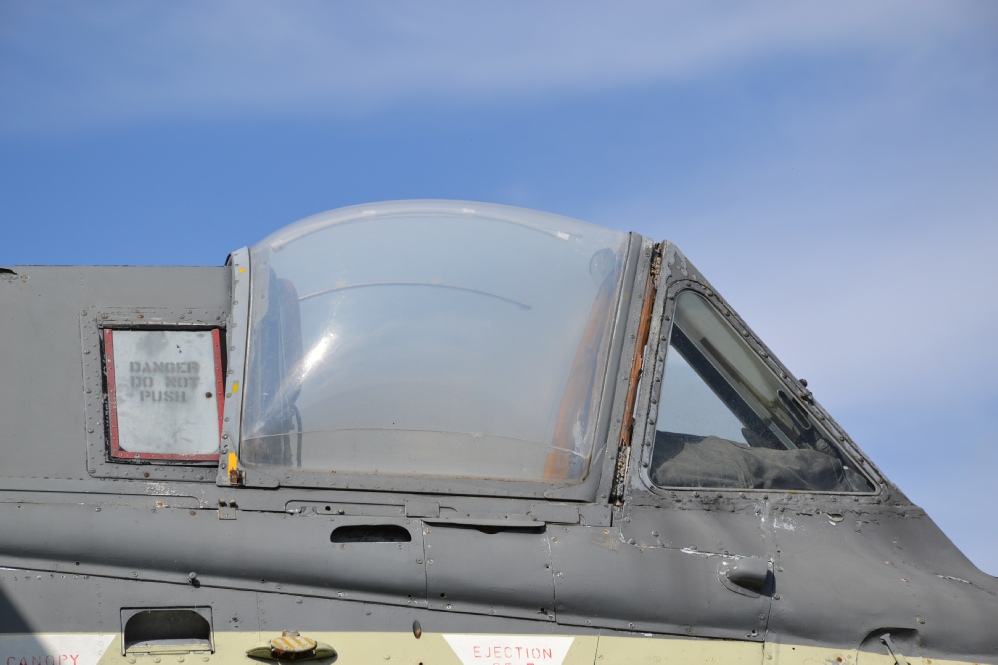
Painting the red and black stripes on the propeller assembly (or yellow and black if you choose that option) poses a bit of a challenge. The breakdown of parts doesn't make it feasible to do this before assembly, but once assembled, the propeller blades make it very difficult to get in there and apply a second colour or touch it up. A hint from my experience here, the black was easier to paint after the fact than the red (or yellow), and you will almost certainly need to touch up the propeller blades afterward, so I suggest adding the colour first, then adding/touching up the black. I painted the drop tanks red and applied strips of black decals to provide the stripes. This wasn’t particularly successful , so some freehand paintbrush touching up was needed. The canopy fitted perfectly, with no need for any filler around the edges. It is nicely thin and clear, but appears to be significantly less bulged than the real thing (see “the real thing “picture below).

This has been a fun kit to build, and whilst Sword are definitely not for the beginner, they continue to provide some very nice kits of some much wanted subjects; I will attempt a second one of these in due course. Watch out for those curling decals though!!!

UK Museum Gannets:
So far as I know there are 6 Gannet AEW.3s in UK Museums, with another in the US and one in Germany.
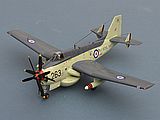
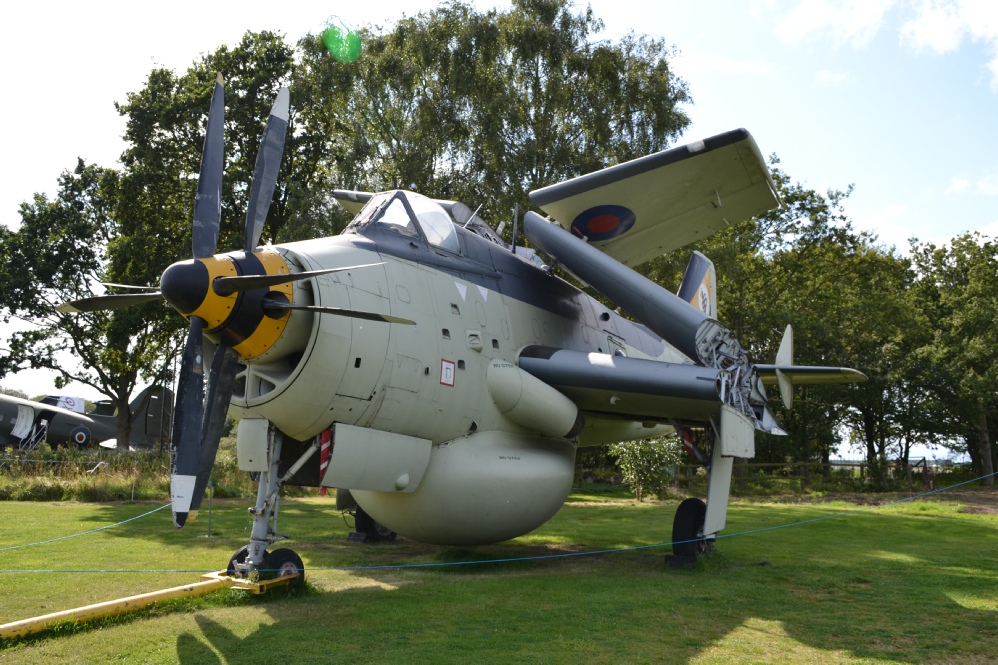
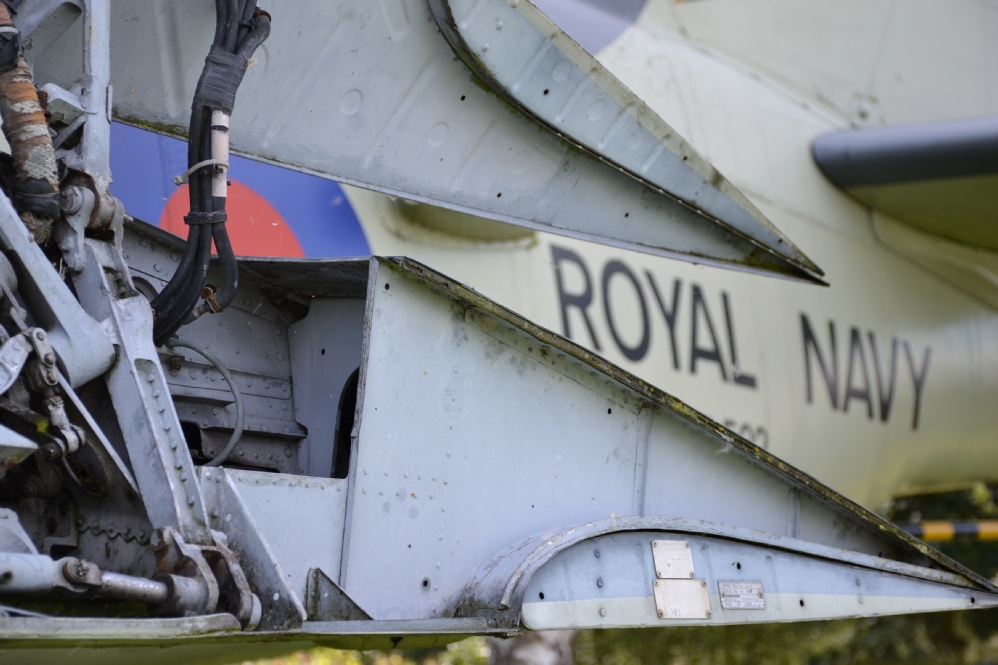
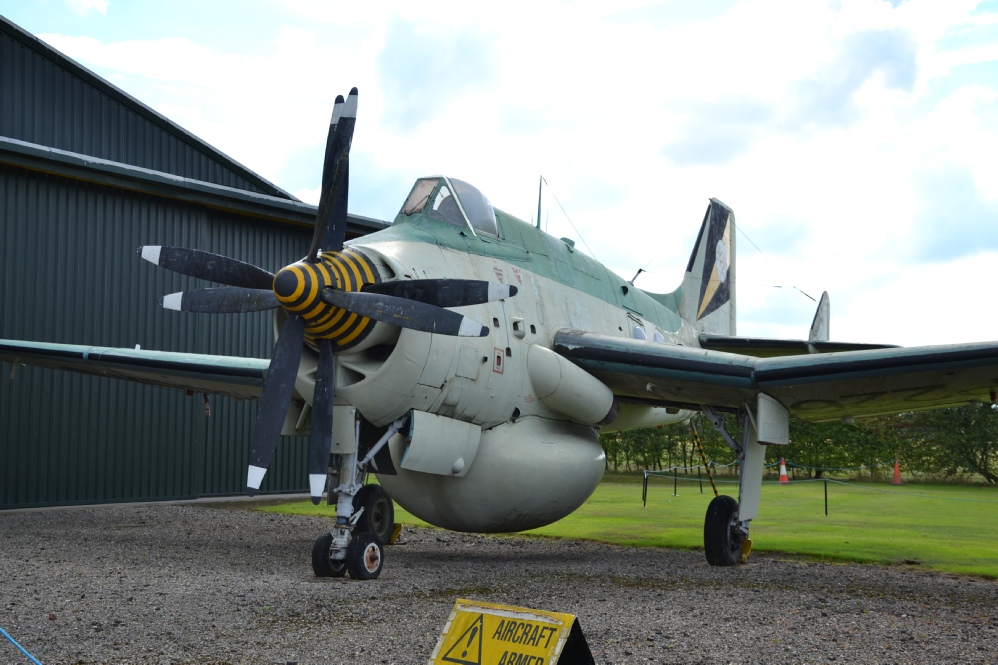
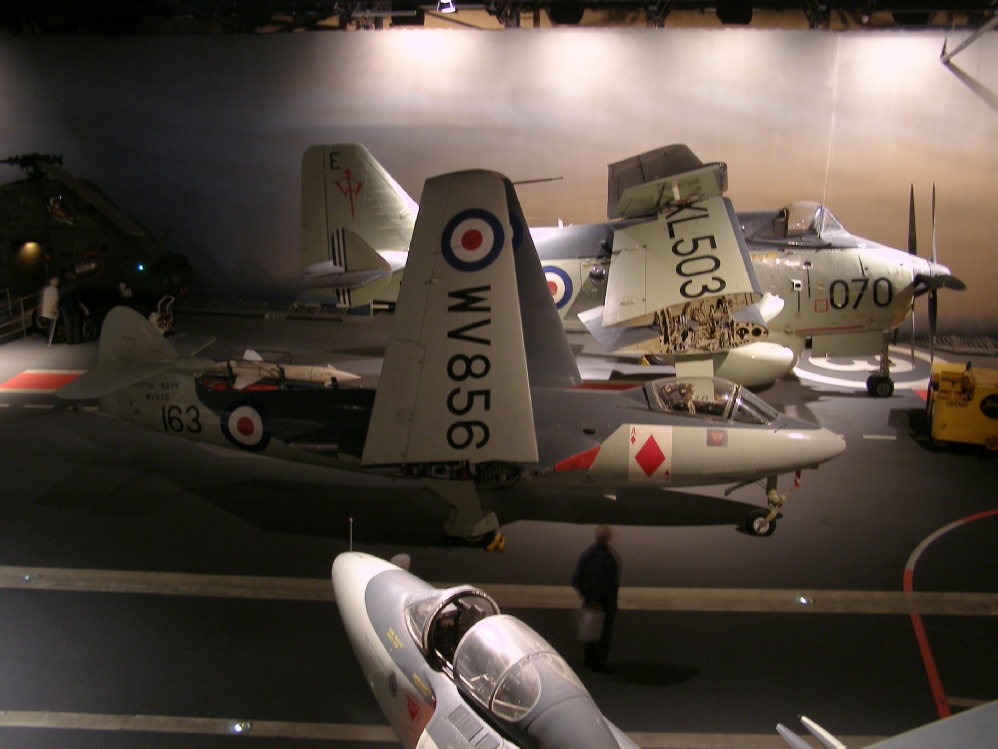
Below: XL 502 at the Yorkshire Air Museum, Elvington, near York. As with most preserved AEW Gannets, she wears the final operational markings, those of B Flight from HMS ARK ROYAL.
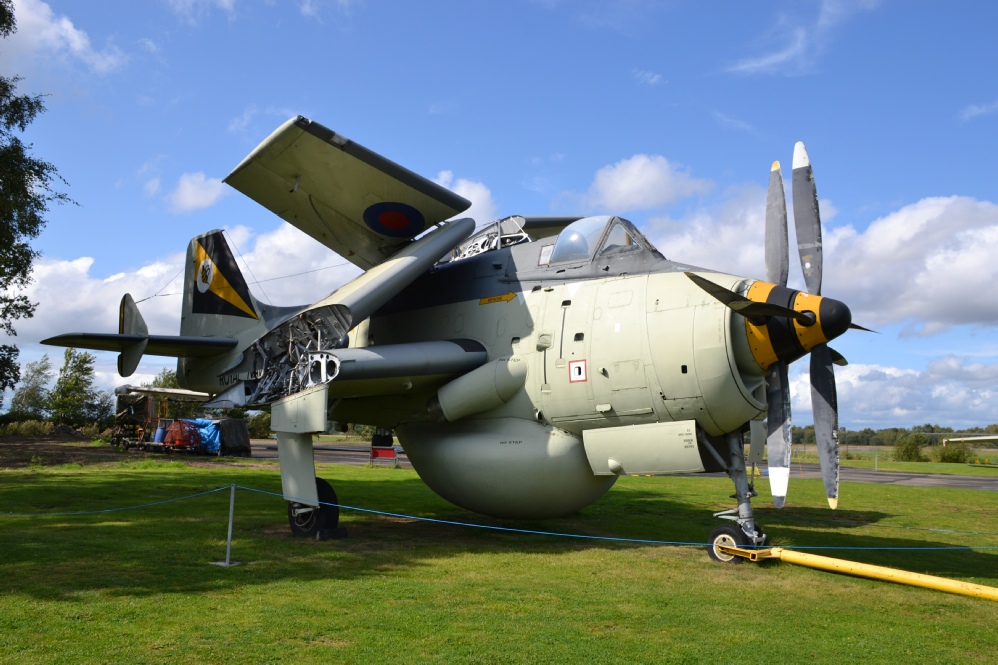
Below: Wearing very similar B Flight markings, XP226 sits at the Newark Air Museum near Lincoln. Although in relatively good condition, the upper surface paint used for her most recent repaint has faded to a strange green!
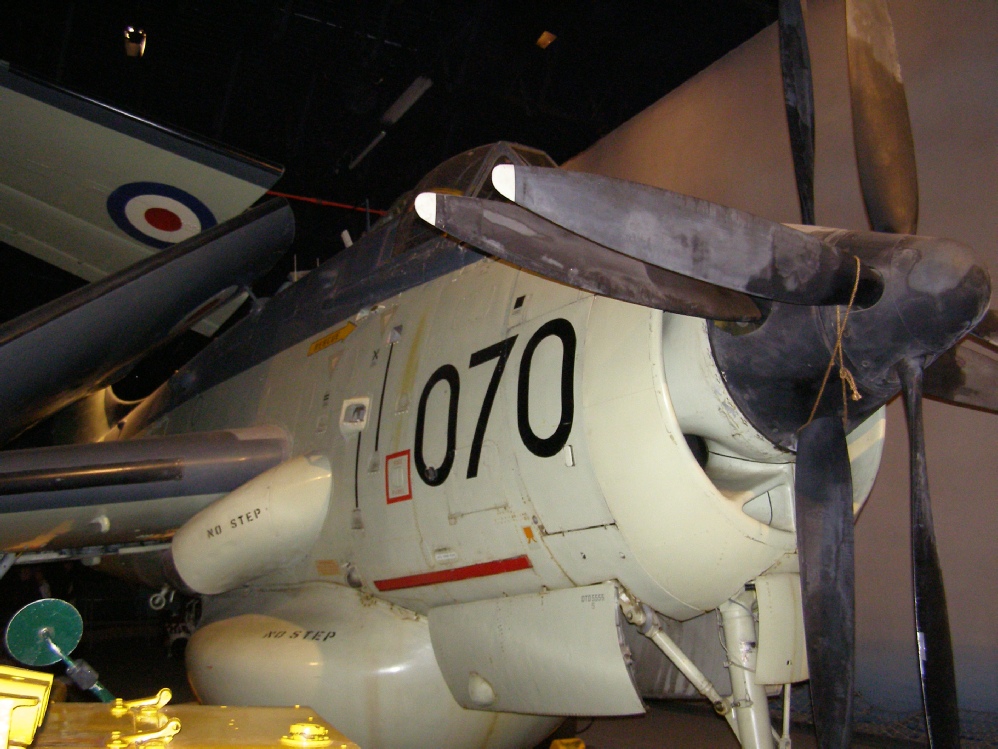
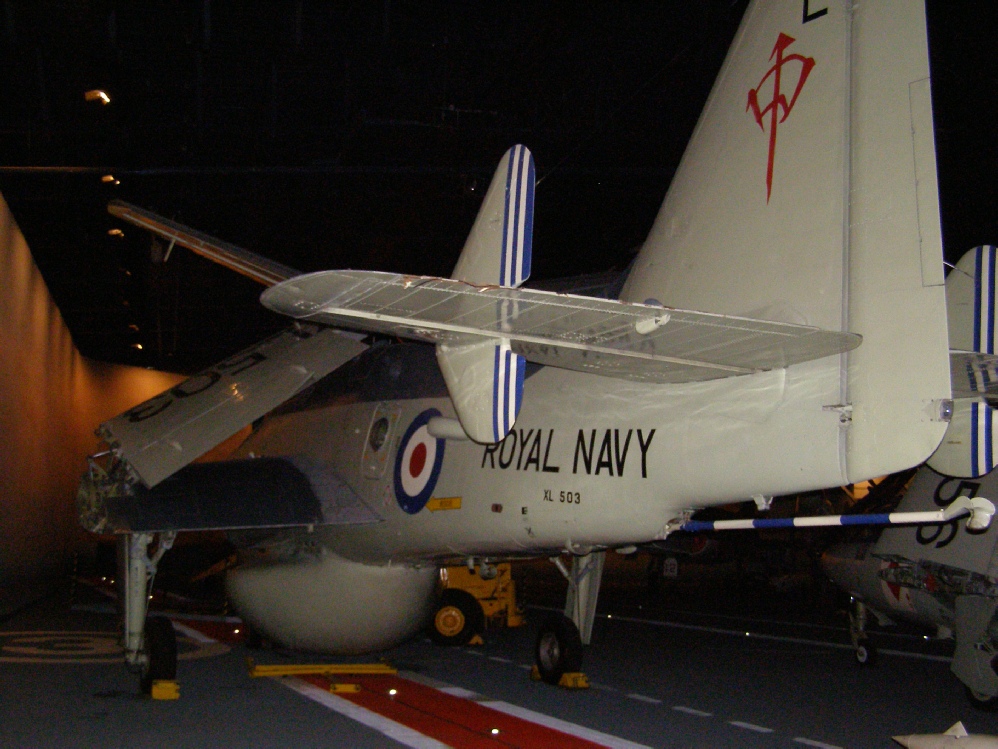
Below: The Fleet Air Arm Museum at Yeovilton has XL503, wearing the markings of D Flight, based in HMS EAGLE. Although previously in the “Carrier” exhibition hall, she is currently in the Cobham hall Reserve collection with limited access to the public.

Above: with my vac-
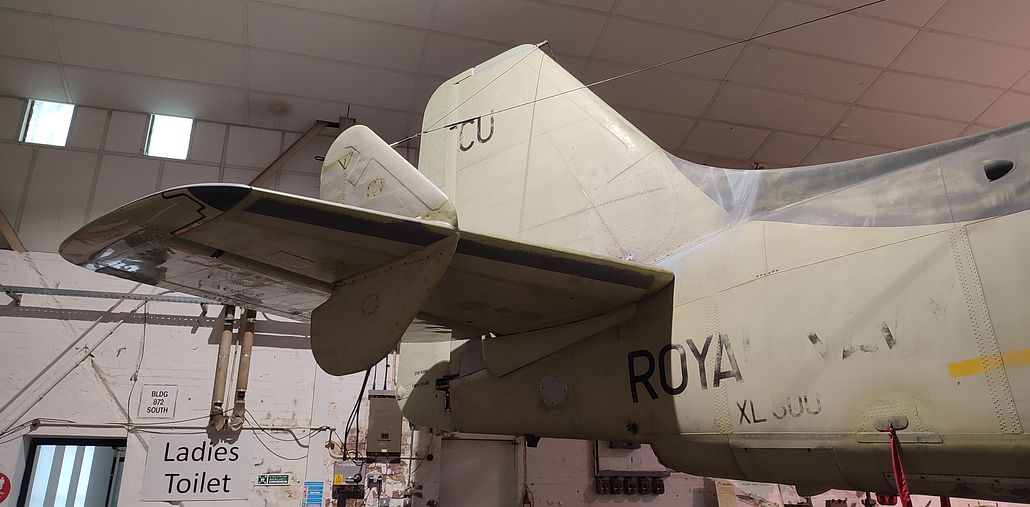
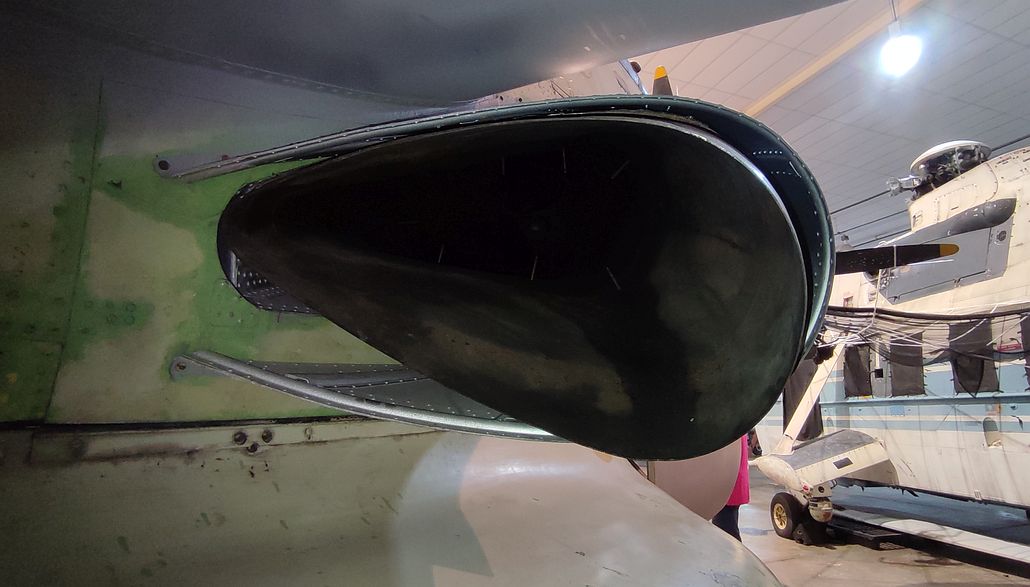
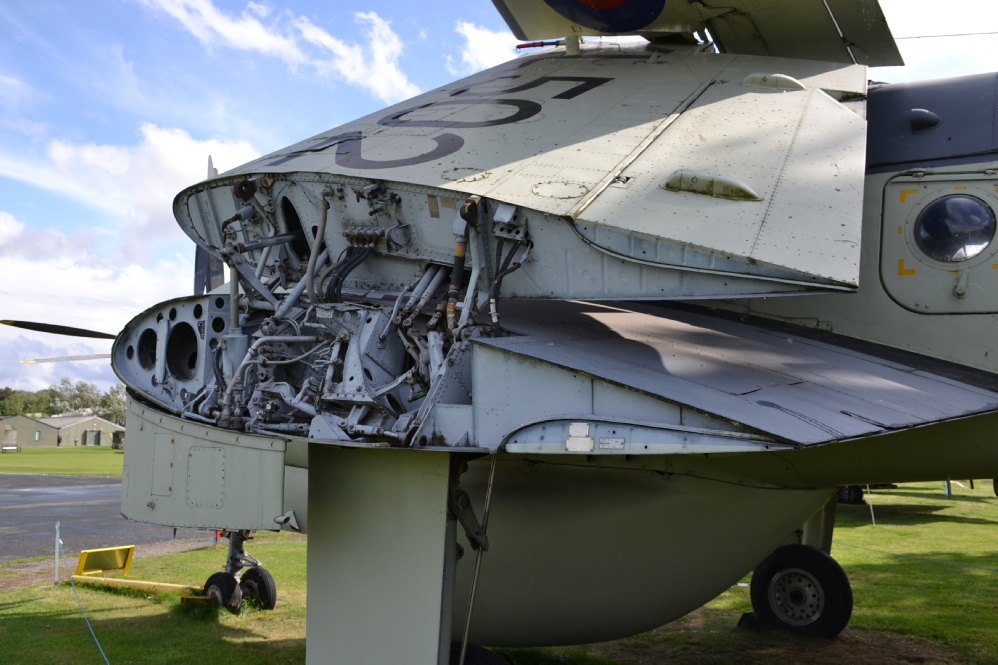
Below: The South Wales Aviation Museum at St Athan has XL500 on display, plus a partial airframe that was being used to restore XL500. The bottom picture shows how the exhaust looks from under the wings.