December
2011
DH110
"Pirate" (Sea Vixen)
AH-1W
Sea Cobra
Daimler
Ferret Scout Car
Brewster
B-339E Buffalo

|
December
2011 |
|
![]()
inks
to Website Index: ![]()
![]() Selected
WW2 70th Anniversaries this month:
Selected
WW2 70th Anniversaries this month:
Between
2009 and 2015, I will be pursuing a general modelling theme that
marks selected 70th Anniversaries from WW2.
December 1941 begins the lowest period of the war for the Allies. The Wehrmacht sits at the gates of Moscow, the Japanese move virtually unopposed across the Far Eastern theatre, threatening even India, Australia and the US mainland, Britain suffers Blitz, night after night, Rommel has the upper hand in North Africa and the British Mediterranean Fleet is suffering unsustainable losses at the hands of Axis navy and air forces. In the Atlantic, despite increasing effort from the US Navy, Admiral Doenitzs' U-Boats continue their stranglehold on the vital Allied supply lines.
But December passes and Moscow does not fall; the besieged and battered island of Malta remains defiant and the US Navy's vital Pacific Fleet Carriers remain operational. Most importantly, the Allied cause now includes the most powerful industrial nation in the world, as the US War machine finally stirs to life. 1942 will see yet more disasters, but also some needed triumphs; whilst Allied victory is by no means inevitable, neither is Allied defeat, and the balance of power is changing fast.
1 Dec 1941 - Malta marks its 1000th bombing raid.
5 Dec - German forces halt their advance on Moscow in the face of ice and blizzard conditions. Despite the weather, the Red Army begins a fierce counter-offensive.
8 Dec (7th Dec US time) - The Empire of Japan invades Thailand and Malaya, declaring War on the UK and US. A superbly executed surprise attack decimates the US Fleet at Pearl Harbor and is followed by air attacks on Hong Kong, Shanghai and Singapore.
10 Dec - In response to the Japanese invasion of Malaya, battleships HMS PRINCE OF WALES and HMS REPULSE sail to intercept the invasion fleet. Lacking air cover, they are attacked and sunk by Japanese bombers. There are now no Allied capital ships in the Pacific. However, the US Navy's aircraft carriers, have miraculously escaped the fate of the US Fleet at Pearl.
11 Dec - Germany & Italy declare war on the United States.
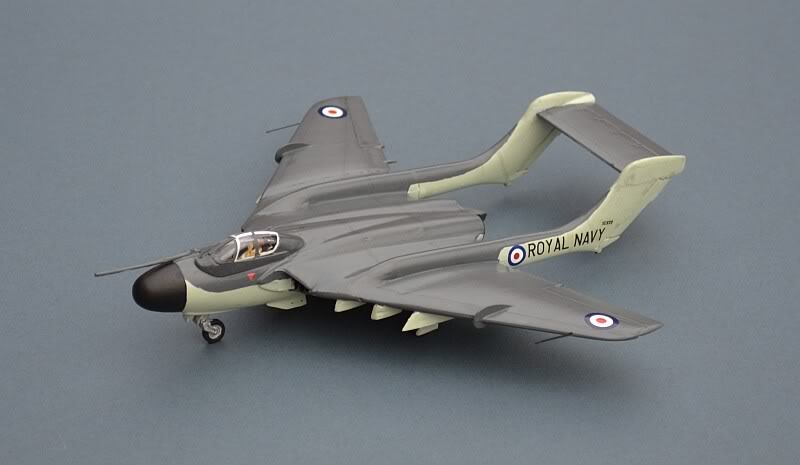
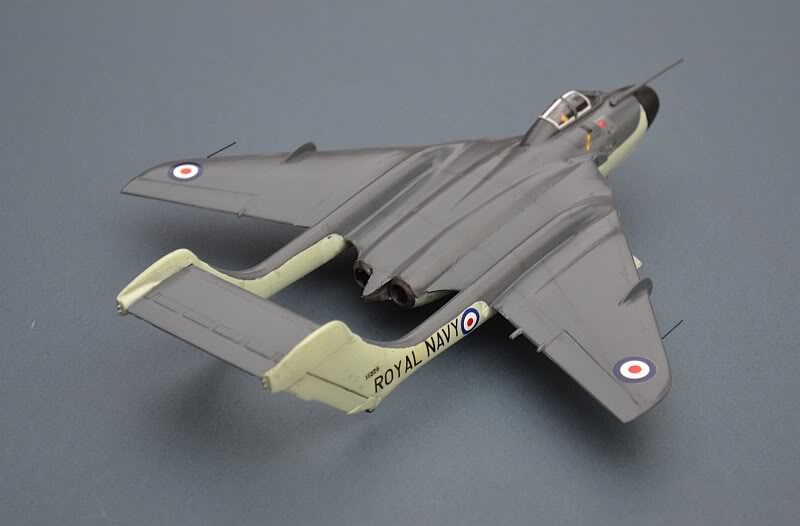
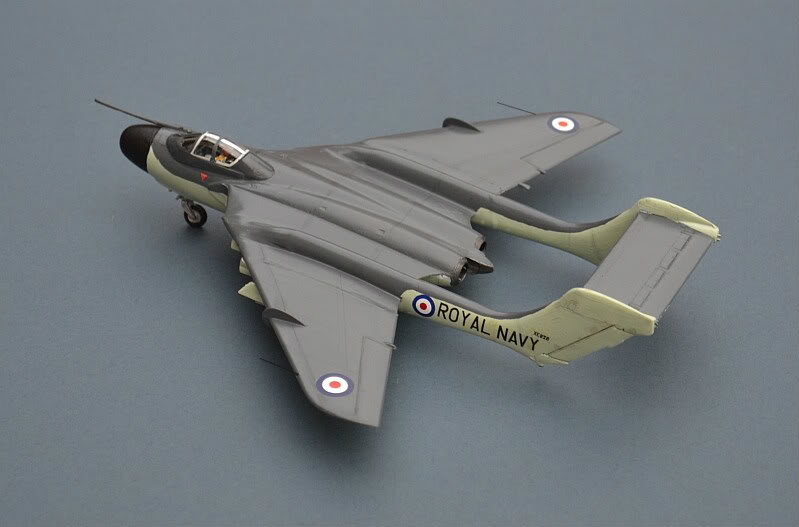
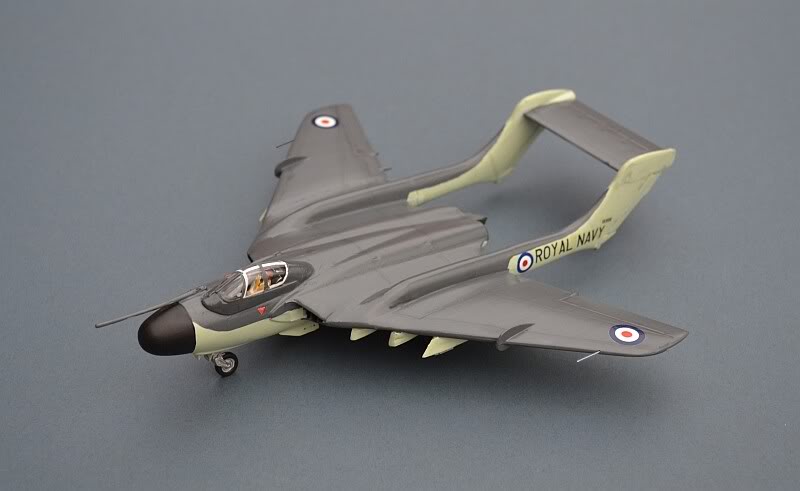
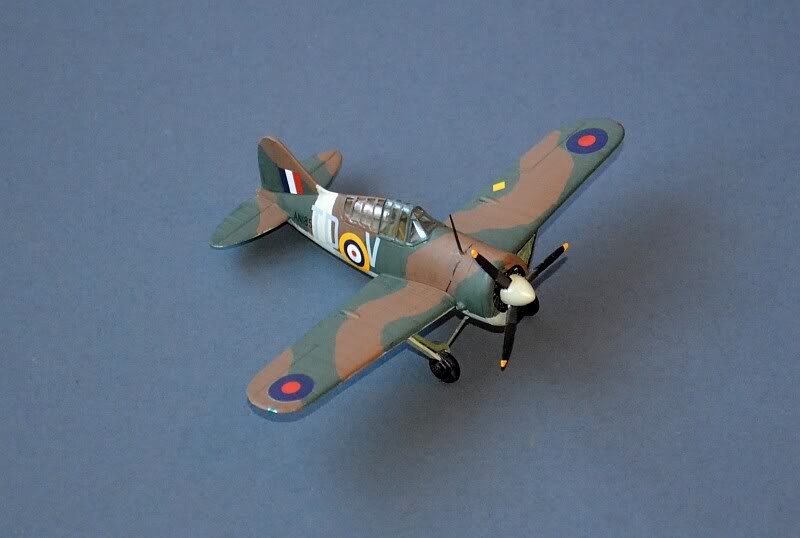
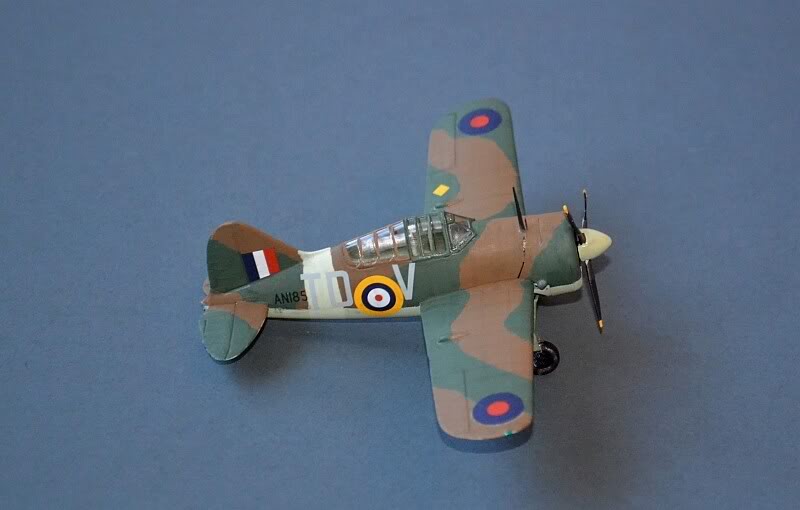
De Havilland DH110 Mk 20. 3rd (Naval) Prototype, 1955.
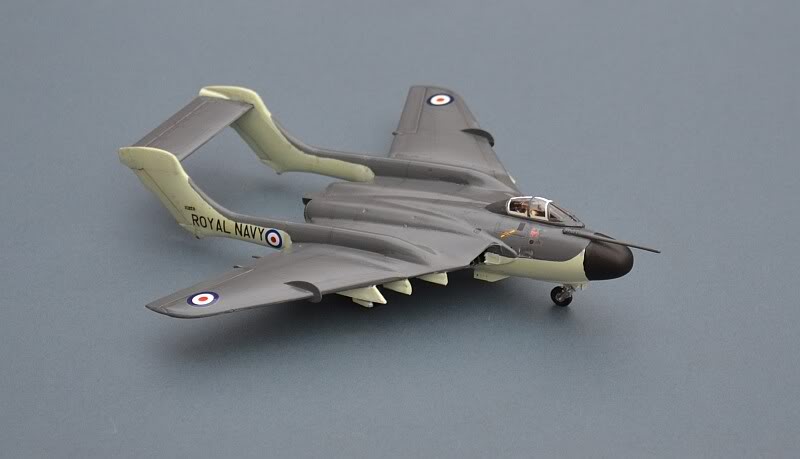
The DH110 was deHavilland's last twin boom design. Beset by development problems, the RAF abandoned it in favour of the (even more troublesome) Gloster Javelin. However, the Fleet Air Arm recognised its potential for carrier operations and adopted it, as the superb Sea Vixen.
Development of the DH110 started in 1949 and it first flew 2 years later. In September 1952 at the Farnborough Air Show, whilst maneuvering hard at the end of a supersonic run toward the crowd, the first DH110 prototype disintegrated in the air, killing pilot John Derry and test observer Anthony Richards instantly. As the airframe broke up, the DH110's engines and cockpit section continued into the crowd, killing 29 spectators and injuring over 60. In the wake of the disaster, strict airshow rules were introduced for all British Air Shows to prevent aircraft flying toward the crowd.
After a redesign of the wing structure, flight testing resumed in 1954; XF828, the first semi-navalised prototype (fitted with arrestor hook, but without folding wings), took to the air in 1955.
Link to Pathe News film of DH110 disaster
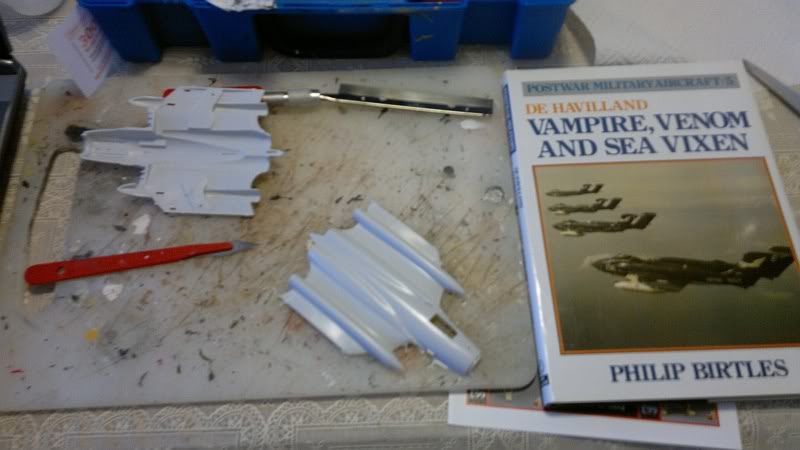
It looks like I will finish this year in a similar manner to how it started - with a Sea Vixen, albeit one with a difference. This came about as I pondered what to do with a spare Frog (Russian re-pop) Sea Vixen? In light of the recent Airfix kit and the (very difficult to build) Xtrakit/MPM versions, the faults of the old Frog kit are now all too obvious.
However, with a bit of work, I have turned it into a basic representation of the DH110 prototype, in its late form. XF828, the third prototype, was partially navalised, with an airframe that was very close to the final Sea Vixen design, making modifications to the FROG kit rather less onerous.
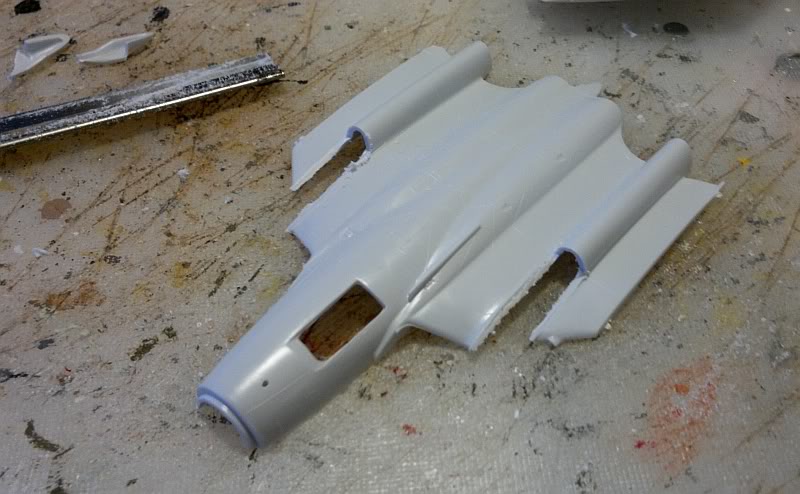
First step is to remove the overwing saddle tanks. When I built my FAW.1 a few years ago, I decided that the resin conversion to do this was probably more trouble than putty and sanding. So; lets put it to the test................
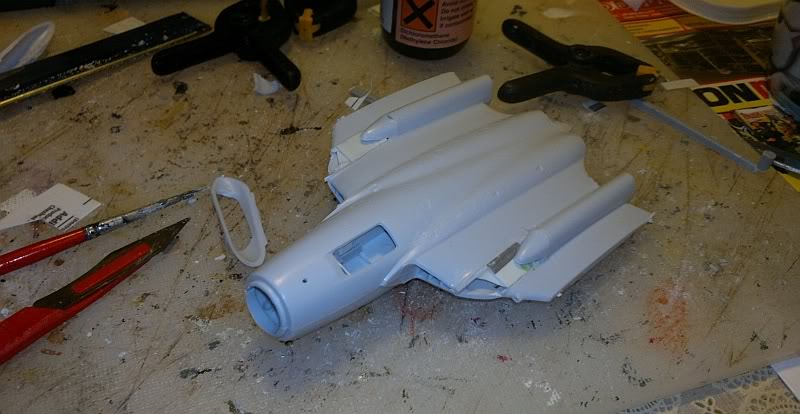
A few basic details have been added to the cockpit; you can't see much of this once built. The overwing gaps are filled with plastic and putty, then sanded back. They stand too proud of the wings, but are good enough for my purposes
The nose cone is filled with putty and lead, ready for sanding to shape later.
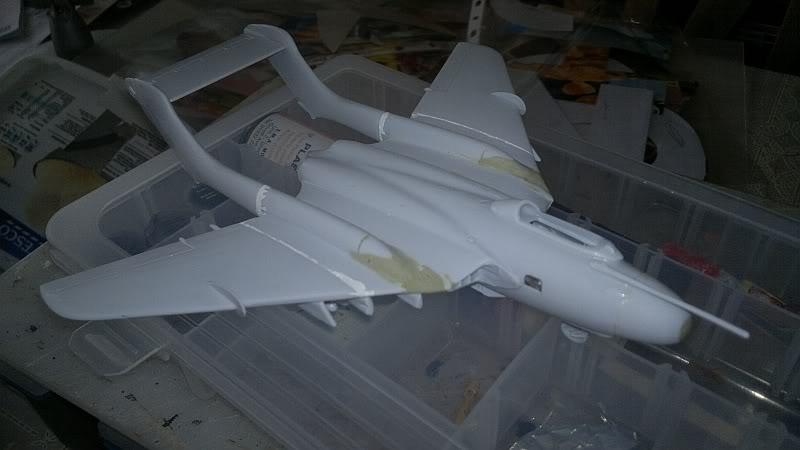
The wing folds must be removed and filled, along with the underfuselage missile packs
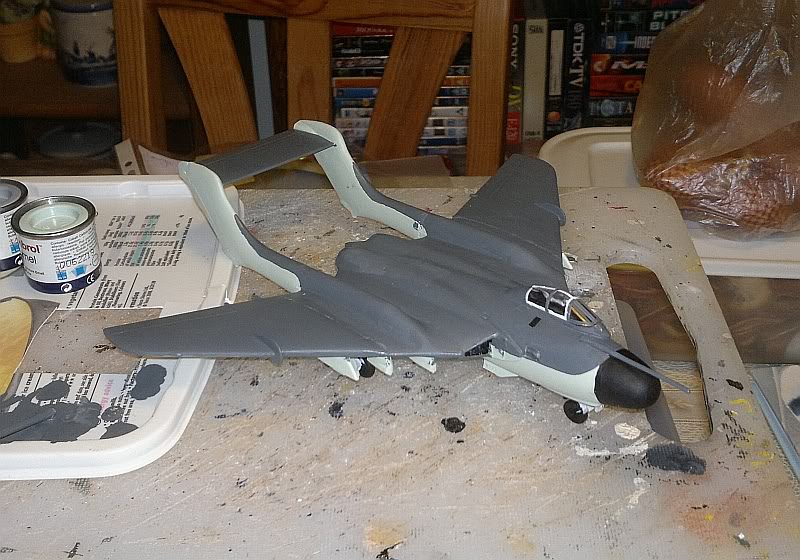
....and after a few coats of paint, hey presto, a DH110. OK, so its not the most accurate DH110 model ever made (actually, come to think of it, I only know of one DH110 model, the ancient FROG kit, which is probably no more accurate than this!), but it conveys the general intent and, most importantly, it was fun to make !
More RN Jets on my RN Jets pages
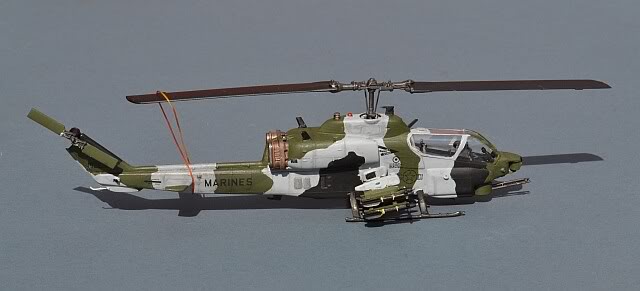
Bell AH-1W Sea Cobra, VX-5 NAS China Lake, USMC/USN, 1990
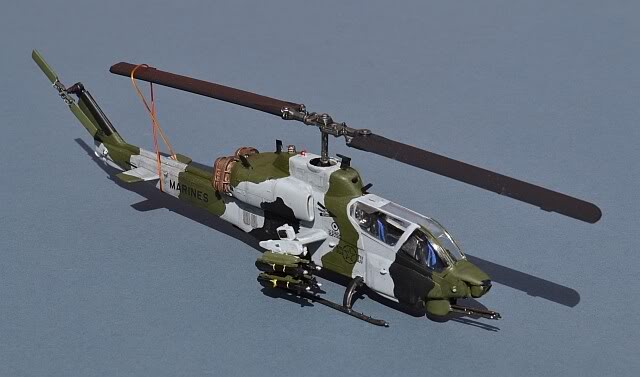
The Bell Huey Cobra was the original Western attack helicopter. Based on the airframe of Bell's proven UH-1 Huey utility helicopter, it entered service toward the end of the Vietnam war.
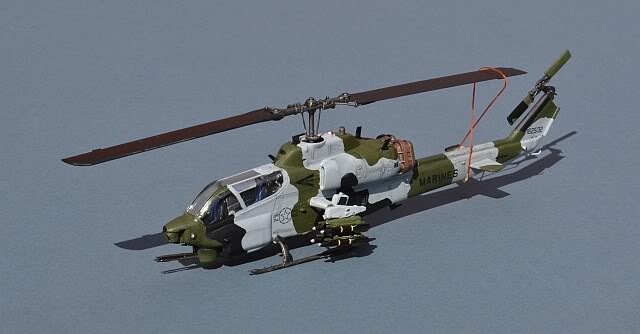
The improved AH-1W version was created for the US Marines in the early 1980s, and features twin engines and a longer tail boom. As of 2010, the USMC still had 167 AH-1Ws in service.
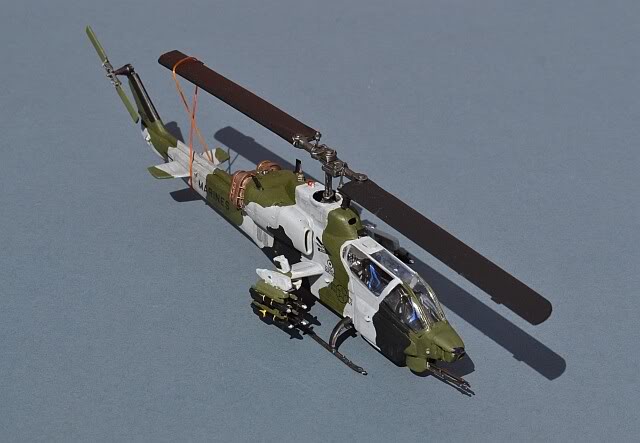
Pressure of work and lack of time has cramped my modelling in quite a severe way this year. Nevertheless, I have managed to complete a quick build of the iconic Huey Cobra attack helicopter, in its naval guise. AH-1Ws, or "Whiskey Cobras" remain a key part of the the USMC's inventory, and will do so for some time to come. As is so often the case, the Italeri kit is based on a prototype, in this case one of the very first conversions, subsequently used by the USN at the China Lake Weapons Test center to develop the new Cobra variant.
More Helicopters on my Helicopters pages
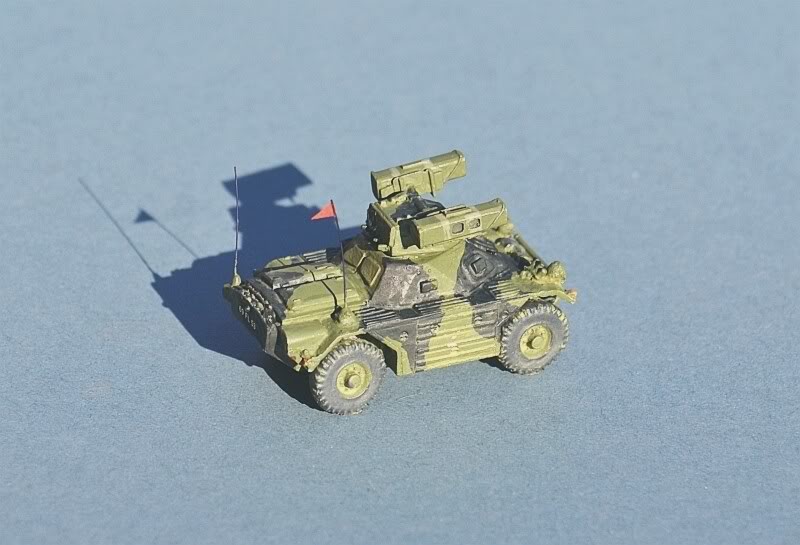
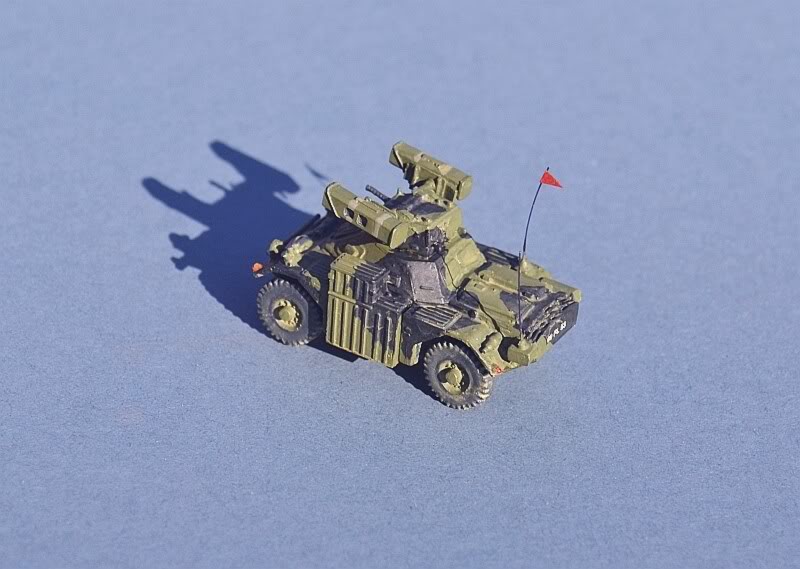
Daimler FV702 Ferret Scout Car Mk. 2/6
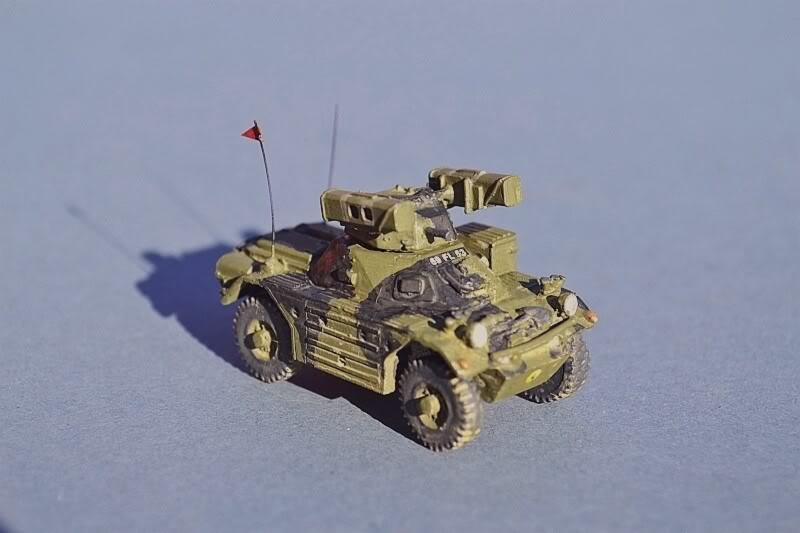
The Daimler Ferret was produced between 1952 and 1971 as a replacement for the Daimler Dingo scout car of WW2. Over 4,400 were built for the British Army and 23 other countries - although no longer in UK service, many remain active around the world.
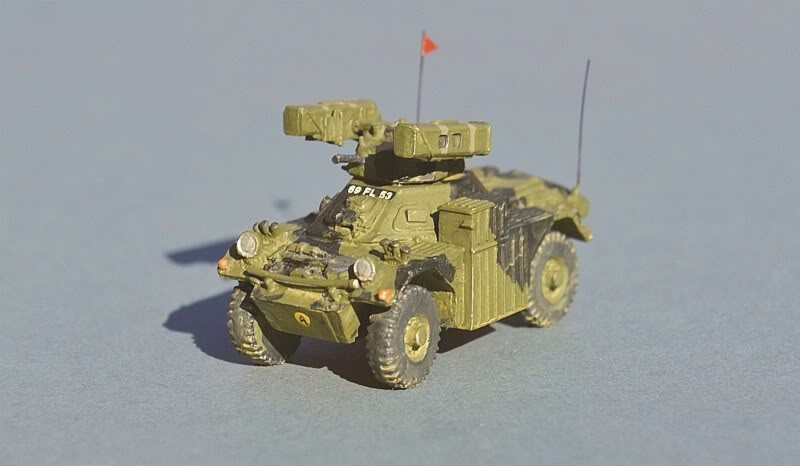
The Mk.2/6 was modified from the standard Mk.2 to carry two Vickers Vigilant wire guided anti tank missiles on its turret (plus two reloads in place of the spare wheel). Roughly equivalent to the infamous Soviet 9K11 Malyutka (NATO Codename: Sagger AT-3) missile, the Vigilant was developed to provide an effective counter to the Warsaw Pact's numerical tank superiority.
External Link to some In-service Ferret photos
Growing up near the massive Redford & Dreghorn Barracks in Edinburgh meant that the Ferret Scout Car was a familiar sight in my youth, although I'm not sure I ever saw a Vigilant equipped one. This is the BW Models white metal kit, which is fairly expensive (£12), but has some really exquisite detail for its size. Building is straightforward, apart from the need to use epoxy or superglue, neither of which are my favourites! Although I have closed all the hatches, they are 2-sided (i.e. they have some inside detail) and there is a rudimentary interior (seats) that could form the basis for a very nice detailing project.

Several glued fingers later, I finally managed to get the wheels to stay on AND all touch the ground at the same time. I resisted the urge to add stowed camouflage nets using my silver foil technique, because I think the model is too small to carry it off, although the real thing normally carried one on the turret and rear deck. Another pleasing addition to my Cold War British military vehicle collection!
More British and Foreign AFVs on my Dark Side pages
And
finally.......
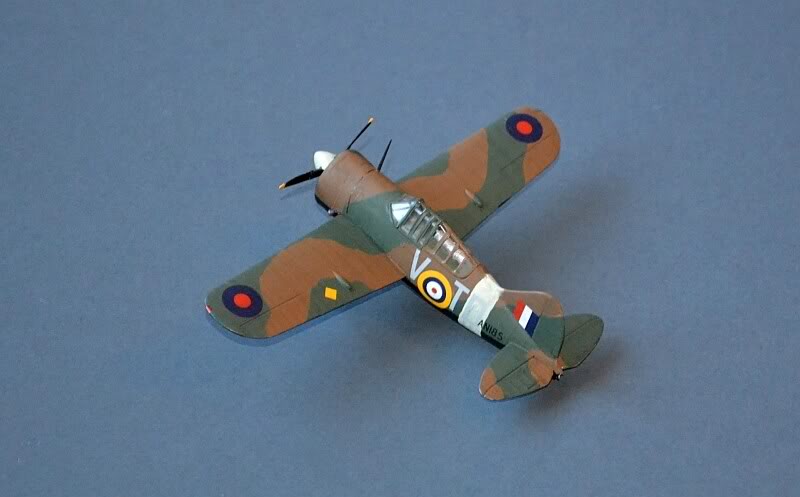
Brewster
B-339E Buffalo 1, 453 Sqn Royal Australian Air Force
Sembawang,
Singapore & Ipoh/Kuala Lumpur, Malaysia, December 1941
The last model of 2011 is another addition to my WW2 70th Anniversary theme. The Airfix Buffalo is typical of its era; not hugely accurate, but still fun to build. The recent issue also has some very nice decals for an RAAF aircraft and a very colourful US Navy (should that be colorful?) VF-22 machine.
Its a better kit than the Matchbox version, with some nice engineering and reasonable fit.
|
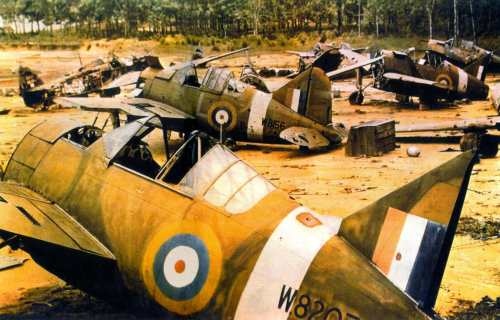
Brewster's stubby Buffalo fighter was a reasonable design, let down by extremely poor build quality arising largely from Brewster's lack of volume manufacturing experience. In Finnish hands, after a local re-build, it performed very well, but for UK and Commonwealth Air Forces operating it "as delivered", it was a big disappointment, verging on a liability. After a disastrous start during the battle for Crete, the Fleet Air Arm's achieved sone success with the Buffalo in the Wester Desert, using aircaft diverted from Belgian and French orders. The original batch of Buffalos procured for the RAF by the British Purchasing Commission in Washington were quickly diverted to the Far East and issued to Commonwealth squadrons, including 453 Sqn RAAF. Following the Japanese invasion of Malaysia on 8th Dec, 453 moved north to Kuala Lumpur and Ipoh airfields, to provide close support to the defending Commonwealth troops. After 3 weeks of intense fighting, 453 was withdrawn to Singapore on 24th December with only 6 aircraft remaining serviceable. The squadron continued to fight in Malaysia and over Singapore until February 1942, managing to achieve a creditable kill ratio of 2:1 despite the limitations of the Buffalo and the desperate operational situation. |
Buffalos captured at Sembawang Airfield, 1942 photo: Wikipedia. |
|
"Prime Minister, I have to report to you that the Prince of Wales and the Repulse have both been sunk by the Japanese - we think by aircraft. Tom Phillips is drowned". "Are you sure it's true?" "There is no doubt at all". Churchill hangs up.... "In all the war, I never received a more direct shock... As I turned over and twisted in bed the full horror of the news sank in upon me. There were no British or American ships in the Indian Ocean or the Pacific except the American survivors of Pearl Harbor, who were hastening back to California. Over all this vast expanse of waters Japan was supreme, and we everywhere were weak and naked" |
453 was also one of the fighter squadrons assigned to support Force Z, led by battleships HM Ships PRINCE OF WALES and REPULSE, on their ill-fated foray north to intercept the Japanese invasion fleet. Despite having agreed a sound plan of action with the ships' operations team that would achieve constant fighter cover for the ships, a combination of confusion (PoW believed that fighter cover was not available so did not ask for it), poor intelligence (PoW believed that no Japanese aircraft were in flying range), what seems to have been sheer arrogance (PoW believed that Battleships were not seriously threatened by air power), and utter desperation (The RN could not just stand idly by as Commonwealth forces desperately fought to repel the invasion), led to the loss of both ships (the first ever capital ships to be lost to air power on the open sea) and the unnecessary death of nearly 400 sailors. At the last minute, the Captain of REPULSE, defying his Flag Officer's orders, broke wireless silence to radio for help; Buffalos from 453 Sqn were quickly on the scene, but it was too late.
|
Return
to Website Index: ![]()
Background image - British Coastal Defence Guns at Gibraltar
© 2011 www.gengriz.co.uk