January
2009
![]()
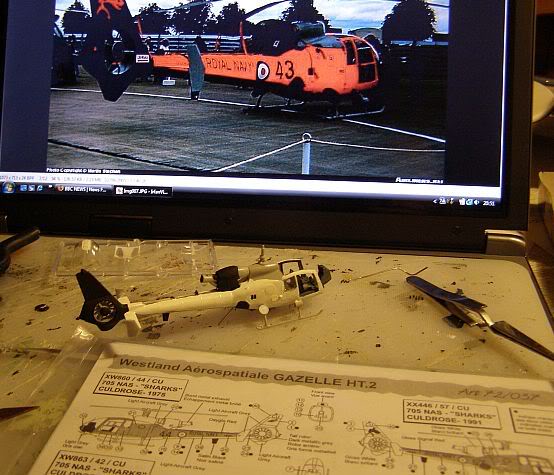
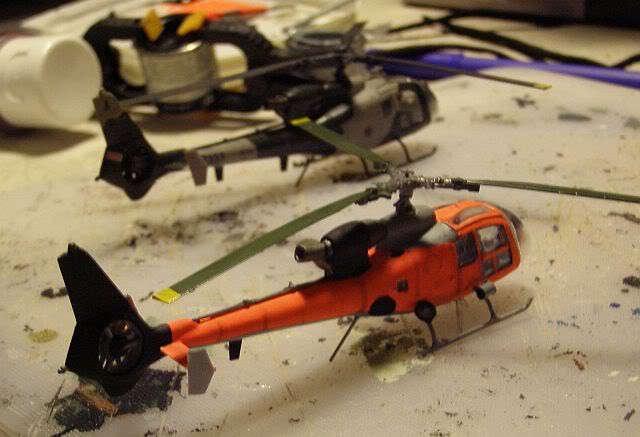
Westland/Aerospatiale SA330C Gazelle, 705 Sqn "Sharks" Display Team, RNAS Culdrose, 1978
Airfix,
with minor modifications and ModelArt decals.
The Airfix Gazelle is still the only 1/72 kit of this elegant little helicopter. This one will be in the early Sharks scheme, in the Dayglo Orange and Grey Royal Navy training colour scheme, rather than the later Tri-service red and white.
Production has been sporadic due to a bout of flu.
To cap it all, the carpet monster swallowed the rotor head cap and refuses to divulge its whereabouts! However, we are now up and running, and the missing bit, it seems is not appropriate for this aircraft!
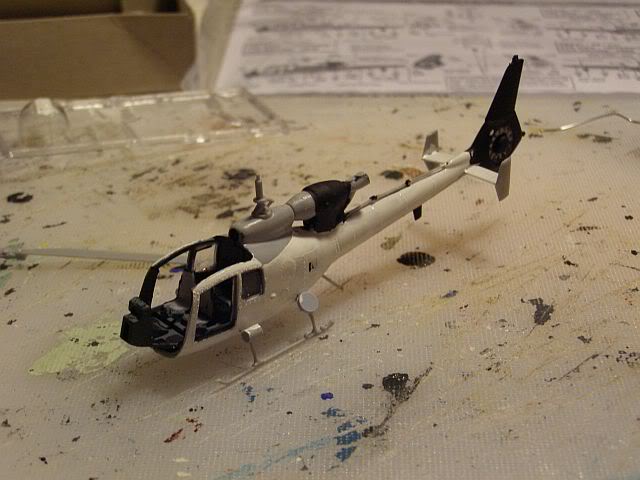
A few smally additions so far; the ground handling wheels (useful when landing at strange airfields) and display smoke generators (early types) are attached to the skids.
I have also given up all hope of stopping it tail sitting, instead fitting a small prop under the rear fuselage:
The "orange paint from hell" is now applied, and the cabin ready to button up. The Revell dayglo paint is very difficult to apply - it dries as you brush it, forms strings and then lifts off the underlying paint. A necessary evil, I suppose!
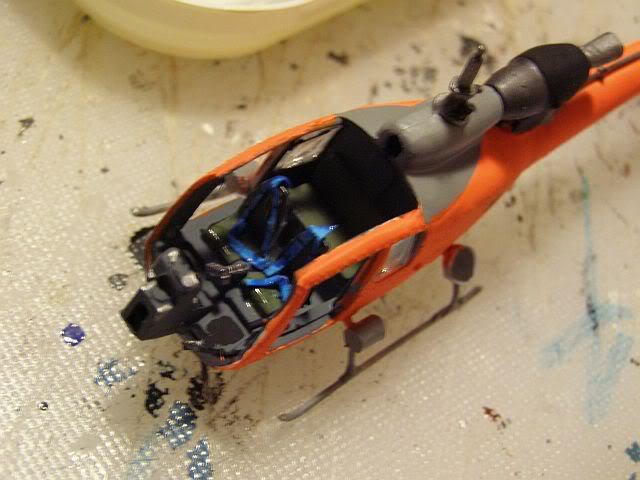

Nose canopy attached; it needed some serious fettling of the instrument panel before it would fit. I don't remember this problem from my previous Gazelle build, so I may have done something wrong when assembling the cockpit.
The paint is all still Matt, of course, so tomorrow it will get a few coats of Klear ready for decalling and a satin (or perhaps even gloss) top-coat.
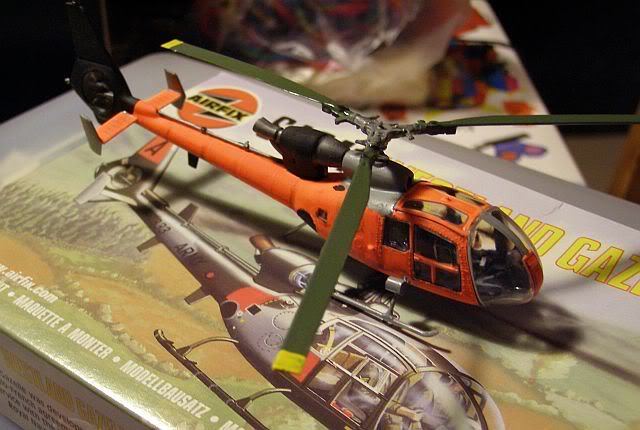
... and the finished article. I have airbrushed out the metal stand from these pictures!
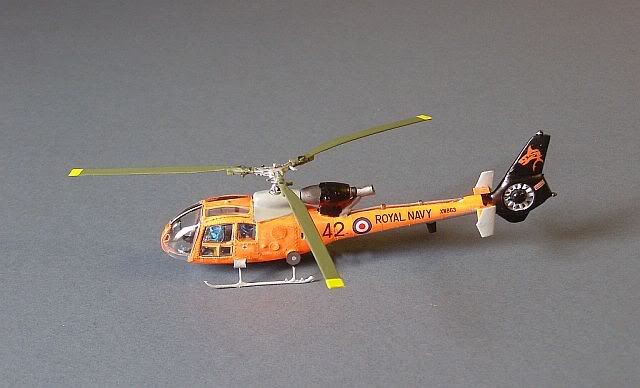
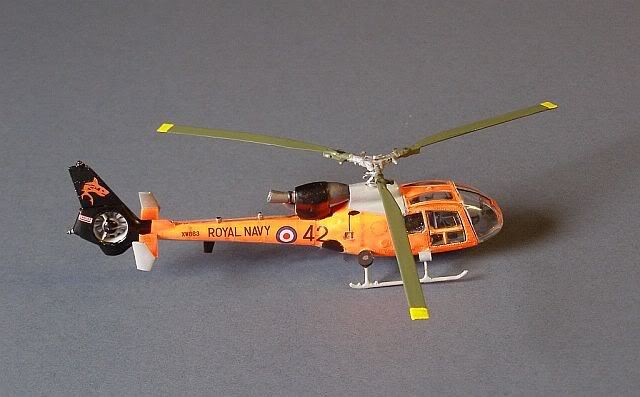
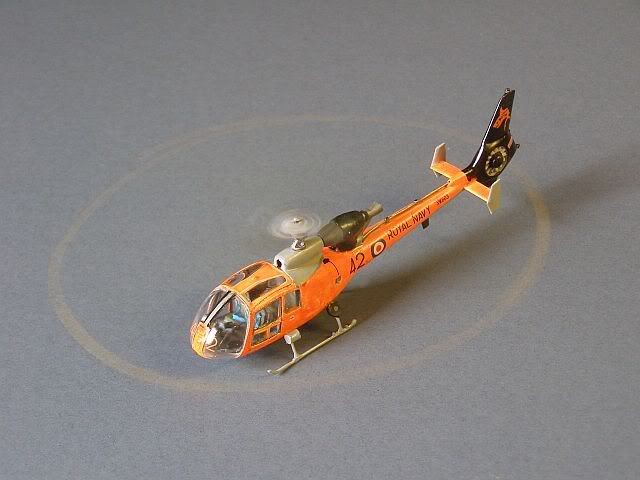
Many more pictures (including a Royal Marines Gazelle AH.1) on the Helicopter Pages
Revell.
OK. A little bit of fun. I didn't realise they were pre-painted when I bought it - I had planned some Royal Navy markings. Construction took about 20 mins. A light oily wash took about 10 mins more. These are really very nice little kits, if you are into that sort of thing!
More light distractions (but definitely no more Star Wars kits) on the Dark Side Pages
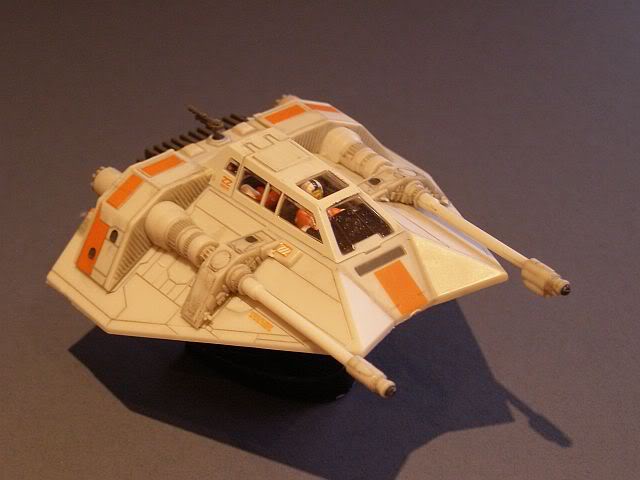
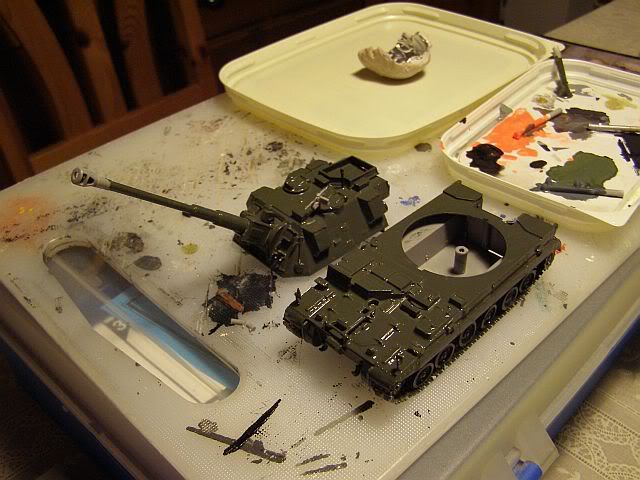
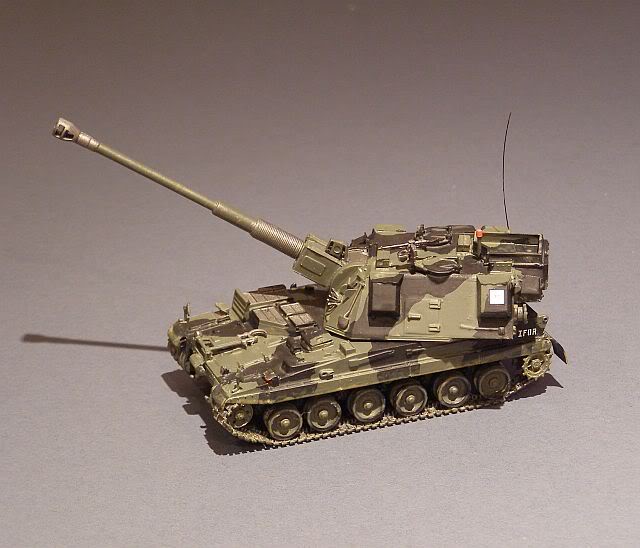
Vickers AS-90 Self Propelled 155mm Gun.
Trumpeter.
I have been doing a lot of courses away from home recently and find that modelling is a good way to relax in the evenings. However, after struggling last month to complete a rather complex Lynx build, I thought that a tank might be a bit easier. It was, except that on day 2 I found that I had left 2 entire sprues at home in a different box!
Anyway, back home now and time to complete the kit. As with all the Trumpeter's I have tried so far, it is beautifully moulded, but has some fit issues when building. And, I really, really, really hate seperate track links! I cannot see how the supplied lengths can possibly ever be sufficient to complete this model - as a result some fudging was needed.
But apart from that, what a superb kit - heartily recommended!
and here she is finished. What a hulking great monster of a vehicle!
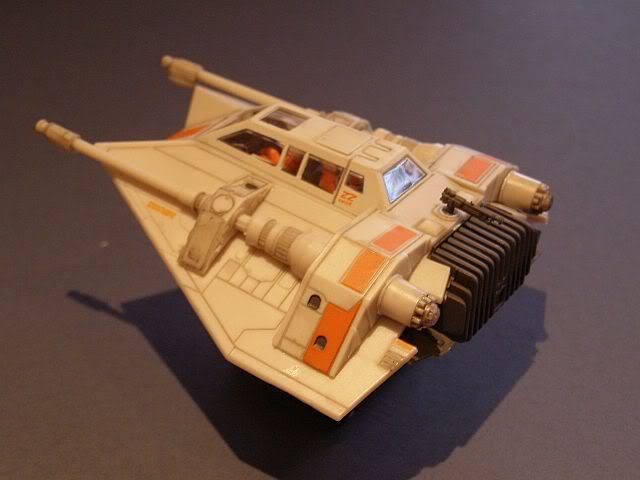
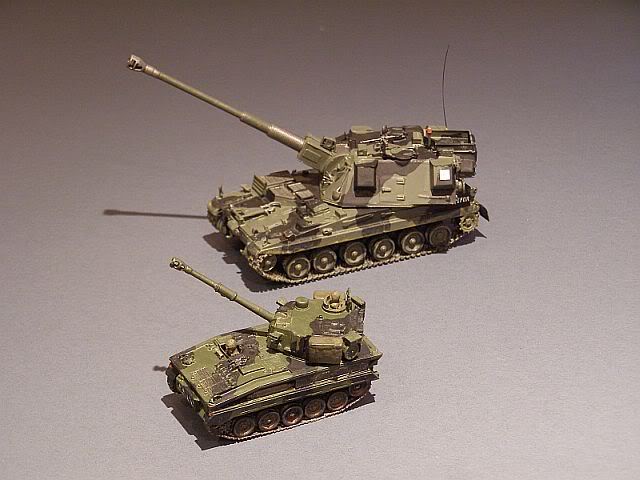
and by way of comparison, here she is again, this time with my Abbott SPG to the same scale!
More Tanks and other AFVs on the Dark Side Pages
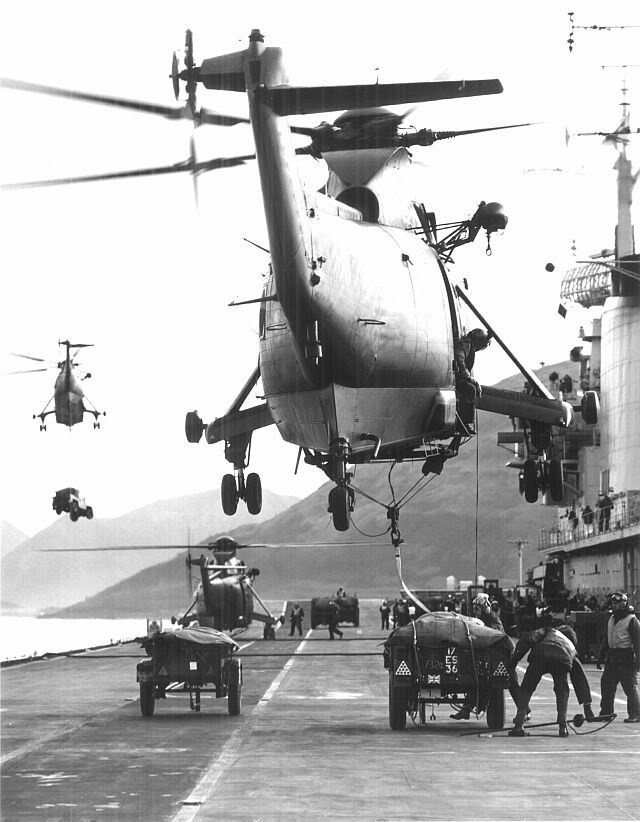
Westland Sea King HC.4, 846 Sqn Fleet Air Arm, HMS ILLUSTRIOUS 1984.
Fujimi , with C-Scale conversion
This project has been some time in planning. The base kit is a Fujimi HSS-2 Sea King, bought as a cheapy from e-Bay some years ago. Sadly, it was missing the main canopy/transparencies, and although the vendor was very sympathetic and helpful, I never did get them (have had a lot of e-bay cheapys like that).
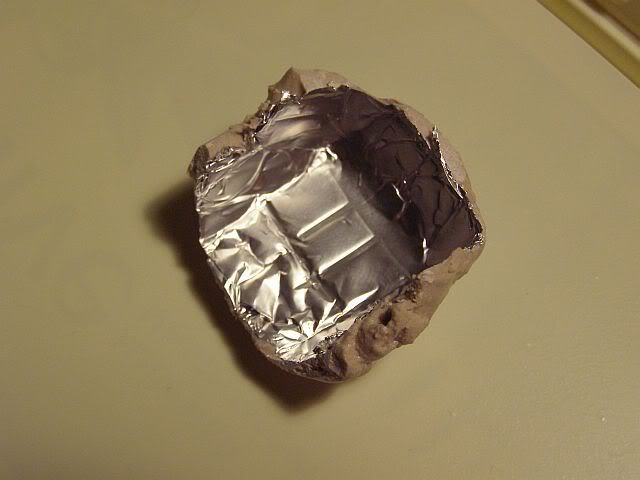
So the initial part of this build will be to create a new canopy/transparency to fit. As I intend to do another Sea King shortly, I have bought a new Fujimi kit to use its canopy as a template. My first attempt will be a simple crash mould of some acetate, using an Isopon/polyester mould as the basis. The original was covered in aluminium foil, then Isopon placed around it, then the original removed (see below). It's not quite vac-forming, but I hope it will work.
I will find out how successful the idea is over the next week or so, but if it fails I have several other plans up my sleeve, so watch this space!
Well, after several tries, I am now running out of ideas!
Plan A (using boiling water to melt/soften acetate over the mould) failed miserably. the acetate curled up into a tightly wound ball!
Plan B (boiling water to melt/soften clear polystyrene over the mould) also failed - the plastic didnt even get soft.
Plan C (hair dryer to soften both of the above types of plastic into the mould) also failed - the acetate curled again, whilst the polystrene shrank, so that a large thin flat clear sheet became a small thick clear flat sheet.
Plan D (place the mould in the oven, with the plastic over it) also failed - the sheet shrank once more. As it was a larger thin sheet, it became an even thicker small sheet.
Plan E (heat the
mould in the oven, remove it and force the plastic into the hot
mould) - well its not flat enymore, but it bears no resemblance to
the canopy I want!
So its on to Plan F - use the original Fujimi Canopy for this build and defer the problem to the later HAS2 build! Actually, all is not lost; I still reckon I can scratch build all but the curved top part (as the separate sections are pretty much flat). For the top, I have some curved clear sections that may fit, or I could even just use putty to make a shape and paint it gloss blue for the tinted skylight canopy sections!
Anyway, the HC.4 build will start in earnest this coming week.
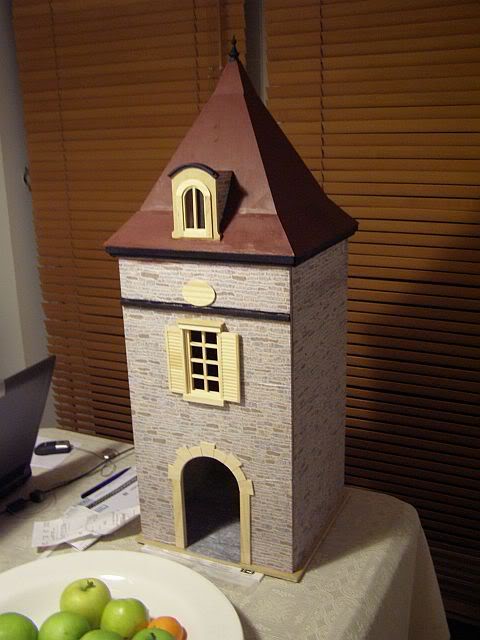
In the meantime this is what I have been doing this weekend - a somewhat different type of model, for my youngest daughter; almost as much fun as aircraft!
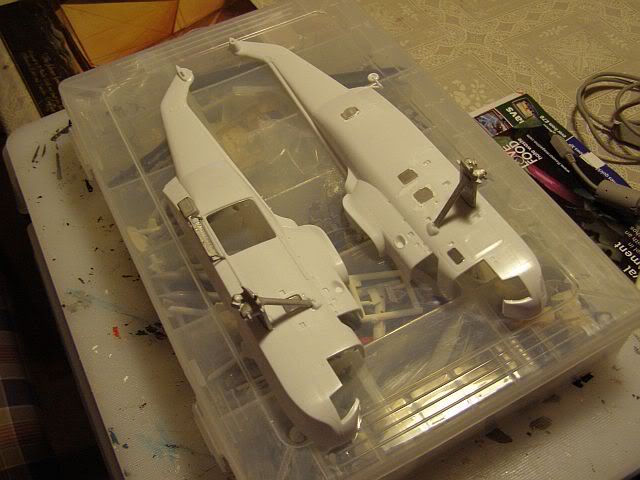
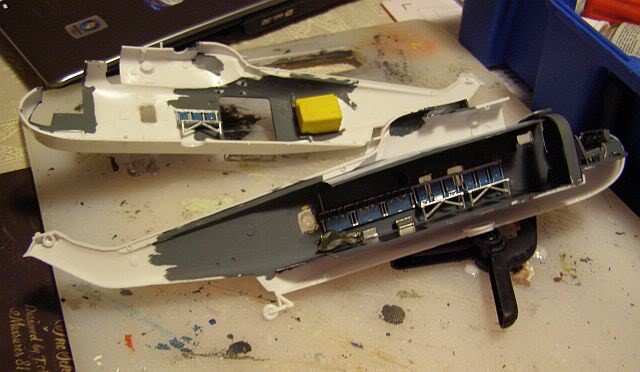
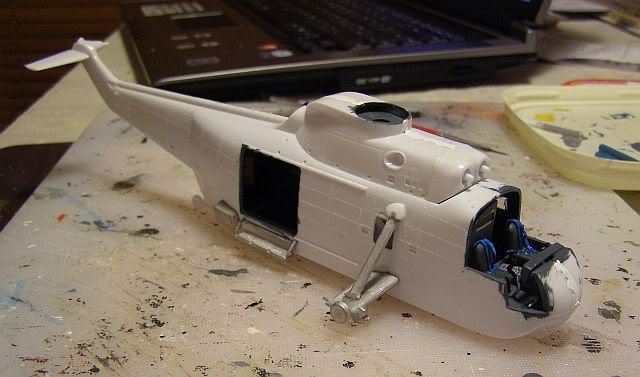
Back to the Sea King; Interior is making progress, with a new floor that stretches to the rear of the cabin, and a range of seats located from other kits. In the meantime, I have opened up the additional windows in the fuselage and (several super-glued fingers later) fitted the new C-Scale undercarriage sponsons, Decca aerial and step.
A quick reminder of the target! This will be an early SK4, without all the bumps and protruberances seen on the current machines.
A relatively simple interior, with some seats (from various kits), boxes, tarpaulin and liferaft. You can't see much through the door, so this will do. A little bit more detailing to do before I button up the 2 fuselage halves.
At this stage, I am definitely of the opinion that this is a better kit than the Revell one - not much in it, but I prefer this one.
................. Cleanest cockpit in NATO!

Fuselage glued together. Still some tidying up to do when it's dry.
More Sea King models on the Helicopters pages
www.gengriz.co.uk