April 2024
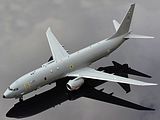
Boeing P-
Link to Website Index: ![]()
Boeing P-
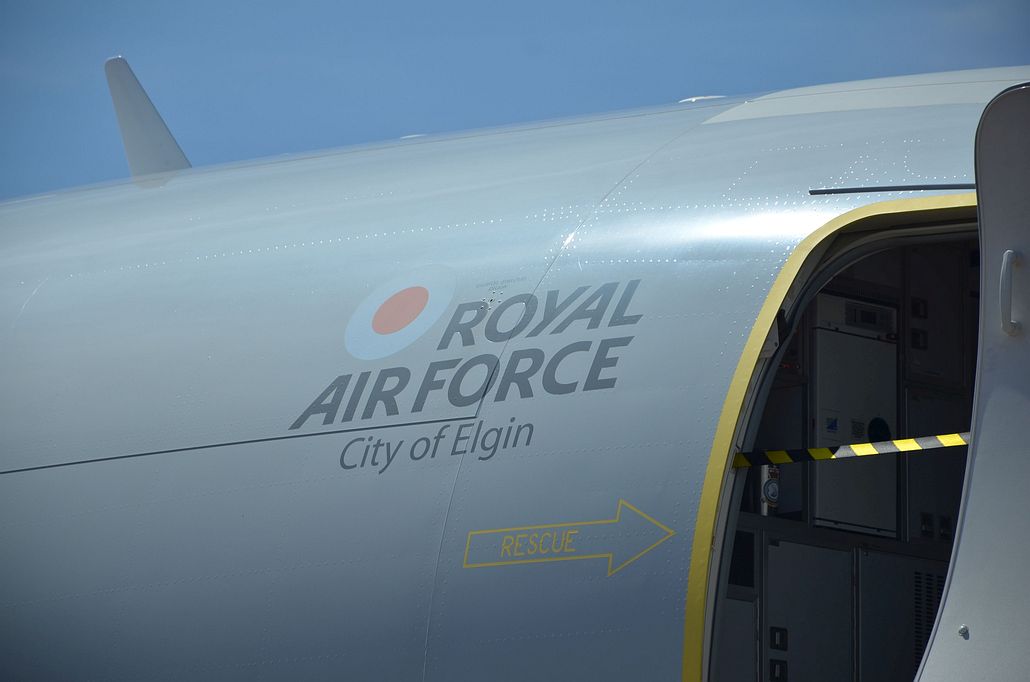
120 Sqn / 201 Sqn
RAF Lossiemouth, 2024
BPK 1/72 with Air-
Link to Website Index: ![]()
Text & Images © www.gengriz.co.uk
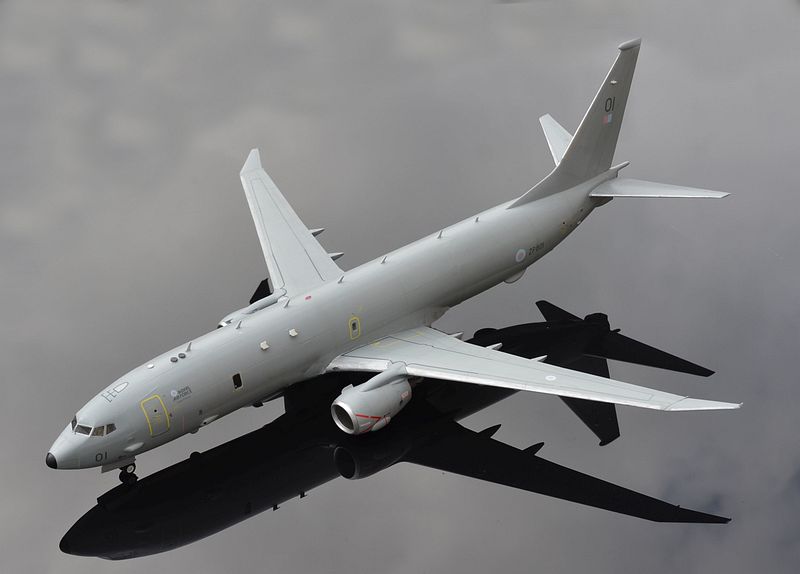
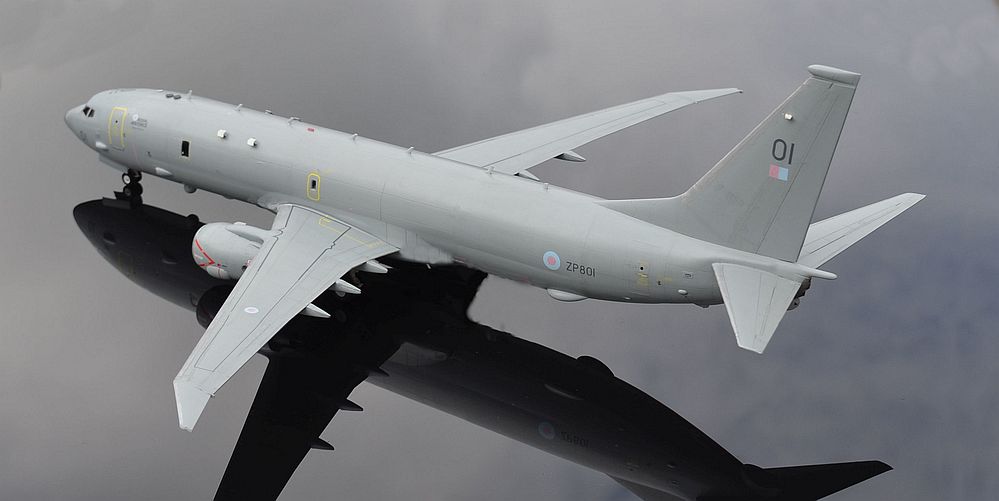
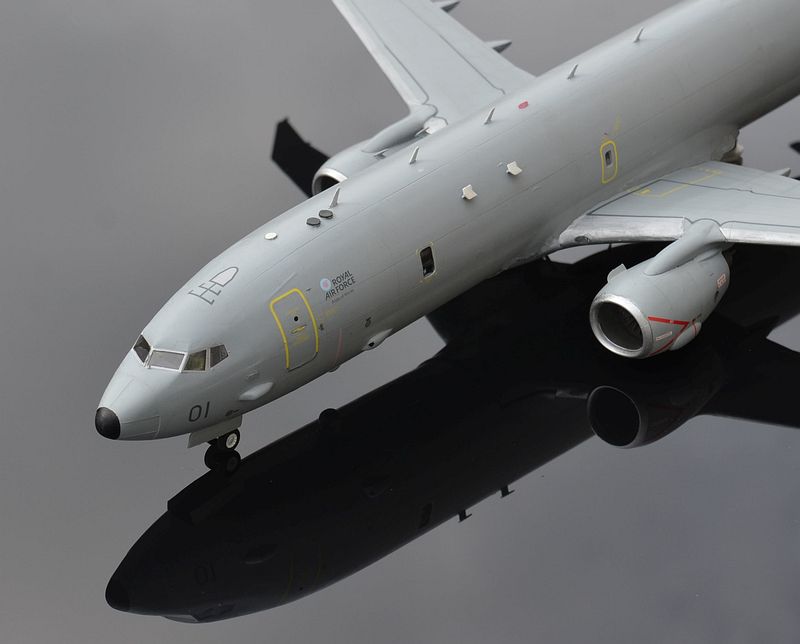
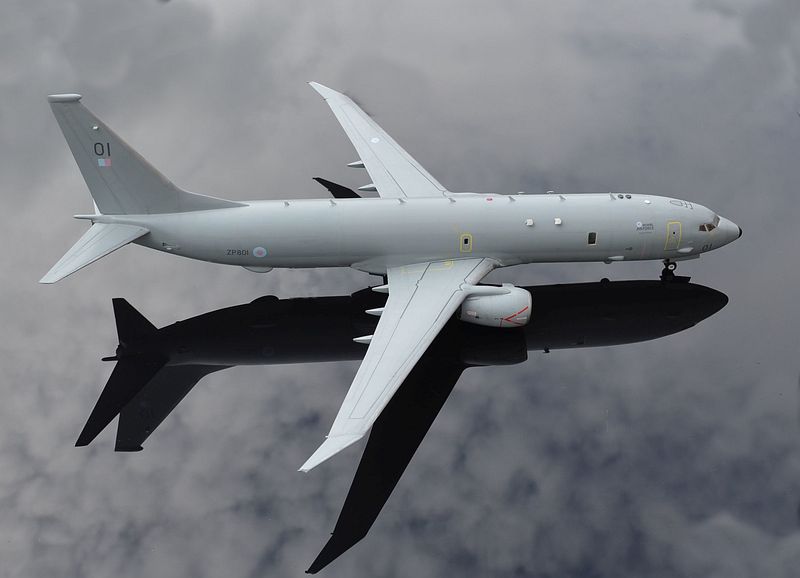
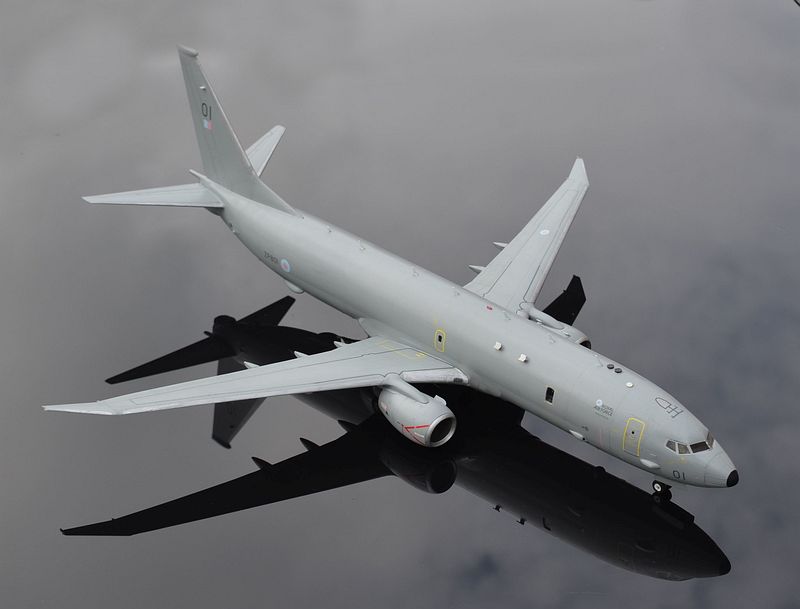
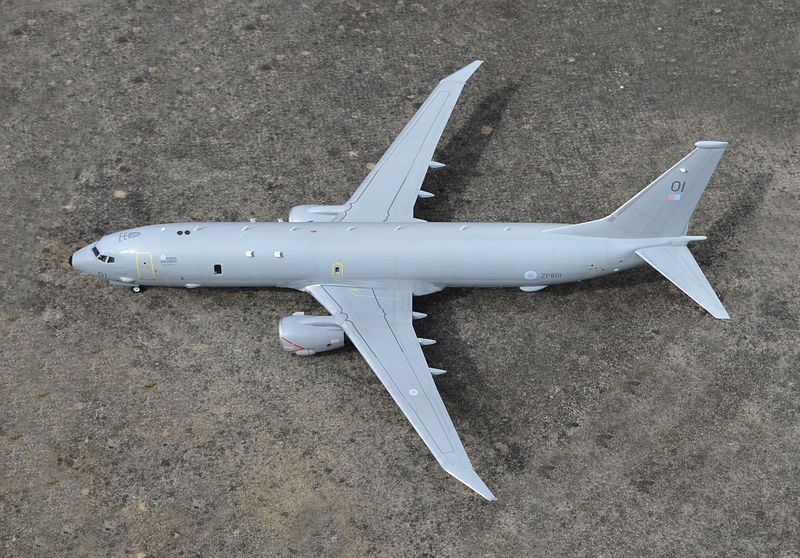
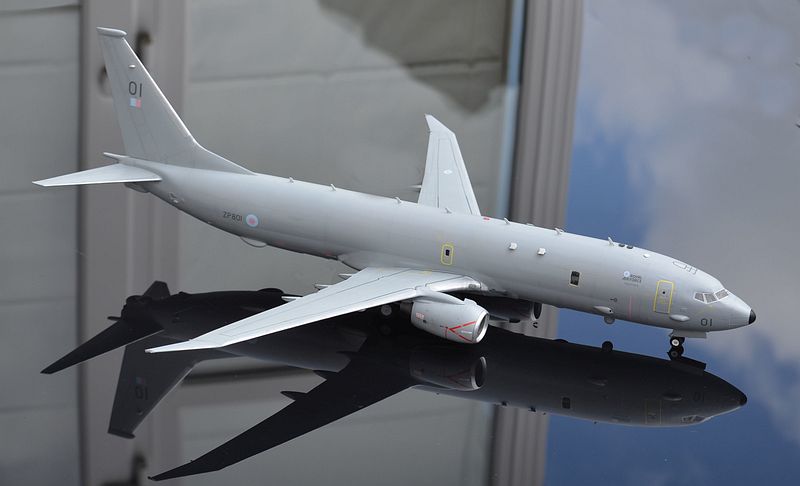
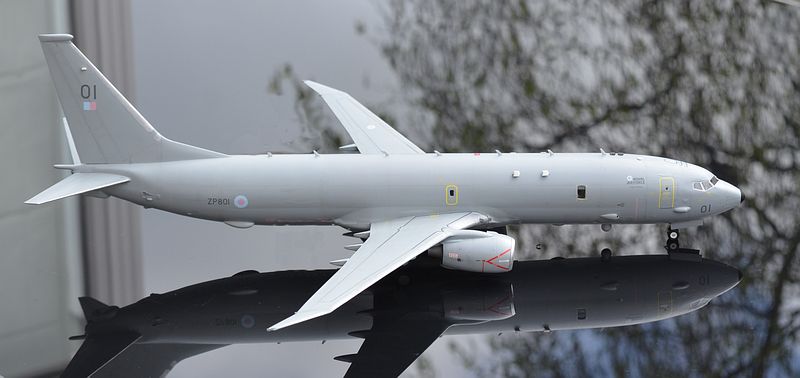
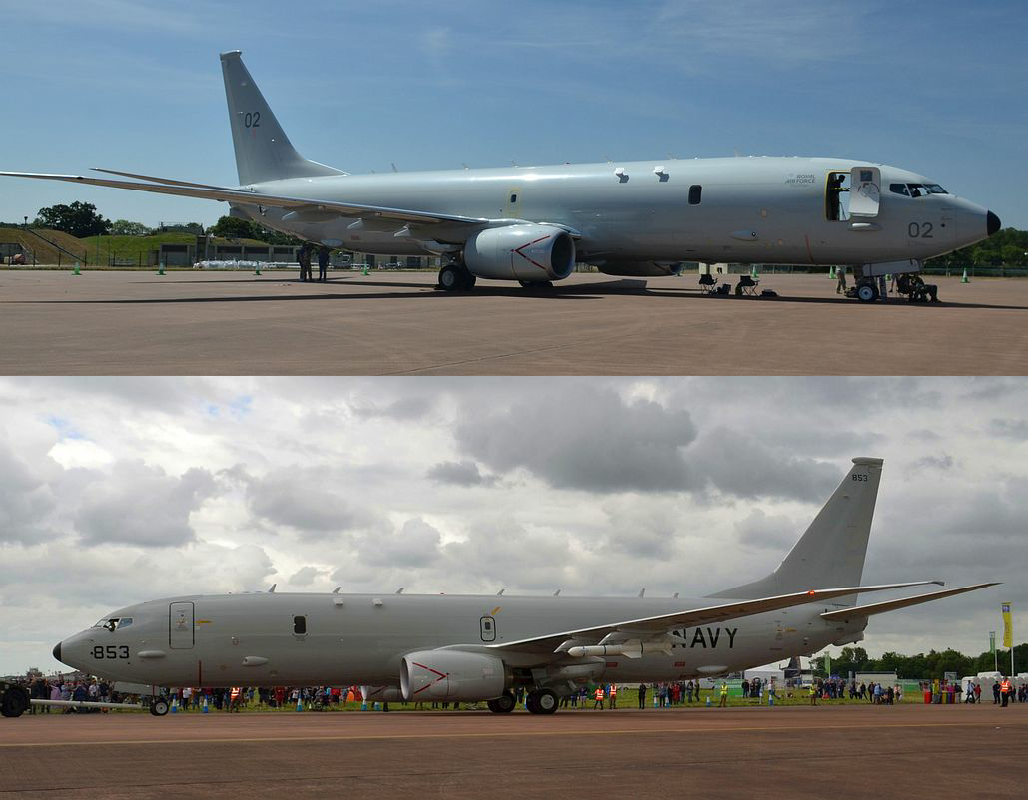
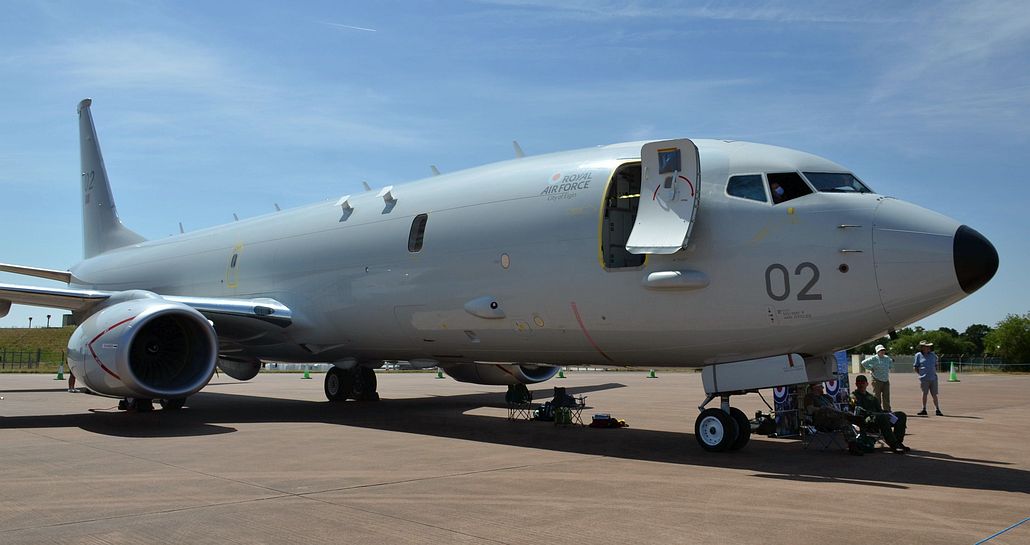
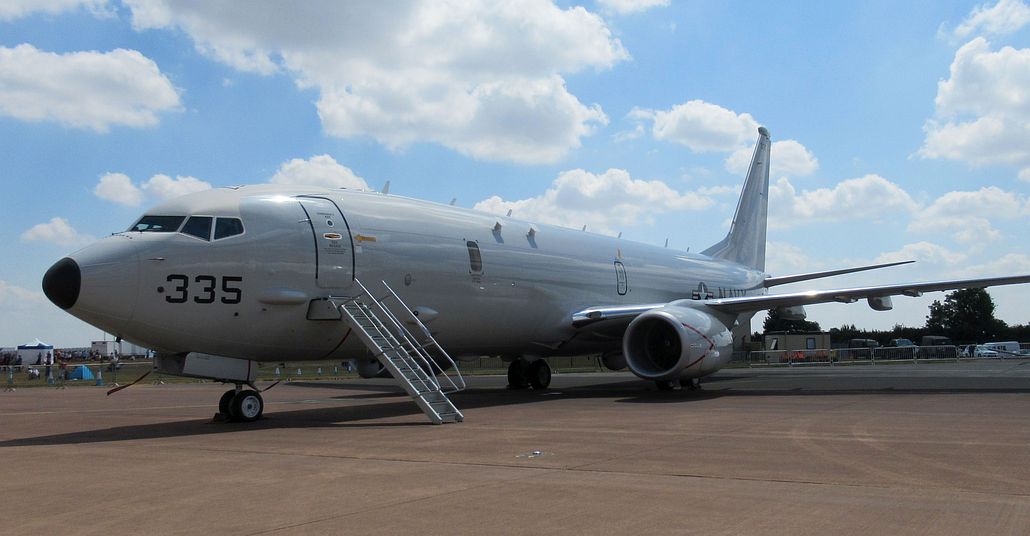
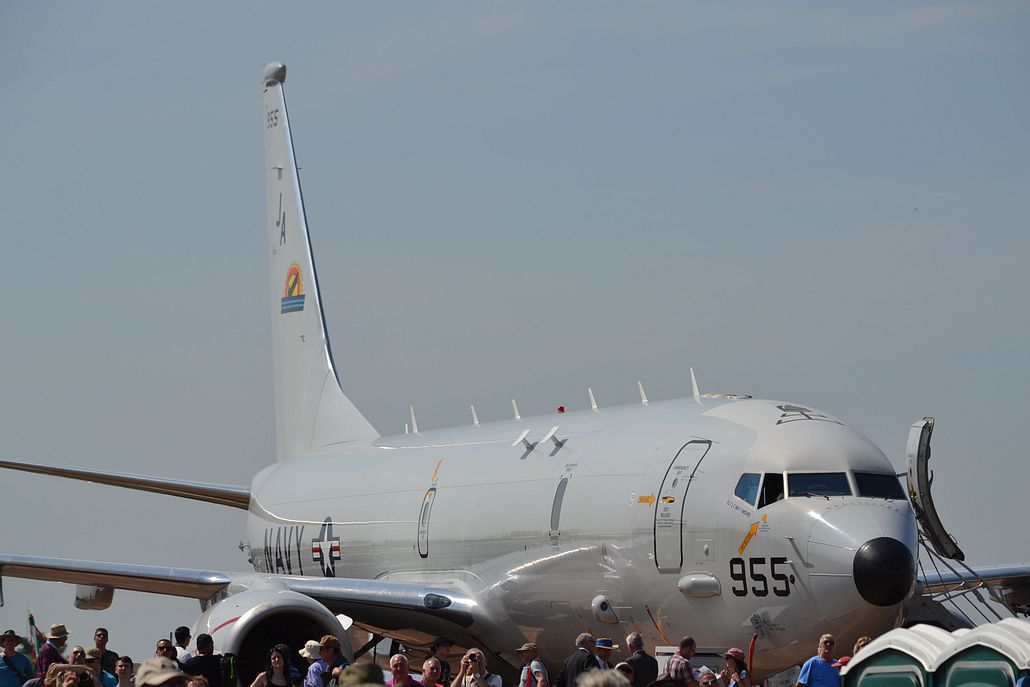
The Boeing P-
The airframe is a strengthened development of Boeing’s civilian 737-
The Royal Air Force received the first of 9 Poseidon MRA.1 aircraft in 2019, with the last delivery in 2022. The aircraft operate out of RAF Lossiemouth in Scotland and are manned by crews from 120 Sqn and 201 Sqn, supported by 42 Sqn as their OCU. In 2024 it was announced that RAF aircraft would be adapted to allow them to carry the advanced British Sting Ray Mod 1 torpedo, which is far more capable than the US Mk.54. However, RAF aircraft still lack wing pylons and are unable to carry any other armament.
Although the aircraft lacks many of the capabilities of the RAF’s former Nimrod MPAs, and EW aircraft, new ISTAR capabilities and commonality with other NATO & 5 Eyes nations make them a powerful and welcome step toward filling the scandalous capability gap left when Nimrod was scrapped.
Link to many more RAF aircraft on my Friends & Allies pages
Building the BPK P-
I can confidently say that this is the most expensive kit (once decals are included)
that I have built so far. It's not the largest, a title that still sits with my
2020 build of the Heller/Airfix E-
Ukrainian company BPK's 737 models have a good reputation, but it is clear that they
are intended for the more experienced and confident modeller who is willing and able
to overcome some of the kit's shortfalls. Parts are well moulded and very nicely
and delicately detailed, in a relatively soft plastic (that emanates a strange smell
when you glue it!) , but the edges of the larger parts are a little rough and need
quite a lot of trimming and smoothing. There is also some flash on that needs to
be carefully removed. We are not taking Mach 2 standard here by a very long way,
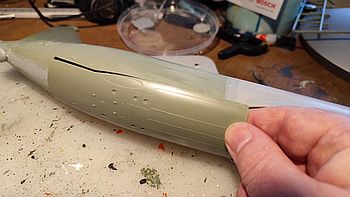
but this is not a kit for the beginner. The fuselage in particular requires a lot
of care in assembly, as it comes in 4 parts, with butt joints and no locating pins
( a few bulkheads would have worked wonders here).
who is willing and able
to overcome some of the kit's shortfalls. Parts are well moulded and very nicely
and delicately detailed, in a relatively soft plastic (that emanates a strange smell
when you glue it!) , but the edges of the larger parts are a little rough and need
quite a lot of trimming and smoothing. There is also some flash on that needs to
be carefully removed. We are not taking Mach 2 standard here by a very long way,
but this is not a kit for the beginner. The fuselage in particular requires a lot
of care in assembly, as it comes in 4 parts, with butt joints and no locating pins
( a few bulkheads would have worked wonders here).
Pre-
As well as the fuselage joins, the instructions are a little vague throughout, with some errors and painfully small diagrams conveying some of the less obvious assembly sequences. I downloaded a copy from Scalemates to zoom on my desktop screen and help locate some of the unnumbered parts on the sprues, only to find that it had differences from my kit and printed copy! The cockpit is very nicely detailed, but it does leave the rear bulkheads and cockpit door a little bland, which is a pity as these are the only surfaces still visible once assembled!
 The main cabin is empty, so windows will need blanks behind them. I added a simple
floor, bulkhead and seat for a side observer on the starboard side. In order to fit
the weapons bay section and for general strength, I added a few sprue spreaders and
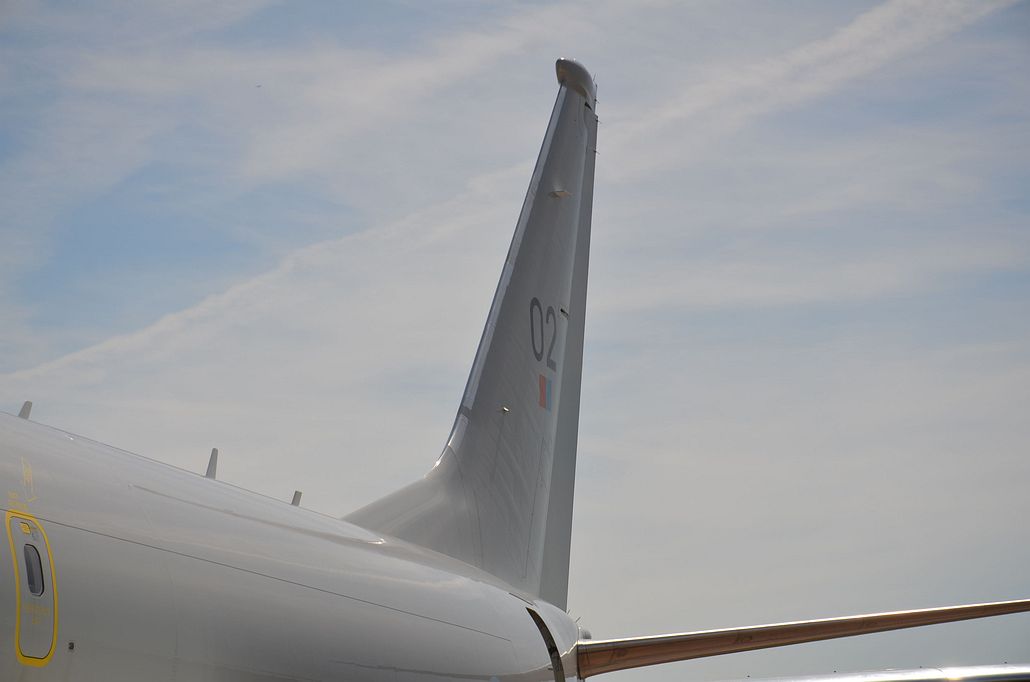
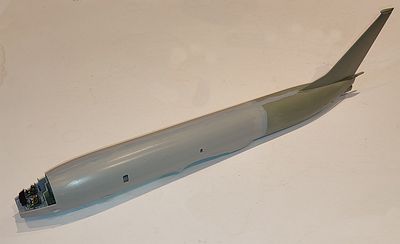
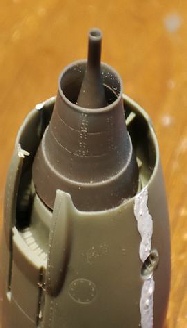
strengtheners inside the fuselage. The fin/rudder needs a little surgery to fit a
Poseidon specific part (an Inmarsat antenna and a towed decoy/wire aerial?) on its
top and the wings also need their raked wingtip extensions added. A couple of locating
dowels are provided for the fin. These fit into holes in the upper fuselage, but
are of zero use, since the fin itself has no corresponding location holes for them
to fit into. The end result is some doubt as to where the fin should be positioned
on the fuselage. The raked wingtips are slightly easier to locate, but have a step
on their rear part that needs to be trimmed off.
The main cabin is empty, so windows will need blanks behind them. I added a simple
floor, bulkhead and seat for a side observer on the starboard side. In order to fit
the weapons bay section and for general strength, I added a few sprue spreaders and
strengtheners inside the fuselage. The fin/rudder needs a little surgery to fit a
Poseidon specific part (an Inmarsat antenna and a towed decoy/wire aerial?) on its
top and the wings also need their raked wingtip extensions added. A couple of locating
dowels are provided for the fin. These fit into holes in the upper fuselage, but
are of zero use, since the fin itself has no corresponding location holes for them
to fit into. The end result is some doubt as to where the fin should be positioned
on the fuselage. The raked wingtips are slightly easier to locate, but have a step
on their rear part that needs to be trimmed off.
The clear canopy has nicely engraved lines to mark the window edges (note that the
more recent 737s do not have the eyebrow windows). BPK provide pre-
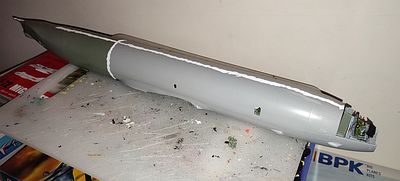
The main wing centre section needs to be trimmed by about 8mm to fit the weapons
bay section. This is quite a delicate task, but I am pleased to report that I managed
to keep the wing section as a click-
BPK seem to have missed out several prominent antenna on the upper surfaces that can't be seen in a side or ground view. For the most part these seem to be round GPS antennae, which I have added from some sliced bits of round section sprue. The upper and underside anti collision lights seem to be missing too, so out with some clear sprue. There seem to be 2 types of these; cylindrical one and aerodynamically shaped, the latter apparently fitted to all RAF aircraft. I also added some plastic card for the two horizontal antenna at the top of the tail fin (ILS?).
Finding the correct colour to paint the kit poses an issue. The real thing is painted
in proprietary Boeing Grey (gray?), which is not a standardised Federal colour. Although
I know its not entirely correct, Humbrol US Ghost Grey (FS 36375) is what I used
on my E-
The darker plastic used for the rear fuselage and nose sections demanded an extra coat of paint to match it with the lighter bits. As per my earlier builds of large aircraft, I hand painted it by brush in sections, aligned with panel lines. A larger brush than usual, with thinned paint and multiple coats eased application. The Air Graphics decals were good and application posed no issues, except for the long wing walkway lines, which didn’t match the panel lines well, curled and also do not seem to match photos of the real thing. As always seems to be the case, there do seem to be some decals missing and some that are not listed on the instruction sheet. A full set of 4 wing roundels is provided, but photos suggest that only one roundel is applied to the upper and lower left wings. The fuselage set also looked a little large to me. A coat of Klear eased application of the decals (and I used decal softener on the windscreen decals to get it to conform with the rivets) then a very dilute dark grey oily wash was run into the panel lines to bring out detail. Finally, I applied some Windsor & Newton Acrylic Satin Varnish to represent (at scale) the gloss finish of the real thing, remembering to apply some matt around the air to air refuelling port and cockpit top.
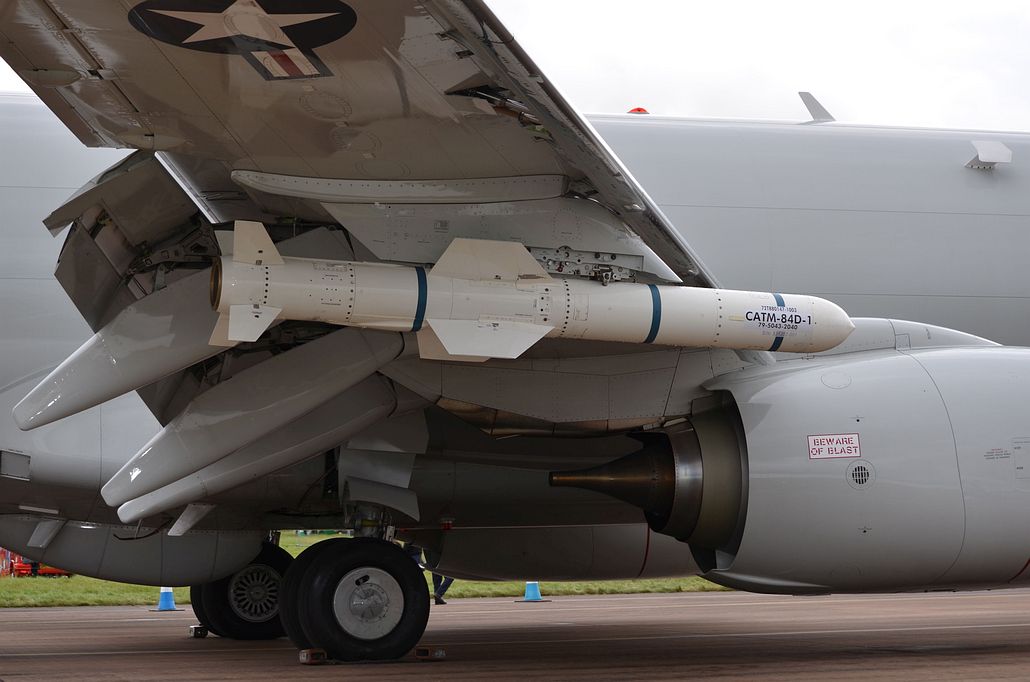
The undercarriage was the last thing that I built (sadly the nice weapons pylons
and Harpoon missiles are not needed for an RAF aircraft). I always tend to leave
wheels and gear to the end to try to avoid any damage during the build. In the case
of this model, the end result was “the sting in the tail” ! The assembly of the
undercarriage pretty much typifies the niggling issues with this kit. The detail
is good and they are well moulded, but all 3 assemblies (nose and 2x main) are very
fragile, the instruction diagrams are too small and insufficiently detailed, and
the design of the kit doesn’t assist the beleaguered modeller!!!!! Fixing positions
are perhaps my biggest gripe. They are there, and despite not being shown on the
instruction sheet, relatively easy to find. However, they are NOT sufficiently well
defined to aid positive assembly, and are too small and fragile to provide the strength
needed to hold up the kit on completion. With the nose wheel, I eventually gave
up and fitted two sprue posts to hold it more firmly in position. And of course,
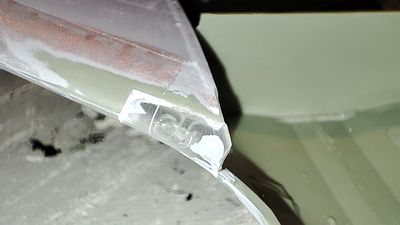
with all this frenzied and frustrated handling, I broke off one of the top fuselage
aerials. The main gear is slightly better engineered that the nose, but still with
vague fitments and a distinct lack of strength. Since the kit will need some nose
weight, this fragility is a shame and I may end up fitting some sprue props underneath
the wing section -
Despite this last minute problem, this is an impressive kit that is well worth the money being asked for it (I paid £99 at Jadlam Models just before Xmas 2023, which seems to have been a very good price). However, it is definitely not an easy build and will require experience, plus perseverance and innovation (i.e. some real modelling) to push it over the line.
It is a shame that it does not have an open weapons bay, since this is a such an
important feature of the P-
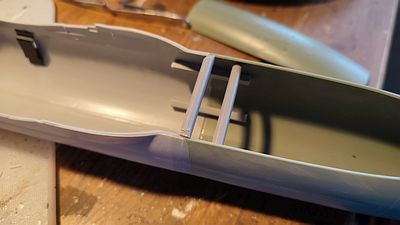
Above: The 4 part fuselage joint is by far the most difficult part of this kit. I chose to assemble each complete fuselage half first, by joining their respective forward and aft parts on a flat surface. I think this helped, but some sprue spreaders were needed to widen the lower rear fuselage and get the weapons bay section to fit.
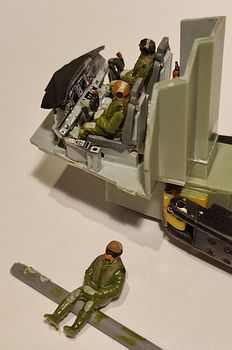
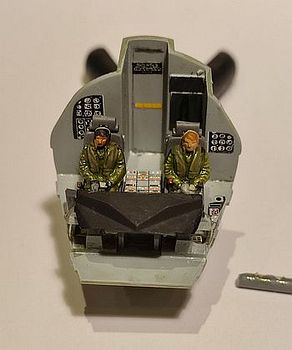
Right: The cockpit is nicely detailed. When I came to attach the clear cockpit top piece, it transpired that my instrument panel coaming was a little too high. Reattaching at a less acute angle solved the problem..
Below right: I was keen to provide some crew, so these ones had their helmets filed off to look like hair!
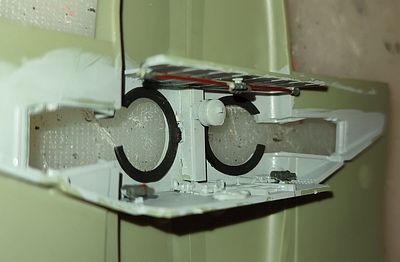
Below: Wing landing lights needed much fairing in. Unfortunately they are not the current LED style as used on RAF aircraft. The engine resin parts are excellent, but their fitting points are not immediately obvious . The centre undercarriage bay is nicely detailed. Unfortunately the attachment points for the undercarriage legs are not obvious.
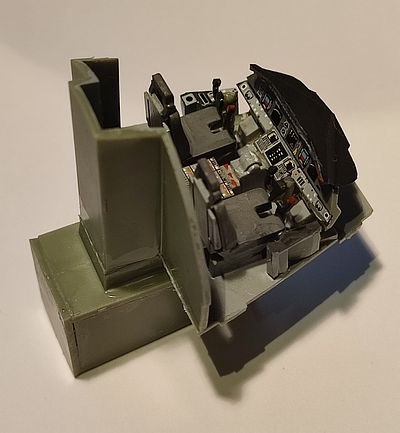

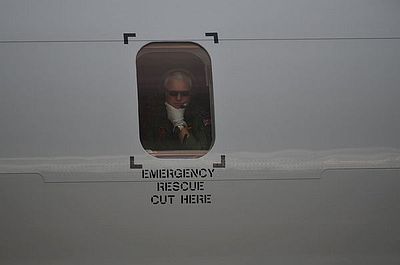
Above: A picture that I took at RIAT 2014, which I was keen to replicate (an exchange RAF aircrew member onboard a US Navy Poseidon), so I fitted a simple scratch interior and seat behind the starboard observation window for my 3rd crew member!