May
2009
![]()
|
7 May 2009 - The 100th Anniversary of British Naval Aviation |
|
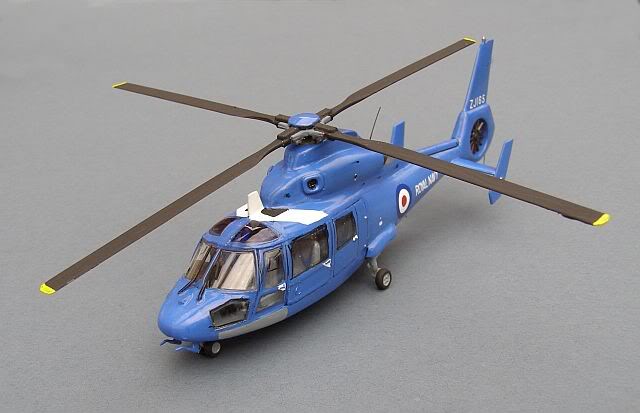
Aerospatiale AS365 Dauphin 2 - FOST, Roborough Airport, Plymouth 2009.
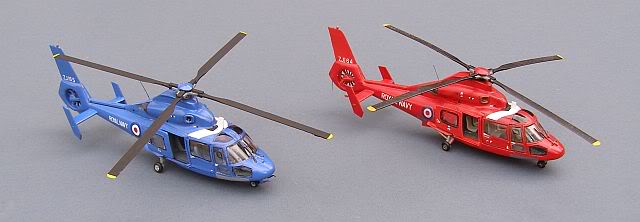
When you get an itch, sometimes it is just best to scratch it! I was really pleased with the simple changes to my Dauphin last month, and while researching on the web I was struck by the current smart blue colour scheme for these aircraft. So, knowing that my local model shop had one of these stashed away in a corner, I just had to do another!
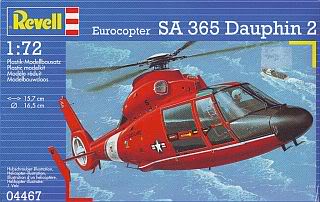
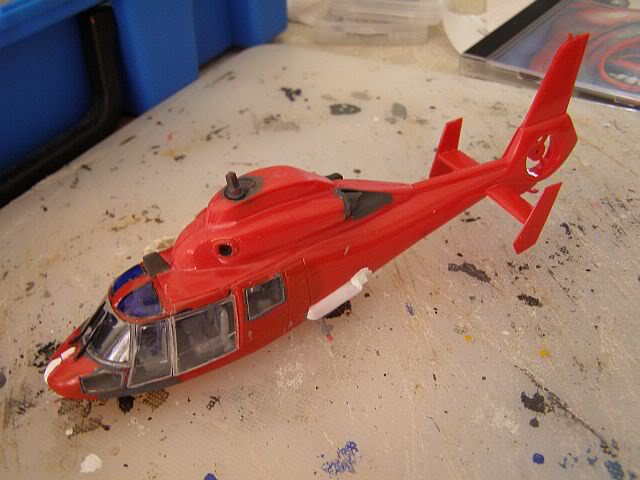
This is the reasonably recent Revell issue of the kit - which comes in a bright red plastic, ironic since I am doing a blue one this time. I had to apply multiple coats to the last one to get the red to cover the underlying light grey plastic ! I built the last one in a bit of a rush, so I intend to take a bit more time on this one.
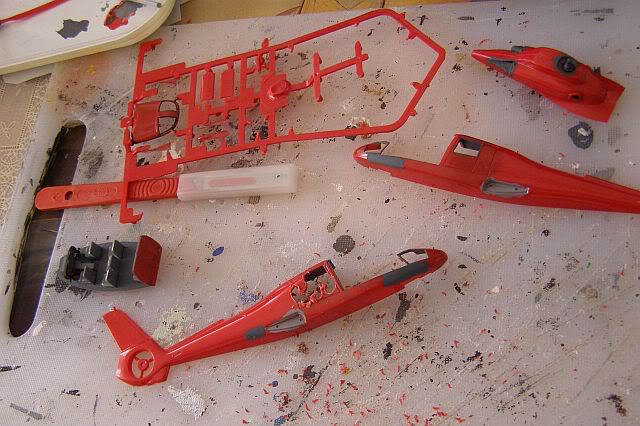
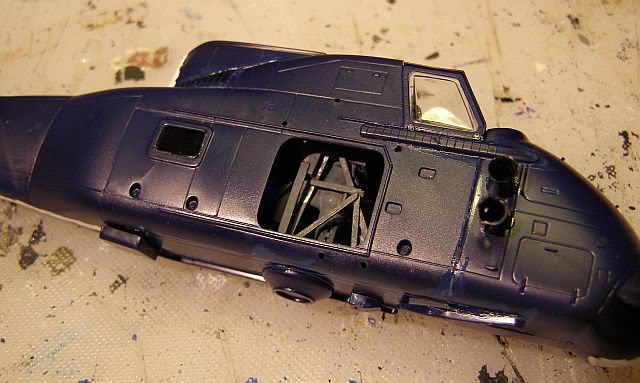
The kit itself seems to be fairly straightforward - at first; after assembling the cockpit (seats added from a variety of sources), I began the "heavy duty hacking" process of removing the incorrect starboard door. I have to say that it was actually easier to do this in the already built model, where the surrounding parts gave it a bit of support whilst I hacked. Nevertheless, I managed without breaking anything, although anyone else aiming to do this should note that the external door engraving is actually further aft than the internal rear bulkhead - not a huge problem as the new door will cover the resulting gap, but annoying anyway.
However, getting to this point, was somewhat frustrating. The cabin sides/doors are supplied as transparent parts, with the roof as a separate section to be added later. A bit like the proverbial chicken and egg, the roof needs the sides in place to fit properly, and the sides need the roof in place to align properly. To cap it all, they don't actually fit without leaving a gap in any event (where the gap appears is your choice) !
The mast with the engines then sits on top. Mine seemed to have adopted a small warp with resulting gaps, so despite my efforts, filler is definitely going to be needed at some stage! Its not fitting properly at the front either, but I think some Tippex will suffice to correct this.
The changes to the FOST aircraft go beyond the new door - later Dauphin models also have a simpler undercarriage than Matchbox/Revell supply, and the undercarriage doors have been replaced by a simple fixed fairing. I will be limited in how much of this I can replicate, but intend to have a try.
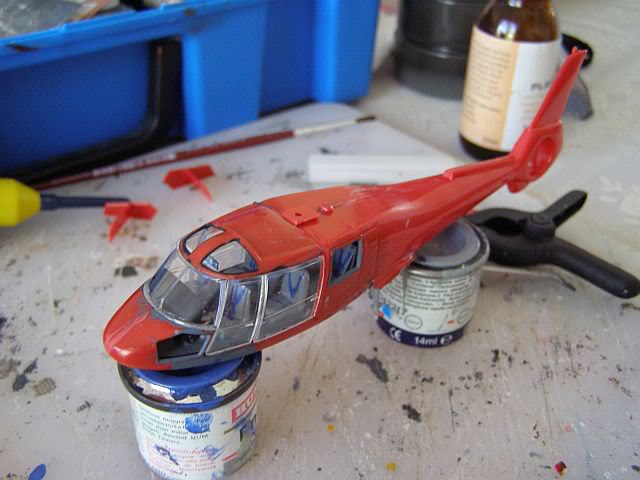
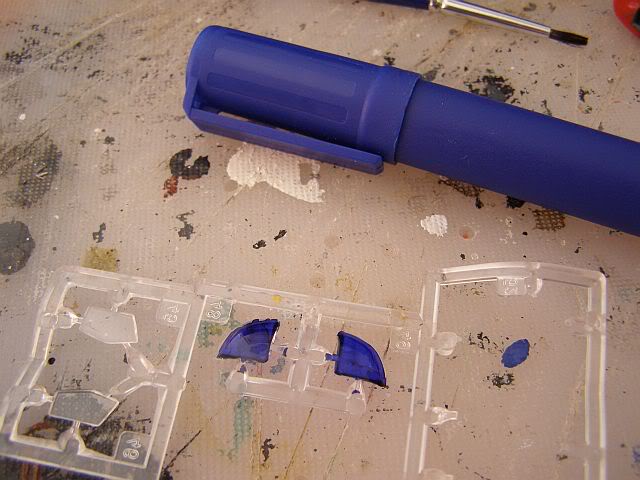
Cockpit upper windows tinted using a magic marker:
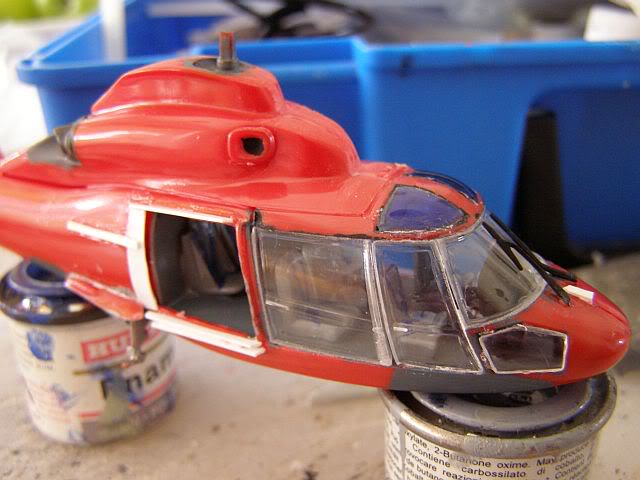
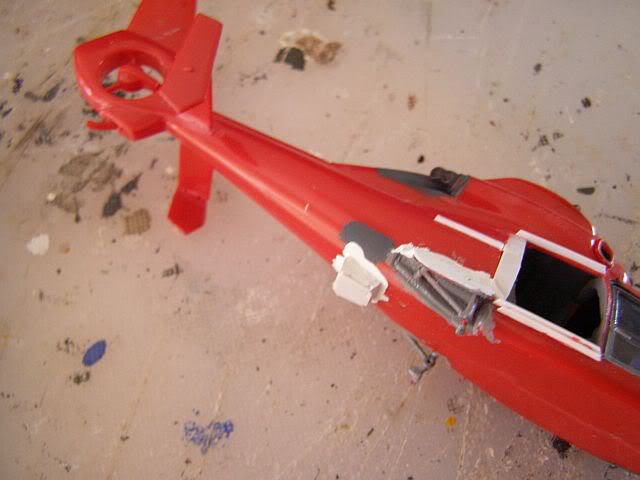
Door frames and runners added. You can see that i have had to put an insert in aft of the door to reflect the fact that its outside engraving didn't match the internal bulkhead. I have also attached the windscreen wipers (fiddly!) and the cabin air intake. You can also see more clearly how poorly the main cabin doors/windows fit.
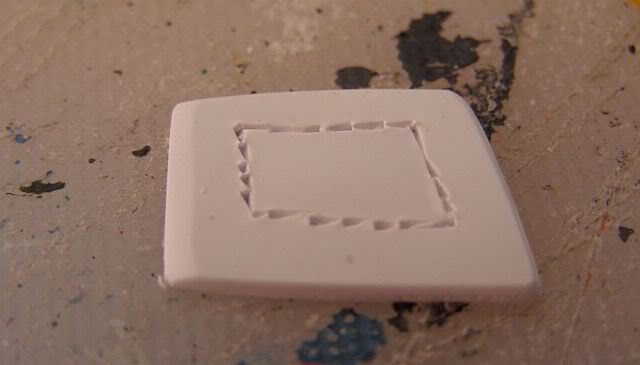
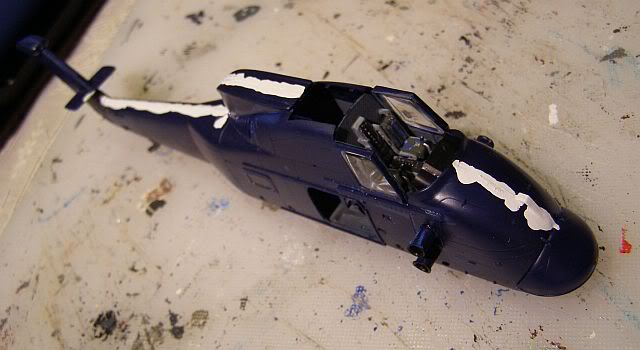
And now: the new door is fashioned from thick plastic card and the window hacked out.
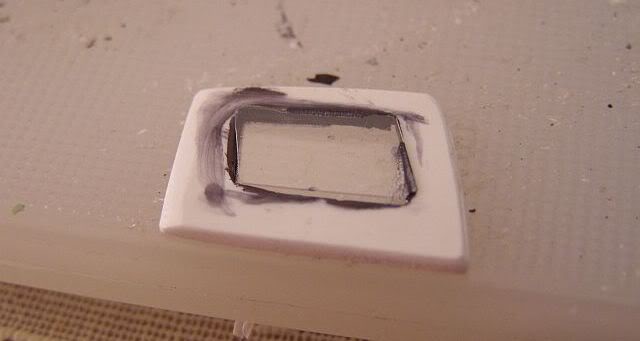
Then clear polystyrene plastic card (Sainsbury's pastry/bun packaging!) is attached to form the cabin window. I have remembered to curve the door in both planes this time (got that wrong with the red one).
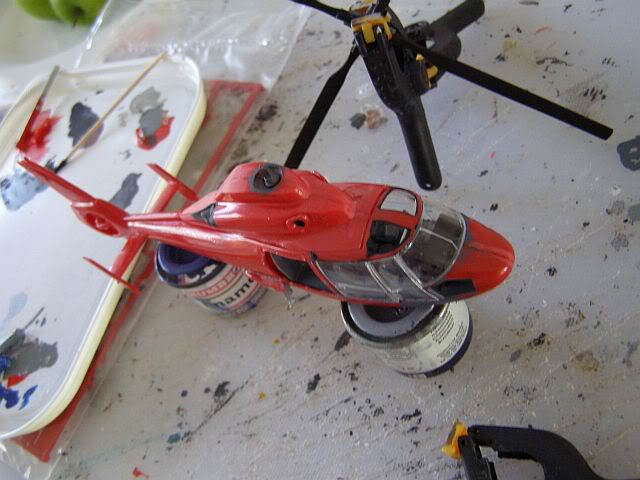
...and I have had a quick go at the new undercarriage fairings (formed from bits of old ink cartridge packaging). They are a bit messy at the moment, so I have smothered them in Tippex, which I will sand back to give a smooth fairing.
I have also added the RadAlt fairing underneath - made this time from the base of an old ejector seat (Frog Vixen I think) and plastic card/strips. Plus, of course, floods of Tippex.
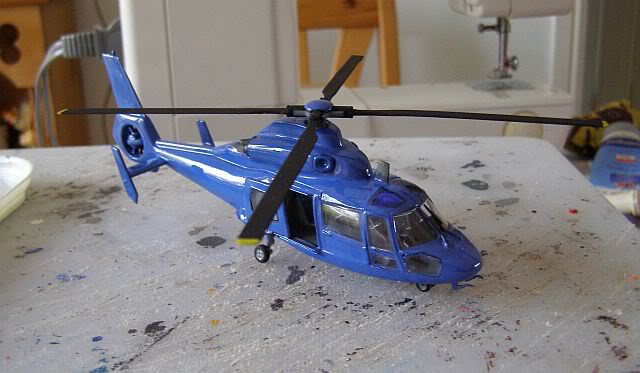
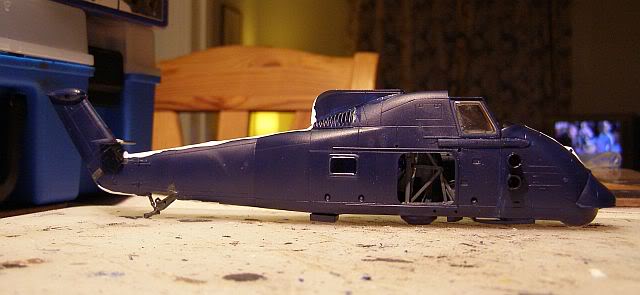
The kit is now fully assembled and blue top coat applied (based on slightly darkened Hu14 French Blue) - actually 2 top coats, because the darkening on the first coat was very uneven (half the aircraft was light blue, the rest dark blue - aarrgh!).
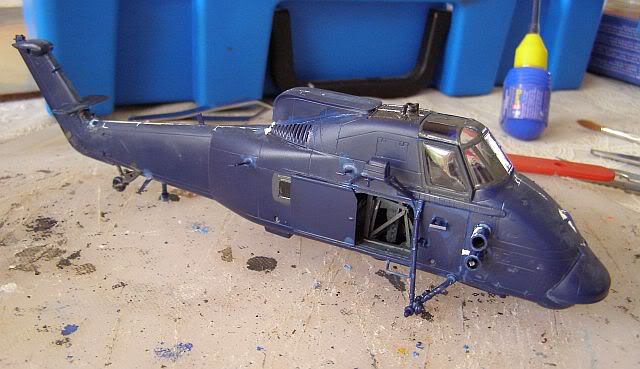
And with the details added. Quite pleased with this; I have certainly made a better effort at the door this time. However, the blue still looks a bit too light (although it looks rather lighter in these phots than it does in real life).
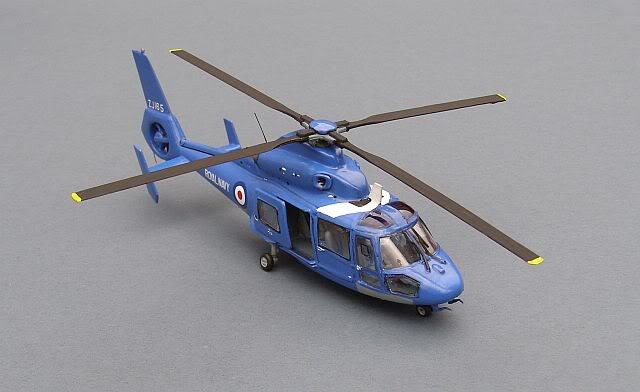
More Dauphin pictures on the Helicopters pages
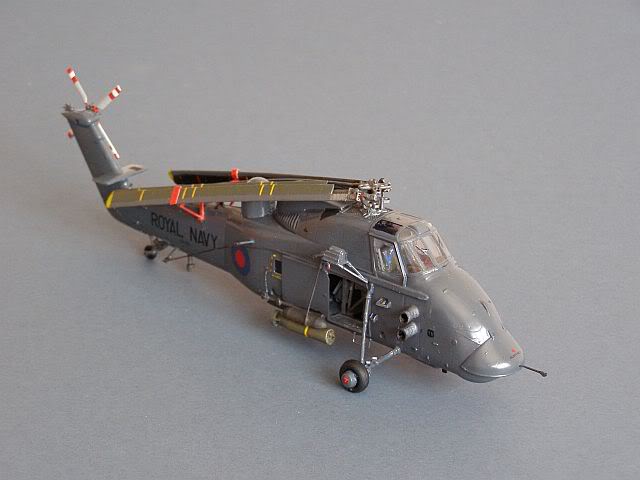
Westland Wessex HAS.3, 100 Flight, 737 Sqn FAA, HMS ANTRIM, Falklands, 1982
"Be pleased to inform Her Majesty that the White Ensign flies alongside the Union Jack in South Georgia. God save the Queen."
The second build of the month will be HMS ANTRIM's Wessex 3, in her wartime colour scheme. "Humphrey" took a leading role in several key engagements of the 1982 Falklands War, including Operation PARAQUAT/PARAQUET's Fortuna Glacier assault (for which her pilot, Lt Cdr Ian Stanley RN, was awarded the DSO) and the capture of the Argentine submarine Santa Fe.
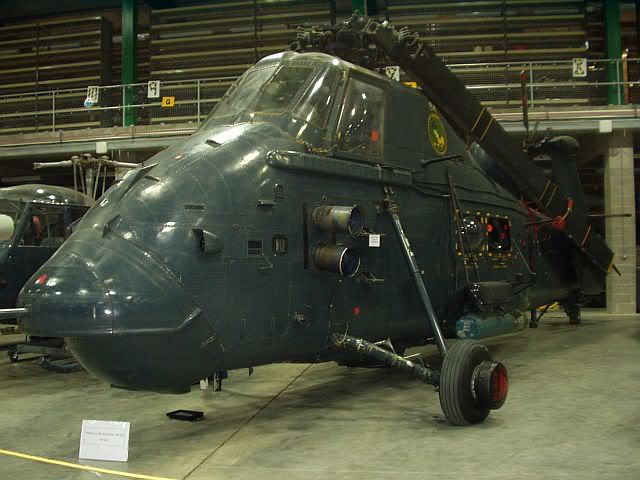
Humphrey currently rests in the Fleet Air Arm Museum, still bearing the considerable scars of war.
The Revell Wessex 3 was released in the late 1990s, as a joint production with Italeri (who issued the Wessex V variant of the same kit). In its initial form it was very expensive (this one cost me nearly £15), however it has been reissued more recently, by both companies, at a much more reasonable price (about £6). It is generally a well engineered kit, with suitably engraved panel lines and excellent fine detail, however it does suffer from a few "faux pas", mainly arising from the fact that different variants, including the Sikorsky S-58 Choctaw version, can be build from the same basic mould. The 2 biggest problems are the tail rotor, which rotates the wrong way, however this is really not difficult to fix, and the radome, which is much too tall and skinny. This is more difficult to resolve, however I have a few better shaped ex-Sea King spares in my parts stash, which I may try to fit instead.
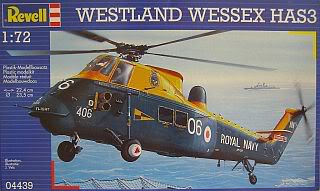
Revell provide a choice of Humphrey in his pre-war colourful guise (complete with Fishery Protection pennants, which will be going on my Italeri one in due course) or his current FAA Museum scheme - for the wartime scheme the squadron badges should not be used. The Italeri markings are a bit of a shambles, with the blue/yellow RN aircraft wrongly marked as also belonging to HMS ANTRIM, and the yellow RAF variant is actually an ex-RN machine (the RAF did not use the Mk 3) which is used for apprentice ground training at RAF COSFORD (not, as Italeri would have you believe, "RAF Cosword").
Unfortunately, Italeri don't provide any interior details for the main cabin. The Wessex 3 carried a substantial sonar winch assembly, plus radar and sonar consoles, so my first task has been to scratch build these from various parts in the spares box, using a superb "under the hood" article in an old Scale Aircraft Modelling magazine for reference.

Prizes to anyone who can name where all the parts came from!
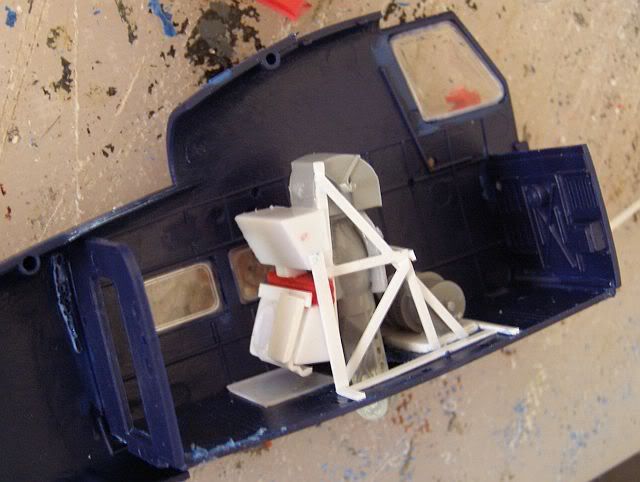
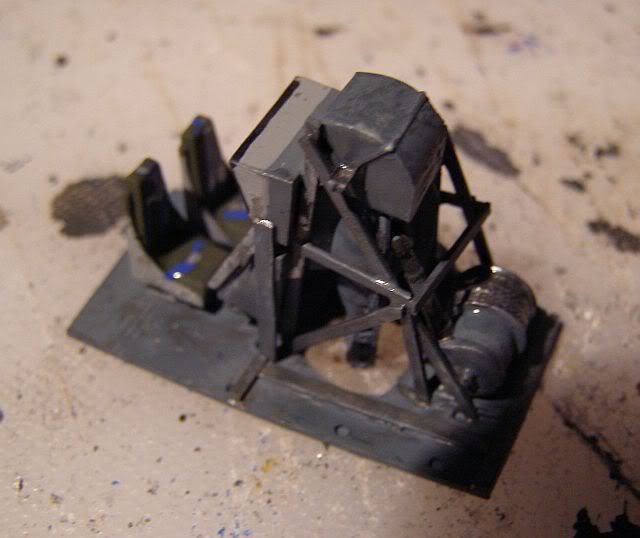
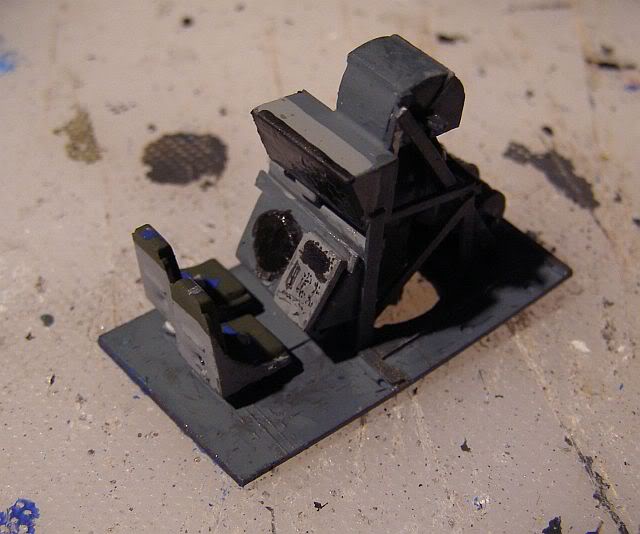
A quick lick of grey paint and it is looking much better already:

At this point I realised that the whole assembly was too far aft, so I have sectioned the cabin floor to place it in its correct position. With a little bit more detailing, we are ready to go (actually you can hardly see any of this once its in the fuselage - oh well, never mind!):
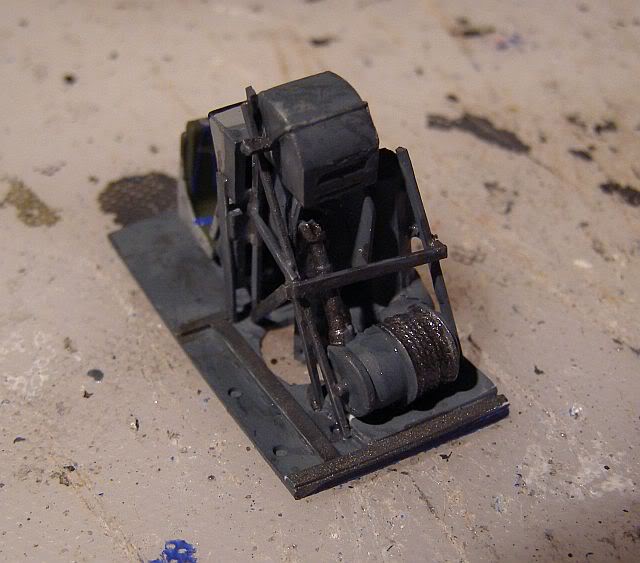
... and inserted in to the fuselage.
Seams aren't bad, but a quick splash of Tippex won't hurt.
Enough for one evening I think. More fun tomorrow.
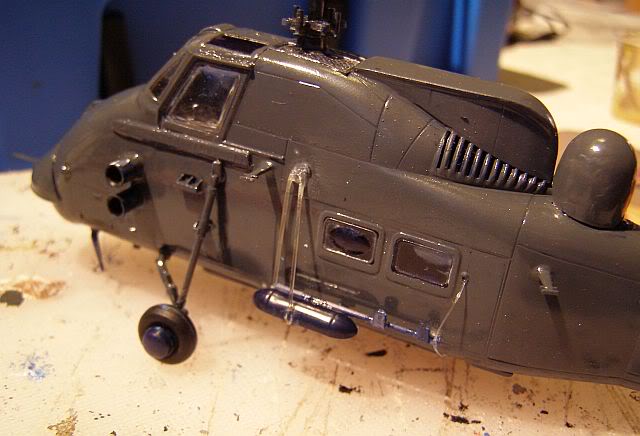
Bits and bobs added. Of course, neither Revell or Italeri tell you which of the many half opened holes in the fuselage need to be fully opened up; end result, nowhere to insert the lower undercarriage arm! Out with the second kit, the correct position was quickly identified and opened from the outside. A minor problem for me, but one that could easily defeat the inexperienced. Other than that, the kit is going together very nicely.
The cockpit windows left a big gap at their lower front edge, I suspect because I didn't align the nose to the main fuselage joint well enough. However, the gap was easily filled with some Krystal Klear. I have also inserted a black card roof for the main cabin, as you could see right through the upper "grilles" and out the door! The blades will be stowed, so I have not attached the rotor assembly yet.
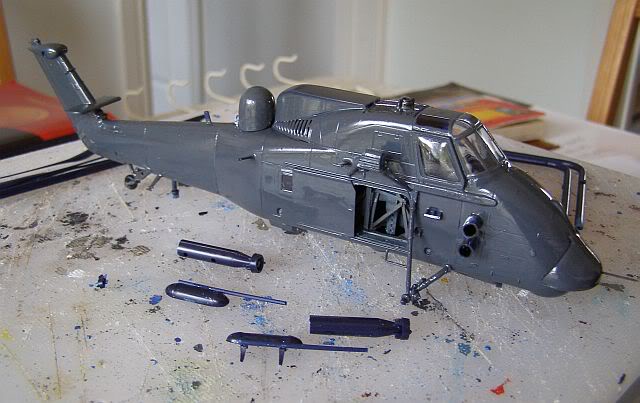
As already mentioned, the kit radome is too skinny and too tall. To overcome this I have modified one from an old Airfix Sea King, which is still not quite rounded enough, but better overall. First (and hopefully only) coat of Xtracolour RAF Blue Grey has been applied, and I have replaced the kit Pitot with my usual steel pin (but I still need to work out how to get a "blob" on the end of it!). I have also begun to scratch build the weapons pylons, using an old set form an Airfix Lynx, plus lots of stretched sprue.
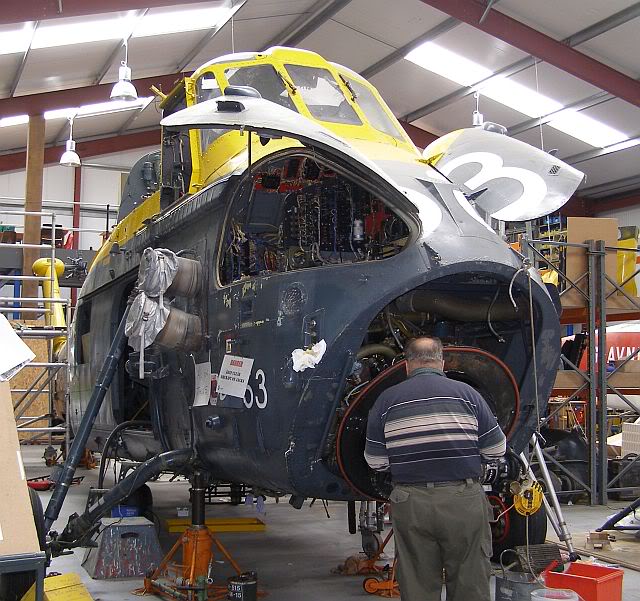
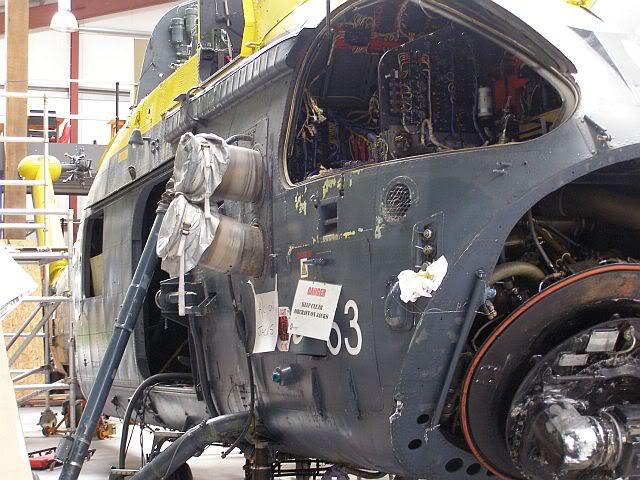
Now, whilst I can't actually get in to see Humphrey at the moment to do some "primary research" (access to the FAA Museum Reserve is limited), I did spend an enjoyable lunchtime today at the Weston Super Mare Helicopter Museum, where they seem to be having a bit of a thing about Wessexes at the moment !

Back to the build! Wheels are on now, and caused a slight hiccup; I seem to have attached the flotation bag air bottle too far outboard on one side, so that the wheel wouldn't fit fully on. Got there in the end. The weapons pylons are on now as well. I decided to use lycra to make the stabilising links, having made small holes in the fuselage to push the ends into. Seemed like a good idea at the time, but wasn't entirely successful, not least because the superglue wouldn't hold it.
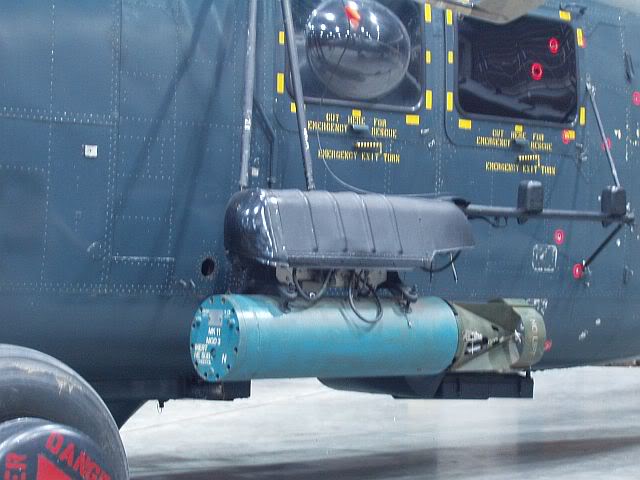
This is what they should look like:
And this is how they look with the Lycra, before painting:
The Mk.11 depth charges are now the right size and shape and drying in a corner - I am not yet sure whether Humprey will be in his wartime guise (with live DCs), or his museum guise (with Ship's badge, bullet holes and drill depth charges), but I need to make a decision soon. I will leave off the external wire aerials until the end, which really just leaves the main and tail rotor. The main rotor head assembly is quite nicely formed, but unfortunately this makes it less easy to fold the blades than with the rather more robust Matchbox equivalent.
Moving into the final stages now and a few more problems have arisen. For some reason the aircraft sits with a very "nose-up" attitude. I have checked several other Revell/Italeri Wessex builds on the web; some seem to have this problem, whilst others don't. Despite my hiccup with unopened holes, I am convinced that I have assembled it as intended, so I think the fault lies in the kit - I suspect that the nose is slightly too short and as a result the fwd undercarriage attachment point is in the wrong place. Apart from splaying the wheels slightly more, there is little I can do at this stage. Pity. The wheels also look too small to me - they are certainly smaller than the Frog and Matchbox equivalents.
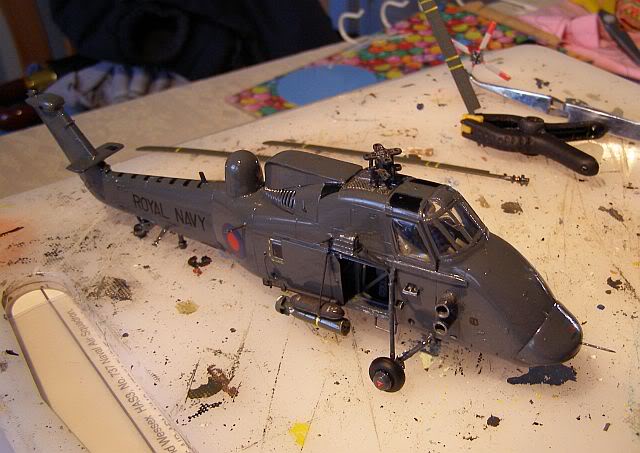
The Revell decals are also problematic - several of mine curled up as soon as they left the paper - the only one I couldn't save was the yellow lines around the port cabin windows, where I resorted to the Italeri kit in the stash as a donor (and I will address its subsequent shortfall in due course). Still, decals are on, details are painted and progress is definitely being made. Next up is the tail rotor (nearly ready) and the folded main blades. Ironically, Revell/Italeri supply the main blades pre-sagged (not very realistically IMHO), so first job is to straighten these, then I will think about how to actually attach them!
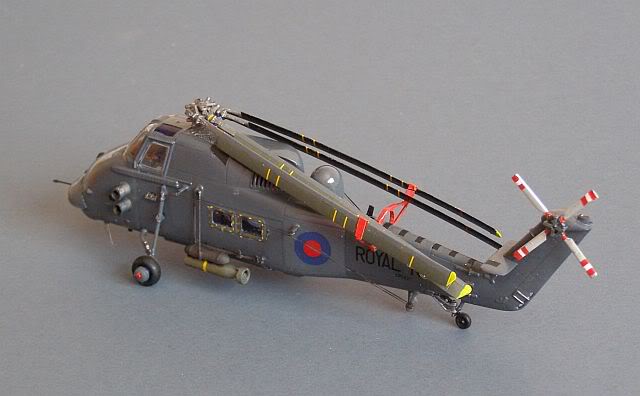
Wire aerials added, tail rotor added (with the correct rotation!) and satin/matt coats applied to various areas. Final part will be the blades. As these will be very prominent, I am taking some time with them. One area I always struggle with on RN helicopter blades is the application of yellow slinging marks; decals look wrong for these so I attempted to paint them on instead - the result was OK, but not as good as i wanted, so I have stripped them back, repainted them and will try the decals tonight.
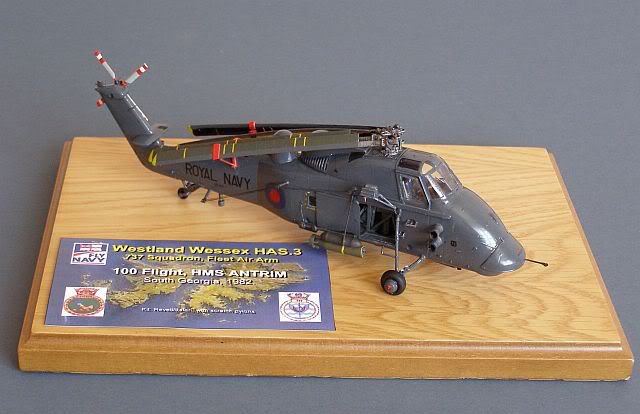
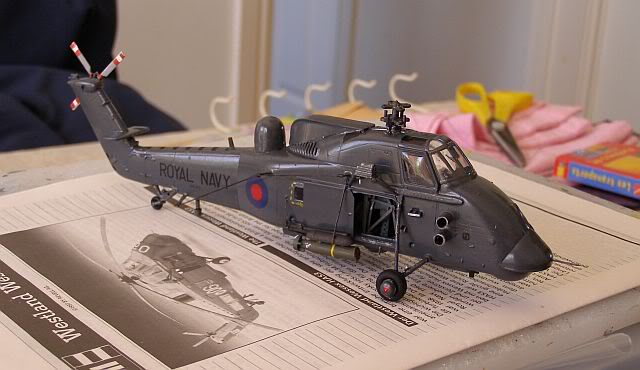
With the main rotor blades finished, it was clear that I needed to add the blade keep stays as well, so I quickly ran a set of these up out of plastic strip; not entirely like the real thing, but good enough for this scale. And there it is, finished. I am really very pleased with the way this one has turned out, so I felt that it merited a decent stand and a label as well.

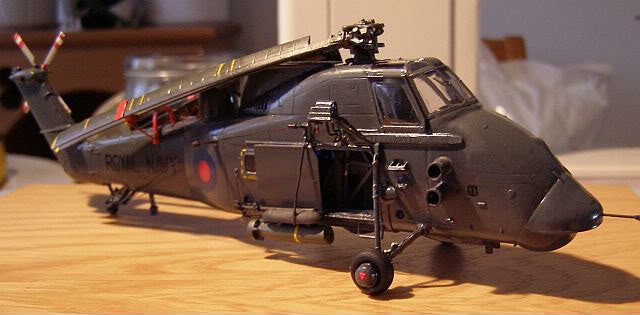
Postscipt: Having posted piccies of this build on several modelling websites, it was pointed out to me that I had omitted the Helicopter In-Flight Refuelling (HIFR) fittings in front of the cabin door. As these are a distinctive feature of the Mk3, I felt that I had to do some re-work, during which I also attached some electrical cabling for the winch:
Many more Wessex pictures on the Helicopters pages
Well, I've never done so much in a month before that I had to start a second page. My apologies to any of you still on dial-up connections - I guess I am getting a bit "picture happy" these days. Anyway, more May building fun on the link below!
On to May 2009 Part 2 (RN 100 Years of Naval Aviation Hawk T.1)
www.gengriz.co.uk