July
2009
![]()
16-24 July -
40th Anniversary of the Moon Landings - Eagle lands
on Moon's surface
20 July 1969
25 July - 100th Anniversary
of Charles
Bleriot's first flight across the English Channel.
2-6 July - 90th
Anniversary of first East West crossing of the Atlantic by air (Royal Naval
Air Service - HM
Airship R-34)
27 July - 60th Anniversary of the first Flight of the DeHavilland Comet
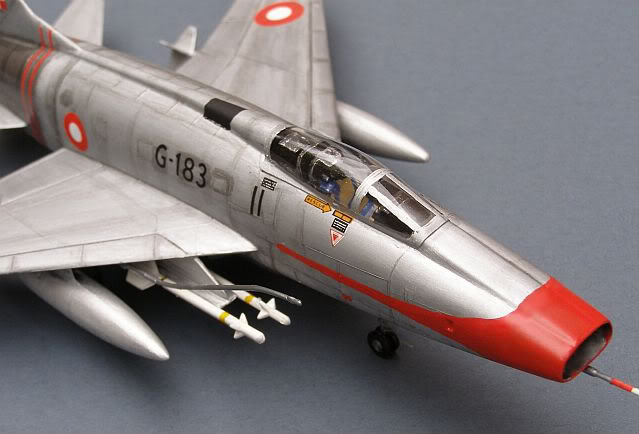
July 1959 - F-100D Super Sabre enters RDAF service
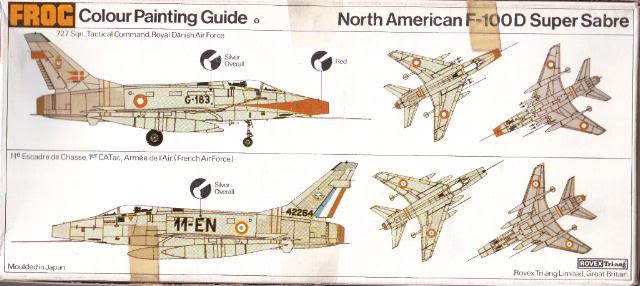
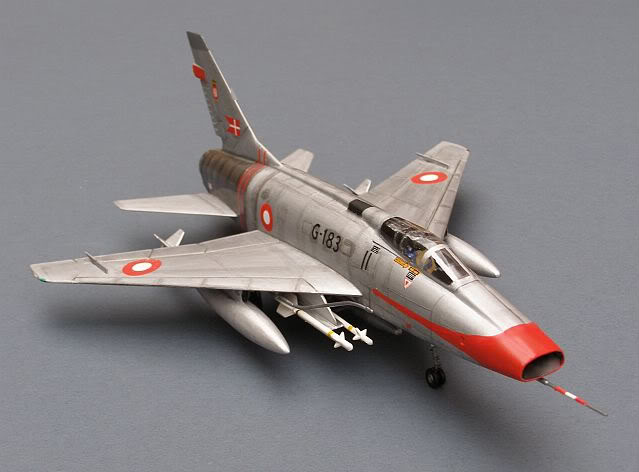
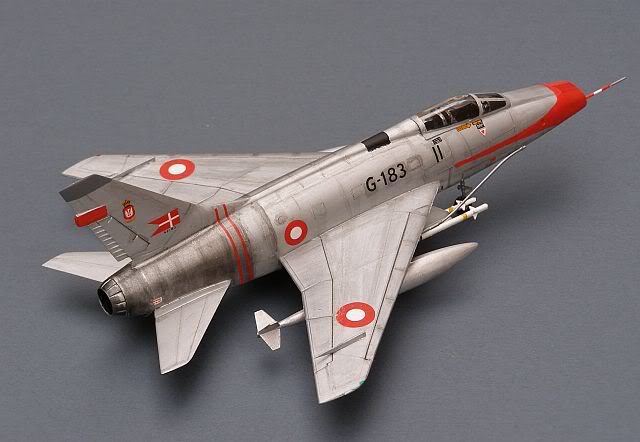
North American F-100D Super Sabre, 727 Esk Royal Danish Air Force (Flyvevåbnet), Skrydstrup Air Base, 1959.
Frog (Hasegawa) out the box.
During the early 1970s, Frog entered a sharing deal with Hasegawa, which saw Frog kits sold in the far east in Hasegawa boxes, and Hasegawa's sold in the European market in Frog boxes. Decal options reflected the market.
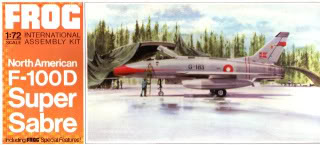
Hence Frog's catalogue for 1970-1974 included this rather nice kit of the F-100D with a choice of Danish or French markings, which I was able to pick up at low cost when my local model shop sold someone's entire collection a few years back. For its time, the kit is beautifully engineered, with a very acceptable level of detail, negligible flash and it fits together (almost clicks together) without the need for any filler. The silver plastic is slightly hard and brittle (although this could just be its age - the kit is at least 35 years old!). My decals have clearly been subjected to moisture at some stage, but I think they should be OK.
Building is straightforward, with no surprises. The cockpit is basic by today's standards, but with the addition of a couple of side panels and a stick, it is entirely acceptable. Perhaps slightly disappointing, the prominent nose intake has no internal detail and terminates in a plastic wall about 1cm in. Likewise the tailpipe is also lacking in detail (and slightly too large for my usual straw/pen trick). The undercarriage is also spindly and weak - the nose wheel leg in particular.
Under-wing stores are supplied in quantity, including 2 Bullpup missiles (although these are not really appropriate for either decal option), no less than 5 fuel tanks (including distinctive banana shaped outer ones) and a set of twin sidewinder pylons and missiles. There is also a reasonable pilot.
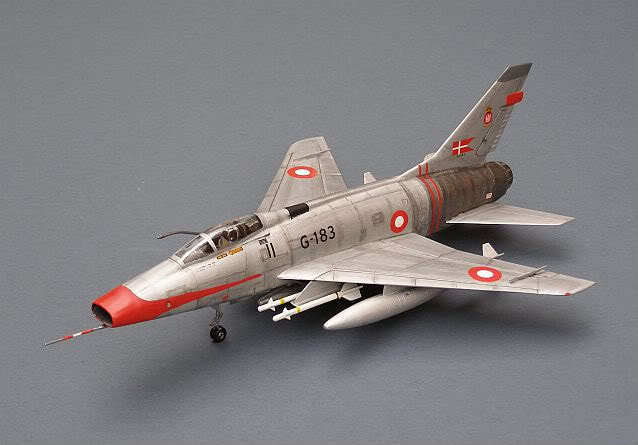
The 35 year old decals worked well, remarkably fully in register and showing absolutely NO SIGN of yellowing at all. The finish on this aircraft is in fact an aluminium paint, not bare metal (except for the hot rear fuselage). I have tried to show it as heavily weathered, not least because I had difficulties getting the Humbrol Metalcote to give an even surface!
And the Naval modelling link? Tenuous I know, but the current Danish roundel is identical to that originally used by the Royal Naval Air Service, until the RFC and RNAS agreed on a common Red/White/Blue roundel, based on the existing French markings, but with the colours reversed. In addition, Danish Super Sabres were assigned to NATO Maritime CAP duties over the Baltic region until the early 1980s.
More Super Sabre pictures on the Friends & Allies Pages
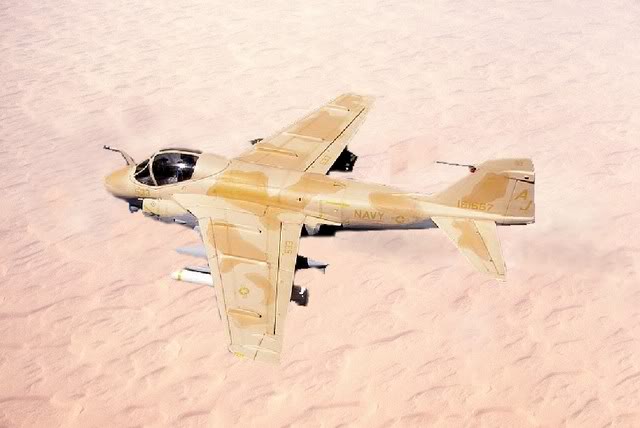
Grumman A-6E Intruder - VA-36 "Roadrunners", USS Theodore Roosevelt, Op Desert Storm, 1991
I am working my way through some of the odds and ends in my stash this month. This is another Frog release of a 1/72 Hasegawa mould, this time the A-6A Intruder, which Frog imported from 1969 to 1972 (so this one is at least 37 years old!). Purchased in 2006, for the grand sum of £1.49, it came without box, instructions or decals, all of which had succumbed to "garage rot".
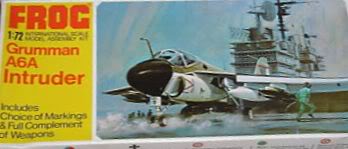
Sorry, but this is the best I can do in box picture terms. Its nothing to write home about anyway!
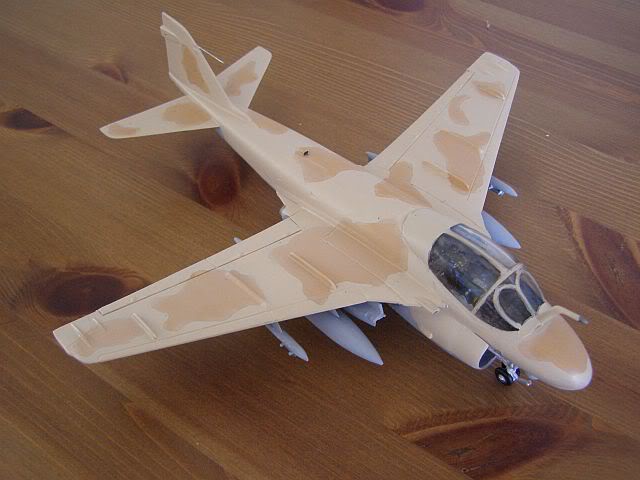
It's not quite as nicely engineered as the F-100D kit was, partly because of the complex fuselage shape, which clearly presented some moulding issues. Plastic (this time white) is again hard and brittle and had surprising amounts of flash in odd places. I have obtained some High-Decal Line markings for a desert camouflaged A-6E so will be doing some minor scratch mods (basically the TRAM turret under the chin), and I will add some scratch detail to the cockpit - that canopy is very large and hides nothing!
The cockpit is very basic - a single piece provides floor and both ejector seats, with an instrument panel and shroud as a second piece. The fuselage halves went together reasonably well, although the underside insert, jet pipes and radome all left gaps that will need to be filled.
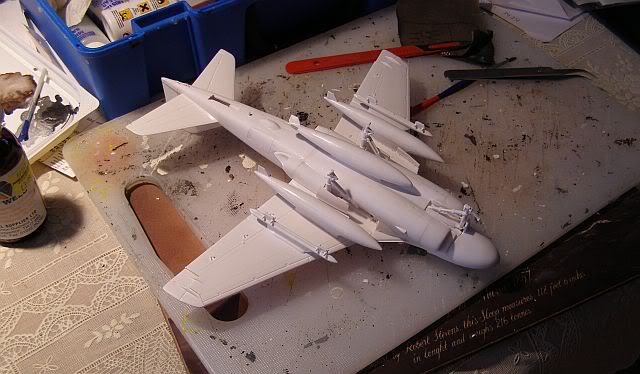
At this stage, Hasegawa still provided underwing stores in their kits, so this comes with 3 drop tanks and 12 "slick" bombs on 2 multiple carriers. However, I plan to use Mk 20 Rockeyes and Mk 82 Snakeyes from the Italeri Weapons Set (and possibly elsewhere, as I don't seem to have enough!).
Goodness, this is a big kit! Assembly of the major parts is now complete and I have begun painting.
First stop was to fill the (nicely detailed) fuselage air-brakes - only the very earliest aircraft used these as they caused handling problems and in any event the split outer ailerons provided ample braking; from the mid 1960s onward most fuselage airbrakes were welded shut, and from mid production onward, they weren't even added in the first place. So, whilst they may be OK for an A-6A (as the kit intends), for my late production A-6E they need to be filled.
Problem areas have included the undercarriage doors (only because I had no instructions), wing top surfaces (keeping them flush with the rear fuselage was difficult - they are quite a sloppy fit in the slots), and of course, the split canopy. I glued the 2 parts together very carefully last night. Today, they had a sharp ridge down the middle. I sanded it off, very carefully, and was happy with the result. The the 2 parts fell to pieces again! Actually, come to think of it, the hard plastic seems fairly resistant to Plastic Weld - the Revell Contacta liquid, which is normally useless, is actually working better on this kit. I also rather over-did the lead in the nose - this kit will NOT be tail sitting.
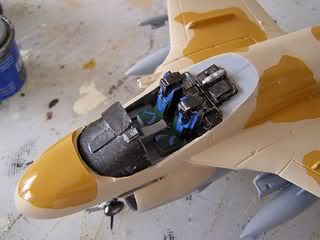
Next up, I plan to detail the cockpit - the large canopy means you can see everything, and at the moment, there just isn't that much to see.
After detailing the cockpit with plastic card and sprue, I have put together a basic TRAM turret made from the nose of a torpedo (!) ex my Tamiya Vosper Patrol Boat. For some reason the Hasegawa arrestor hook bears little resemblance to any A-6 pictures I can find, so a new A-frame has also been attached using styrene strip.
One other change is needed, to reflect the ESM antennae on the inner wing leading edges, however I have fudged this by removing the outer "blade" leading edge and blunting the remaining wing instead. The undercarriage bays are very empty, and show rather a lot of kit innards, so I have added a bit of curved plastic card as an inner lining.
Next up, first coats of paint.
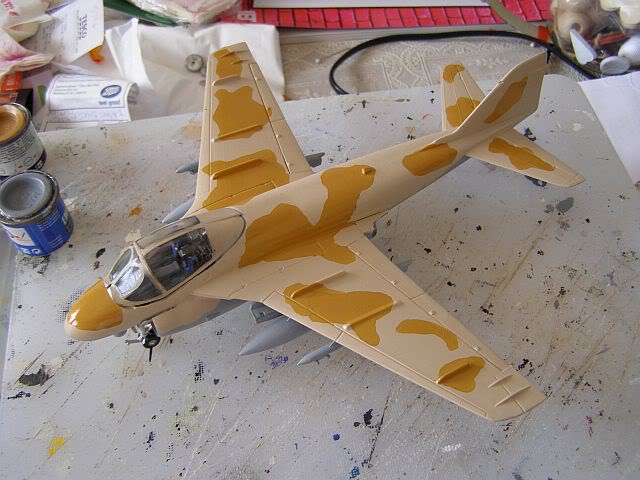
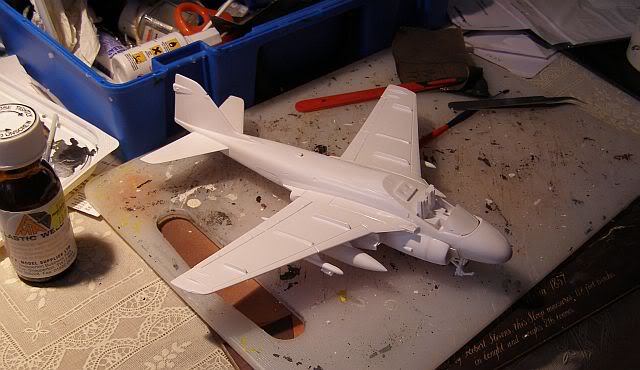
These are the recommended colours in the decal instructions, honest. Supposed to be sand & tan, but looks more like flesh & orange to me, or something out of a Disney movie! I'm sure they will tone down once weathered and matted. The cockpit detailing is nearly complete - I have a couple of generic decals for the centre and side panels and I need to tidy the belts and buckles. The canopy still has its ridge, but I think it will be better to fill it once fitted to the fuselage, as it will then be more rigid. I have to say that it also looks a little too tall and bulbous to me but we will see when it is fitted properly.
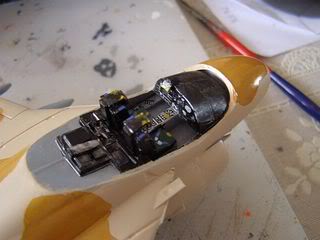
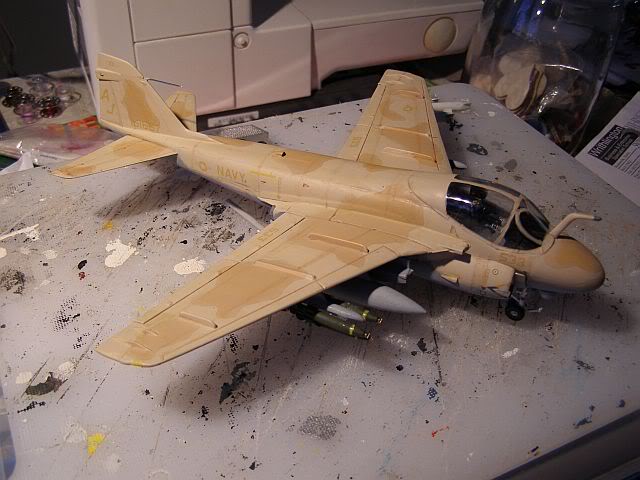
Once attached, I was able to smooth down the canopy ridge quite successfully. The final refuelling and pitot probes are now attached and the main part of the build is now complete. The weapons, (Snakeyes and Rockeyes) are assembled and partly painted, but I'm in no rush to attach them. I wibbled on the caramel brown/orange colour and have now applied a light wash of the stone over the top; not only has this given a feathered edge effect to the mottles, but it has also toned down the colour, so that I am now much happier with it. I intend to use a darker brown wash to finish, which I hope will give the required effect.
In the picture below the kit is drying before I apply some Klear then have a go at the decals.
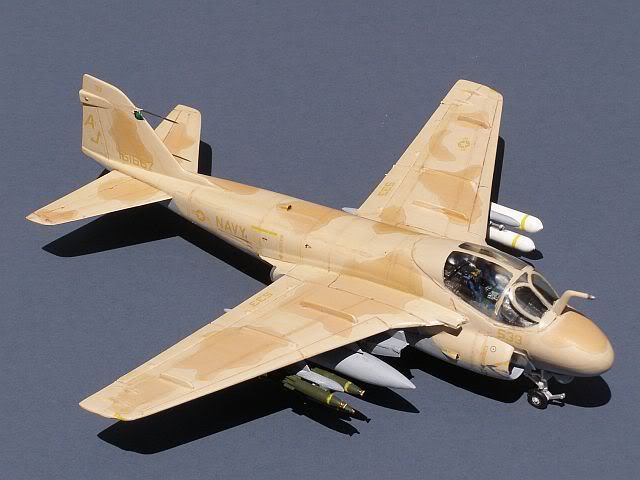
Into the final straight now; the decals went on without any problems, I then used a burnt ochre wash in the panel lines, followed by a sandy wash overall (both watery acrylic with a minuscule amount of washing up liquid). The Snakeye bombs are superglued to the stbd pylon, although I am not altogether happy with them; I suspect they may have to come off tomorrow and be reattached some other way.
The Rockeyes are still being painted, but nearly ready. I have polished up the canopy with toothpaste and a coat of Klear - possibly some more needed tomorrow. Hopefully (as it is expected to be the only sunny day of the week), I can get outside for some decent photos tomorrow evening.
.... And here they are, pictures squeezed in between rain showers. Its windy here too, and the grey board, plus kit, took off shortly after the first photograph. I caught it, but broke the refuelling probe, which had to be reattached before I took any more.
All in all, this was a fun build, out of my ordinary area of interest, and I am pleased with the result.
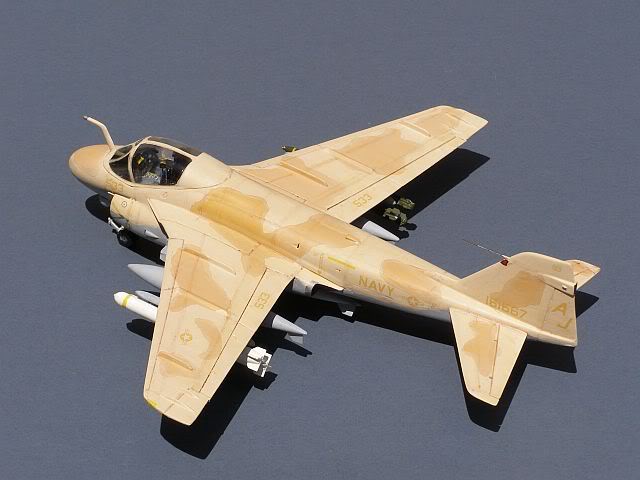
.... and with a bit of photoshopping fun:
More Pictures of the A-6 and others on my Friends & Allies pages
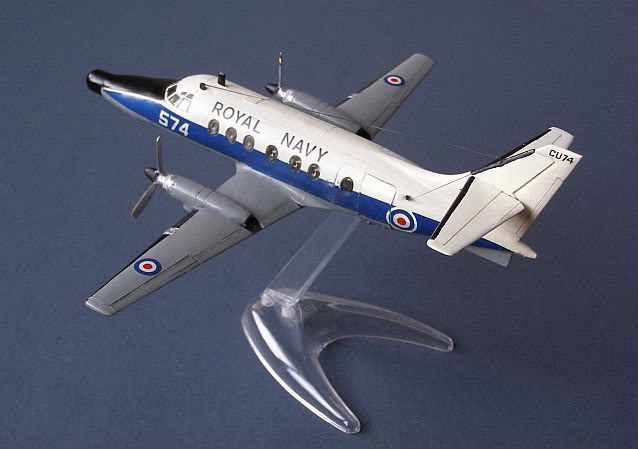
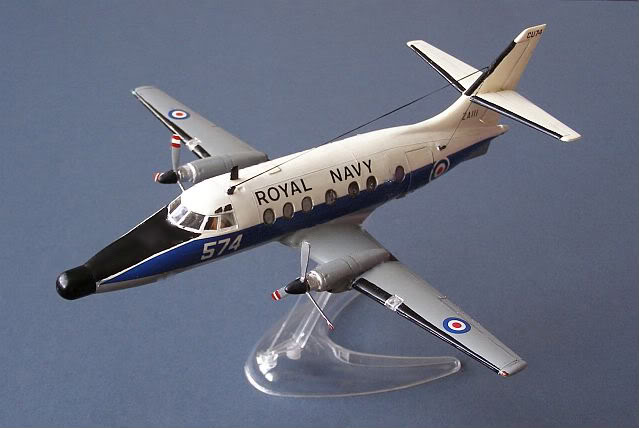
Handley Page/Scottish Aviation/British Aerospace Jetstream T.2, 750 Sqn RNAS Yeovilton 1986.
To finish this month, this is an old build of mine from the 1990s, which really wasn't up to current standards, so has had a bit of a tidy up. It's the Airfix Handley Page Jetstream C-10, with the M & E Models' conversion, which includes a new radar nose, replacement engines and some rather nice transfers for both RN T.2 & RAF T.1 variants.
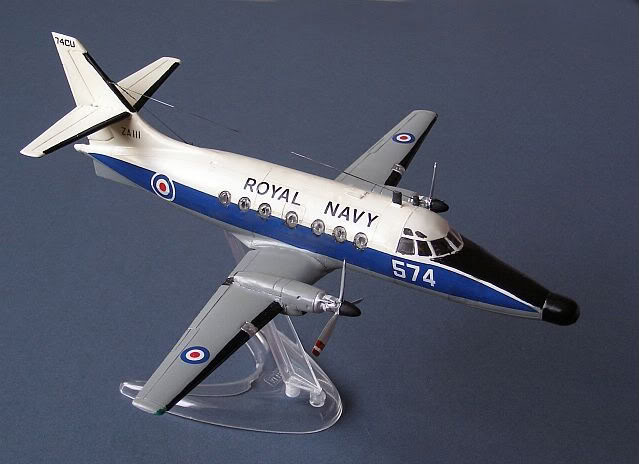
Unfortunately, it isn't one of my better builds, and was beginning to look a bit sad alongside some of my other models. There is a definite limit to how much it can be tidied up, but I have straightened one of the wings (the replacement engine had pushed it out of shape), replaced an airscrew blade that was missing, repainted the front of the engines (I have better references now) and added blade and wire aerials. I have also repainted the black anti-glare section on the nose, added the upper cabin windows and highlighted the cabin windows with a black marker, as well as addressing a few more minor details. Finally, as the undercarriage disappeared many years ago, I have opened up the fuselage slot for an Airfix stand.
Not a great deal of work , but worth the effort, as it certainly looks a lot better!
More Pictures of the Jetstream & others on the RN Props pages
www.gengriz.co.uk